

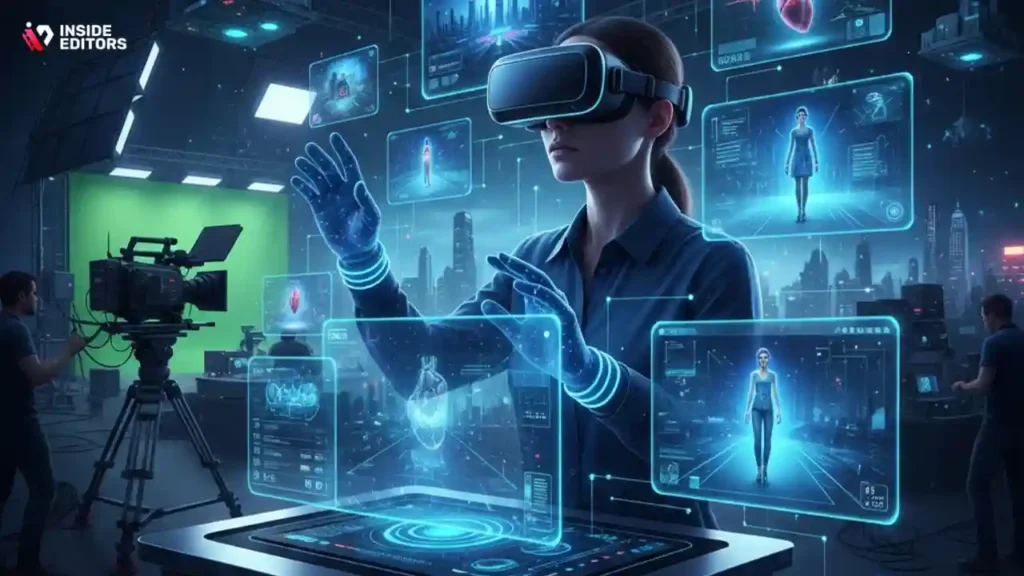
Creating immersive, polished, and visually exciting 3D videos has never been more accessible than it is in 2025. Whether you’re a YouTuber experimenting with depth, a filmmaker working with VR footage, or a brand producing high-impact product visuals, the right approach to 3D video editing can transform your final output. And if you’ve ever tried editing 3D footage before, you know how quickly things can get overwhelming – from stabilizing dual cameras to correcting parallax issues and exporting in the right format. This guide is here to make that entire journey feel intuitive, smooth, and confidence-boosting.
In this article, you’ll learn the most effective 3D editing techniques used by professional editors today. You’ll also get a modern look at the tools, workflows, mistakes, and creative strategies shaping 2025. Think of this as a friendly walkthrough from someone who spends every day turning raw footage into breathtaking 3D stories.
Let’s start by understanding why 3D editing in 2025 demands a slightly different mindset than traditional video editing – and how embracing that shift can save you countless hours in post-production.
Why 3D Video Editing Matters More Than Ever in 2025
Over the last three years, consumer demand for immersive video has exploded. This doesn’t just apply to Hollywood or VR creators – everyday content creators are using 3D visuals to stand out on YouTube, Instagram, TikTok, and even Amazon product pages. Viewers have learned to recognize and appreciate depth, realism, and spatial storytelling, so low-effort footage doesn’t compete anymore. And this is exactly where 3D video editing becomes a game-changer. When done well, it adds emotional weight to scenes, makes products look more expensive, and engages audiences in a way that flat, traditional visuals often can’t match.
Many creators discover 3D tools because they want a competitive advantage. But they stay because these tools help them express their ideas more freely – which is ultimately why 3D has become such a powerful medium in 2025. As more devices support spatial playback, from VR headsets to phones with depth-sensing cameras, consumers expect content that uses these capabilities creatively rather than treating 3D as a novelty.
Why the Right Workflow Saves You Time, Stress, and Revisions
If you’ve edited standard videos before, you already understand the importance of clean audio, stable footage, and tight storytelling. But 3D pushes those fundamentals further. Footage that looks normal in 2D may look distorted or uncomfortable when viewed in 3D, especially if depth alignment isn’t handled properly. That’s why having a structured workflow matters. When you follow consistent steps – organizing your files, syncing cameras, checking parallax, and monitoring depth – you set yourself up for fewer surprises in the final export.
A good workflow also makes collaboration easier. If you hand your footage to a professional editor at Inside Editors, for example, they can instantly identify your creative vision and build on it smoothly. Clean organization is like handing someone a clear roadmap instead of a pile of puzzle pieces. It saves hours of back-and-forth, and it gives you a final video that truly reflects your intended vision without unnecessary delays.
How Staying Up-to-Date Helps You Edit Faster
3D technology evolves quickly. In 2025, AI-assisted depth correction, automated parallax fixes, and cloud-based 3D rendering tools have dramatically changed the editing landscape. Editors who keep up with these changes not only create better content – they work faster. New tools can automatically align stereo pairs, remove distortions, or track objects in 3D space with minimal manual effort.
If you’re the kind of creator who hates spending hours on technical fixes, embracing modern tools can make the entire editing process feel lighter and more enjoyable. And don’t worry – throughout this guide, we’ll explore which tools make the biggest difference so you can choose the right setup for your needs.
Now that we’ve set the stage, let’s dive into the editing process itself and explore the techniques that elevate projects from simple 3D videos to immersive, professional-grade experiences.
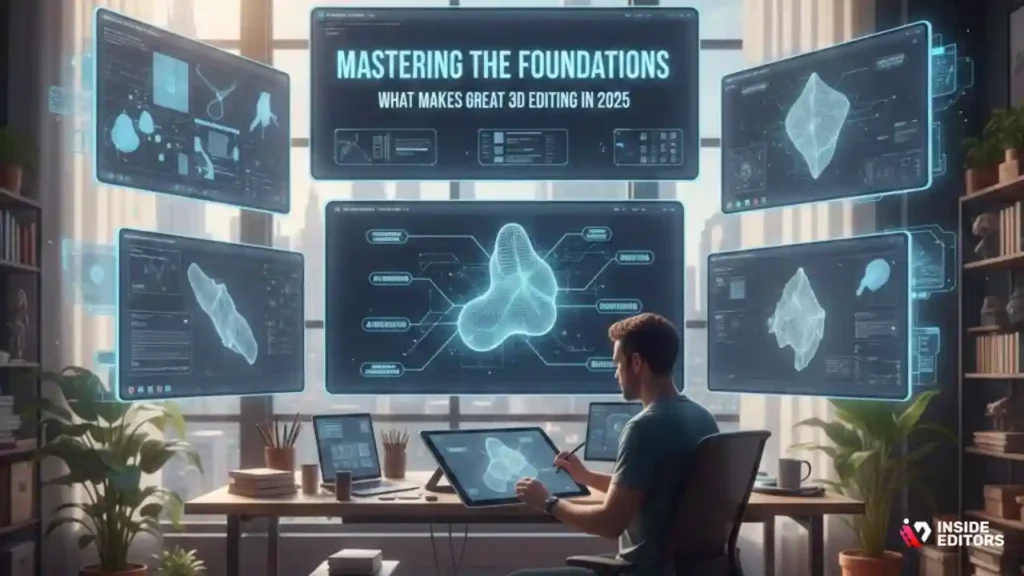
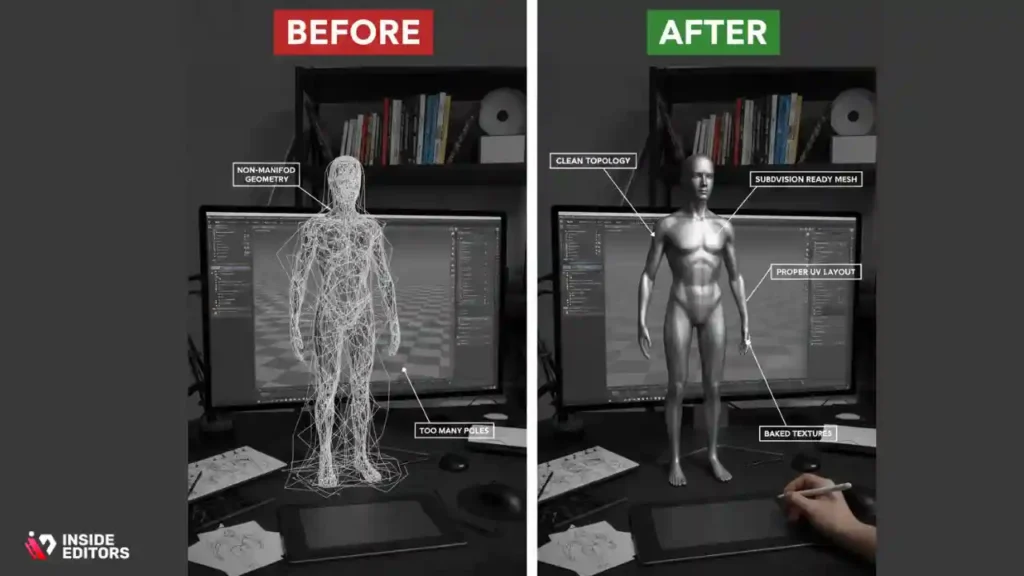
Mastering the Basics of Great 3D Editing 2025
Before you even press “record,” the way you set up your camera affects everything you’ll do in post-production. Many beginners underestimate how sensitive stereo footage can be – small mistakes during capture often become major time sinks during editing. For instance, if your lenses aren’t perfectly aligned, you’ll spend extra time correcting vertical displacement. If your cameras drift out of sync during recording, you may notice jittering when converting the footage into a 3D timeline.
Even with modern AI tools, fixing these issues manually can slow your entire workflow. That’s why professional editors always emphasize the importance of solid preparation. Simple habits – like calibrating your lenses, checking sensor distance, or locking exposure – reduce technical headaches later. A clean shoot means less time fixing problems and more time polishing creative elements like depth, color, and transitions.
If you’re relying on a single 3D camera instead of dual cameras, many of these challenges become easier. But even then, ensuring stable movement and maintaining consistent lighting makes the footage far more forgiving in post. Ultimately, the cleaner your source footage, the smoother your editing experience.
The Importance of Organizing Your Stereo Footage Early
If you’ve ever worked with large video projects, you know how chaotic files can get. 3D projects amplify that chaos because you’re dealing with pairs of clips rather than individual files. Proper naming, folder structure, and metadata organization prevent confusion later – especially when you’re handling multiple angles or extended takes.
A common mistake beginners make is mixing up the left and right eye footage. If this happens, depth can appear inverted, causing eye strain for viewers. Organizing files early ensures that your timeline stays clean, edits remain predictable, and your story unfolds smoothly.
Professional studios, including Inside Editors, name, tag, and store every stereo file systematically. This isn’t just for neatness – it’s because a well-organized project reduces errors, improves collaboration, and makes revisions significantly faster. You’ll notice your workflow feels calmer when everything sits exactly where it should.
The Right Tools and Software for 3D Editing Success

Why Your Editing Software Matters More Than You Think
Not all editing software handles 3D footage equally. Some tools simplify stereo alignment but struggle with color grading. Others offer advanced depth maps but require a high-performance computer to run smoothly. Selecting the right tool depends on your creative goals, preferred workflow, and hardware.
For example, Adobe Premiere Pro remains popular because it integrates well with other Adobe tools, allowing editors to handle depth, color, and effects in one environment. DaVinci Resolve continues to dominate when it comes to color grading, offering precise control over 3D color correction. Meanwhile, specialized software like Mistika VR or Stereo 3D Toolbox offers advanced distortion fixes designed specifically for immersive experiences.
If you’re just starting out, simpler tools may feel less intimidating. But as your projects become more ambitious, you’ll appreciate software that can handle complex effects, seamless depth calibration, and efficient rendering. Choosing the right tool early helps you grow without switching platforms repeatedly.
When AI-Assisted Tools Can Save You Hours of Work
AI has changed editing dramatically. In 2025, tools can automatically correct parallax, track depth maps, remove background artifacts, and improve stereo alignment with minimal human input. These features help beginners avoid common mistakes and give professionals more time for creative decisions.
AI-assisted depth correction is especially useful when shooting handheld footage. Instead of manually stabilizing each frame – which can take days – you can let software interpret movement patterns, adjust for lens distortion, and output stable, comfortable footage in minutes.
While AI won’t replace your creative eye, it certainly removes a lot of repetitive tasks. The more you embrace these tools, the more time you’ll have to focus on color, storytelling, and emotional impact – the elements that truly set your videos apart.
Color Grading, Depth, and Style in 3D Editing
Why Color Grading Matters Even More in 3D Footage
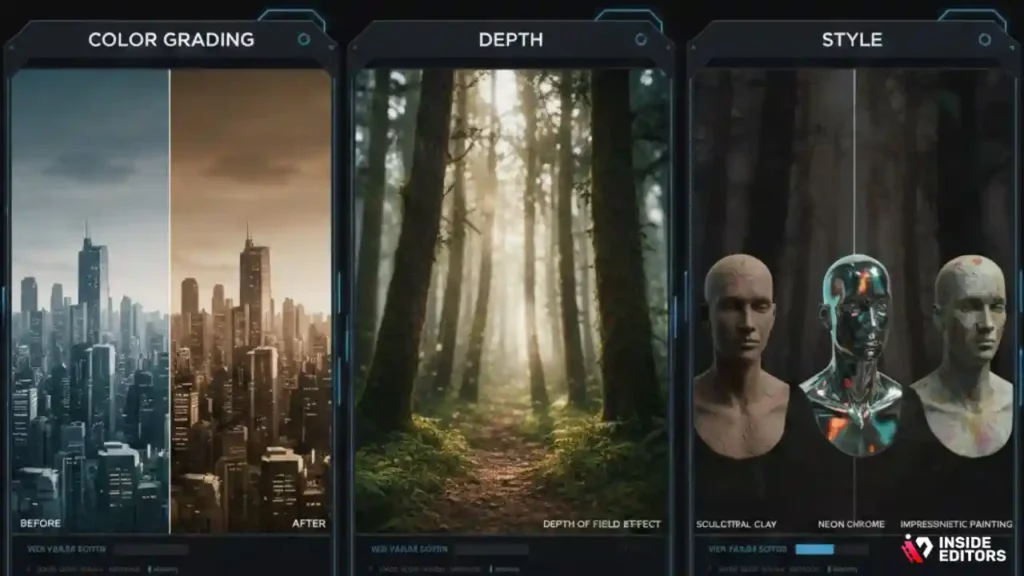
If you’ve ever watched a beautifully color-graded film, you already know how much color can influence mood. But in 3D videos, color plays an even more important role because it directly affects how depth is perceived. Small changes in contrast or saturation can make an object feel closer or farther away, which means careless grading can unintentionally distort your scene’s intended depth.
This is why professional editors approach color grading in stages. First, they balance color across both eyes to prevent discomfort. Then they adjust highlights, shadows, and midtones to reinforce the story’s mood. For example, deeper shadows can create a sense of mystery, while brighter highlights make objects pop from the background. When grading 3D footage, it often helps to ask yourself how each color adjustment will influence spatial relationships and viewer comfort.
If you’ve ever found that your 3D video feels “off” after grading, chances are your adjustments weren’t symmetrical between eyes. Luckily, modern tools offer excellent monitoring options that help catch inconsistencies early. This makes color grading both more expressive and more forgiving than it used to be, especially when paired with AI-powered corrections.
Balancing Foreground and Background to Avoid Viewer Fatigue
Fatigue is the silent enemy of 3D viewing. When objects jump too close to the viewer or hover too far away, the eyes struggle to merge the stereo images. Over time, this creates strain and reduces engagement. A well-balanced 3D video gently guides the viewer’s eyes through each scene, almost like a visual conversation.
The key is to maintain a consistent depth rhythm. Editors often start by examining the strongest depth cues – where the viewer’s focus naturally falls – and adjusting the surrounding elements to support that focus. If foreground elements overwhelm the viewer, pulling them back slightly can improve clarity. If the background feels too flat, adding subtle depth through parallax or color contrast helps restore dimension.
Think of depth like audio levels. You don’t want everything at maximum volume. Instead, you want each element to contribute to a balanced, harmonious experience. This creates the kind of immersive viewing that audiences in 2025 increasingly expect.
Adding Creative Style Without Overwhelming the Viewer
One of the joys of 3D editing is the creative freedom it offers. You can enhance depth during action sequences, create floating UI elements, or push objects forward for dramatic effect. But as tempting as it is to experiment, restraint often creates stronger results.
The best 3D videos use style to enhance storytelling, not distract from it. That might mean adding subtle depth effects to emphasize emotion or using carefully timed transitions to guide the viewer’s attention. Professional editors know that small changes in parallax or motion can have big emotional impacts – making scenes feel more intimate, vast, tense, or playful.
A useful tip is to create a “depth style guide” for each project. Decide early how far you want to push elements toward or away from the viewer and stick to that range. This creates consistency and helps your video feel professionally crafted. It also makes collaboration easier if you’re working with a team or passing your footage to editors at Inside Editors.
As you become more familiar with how depth interacts with color and motion, you’ll find it easier to develop your personal 3D editing style. And that style is what ultimately sets your content apart in a crowded market.
Motion, Transitions & Effects in 3D Editing
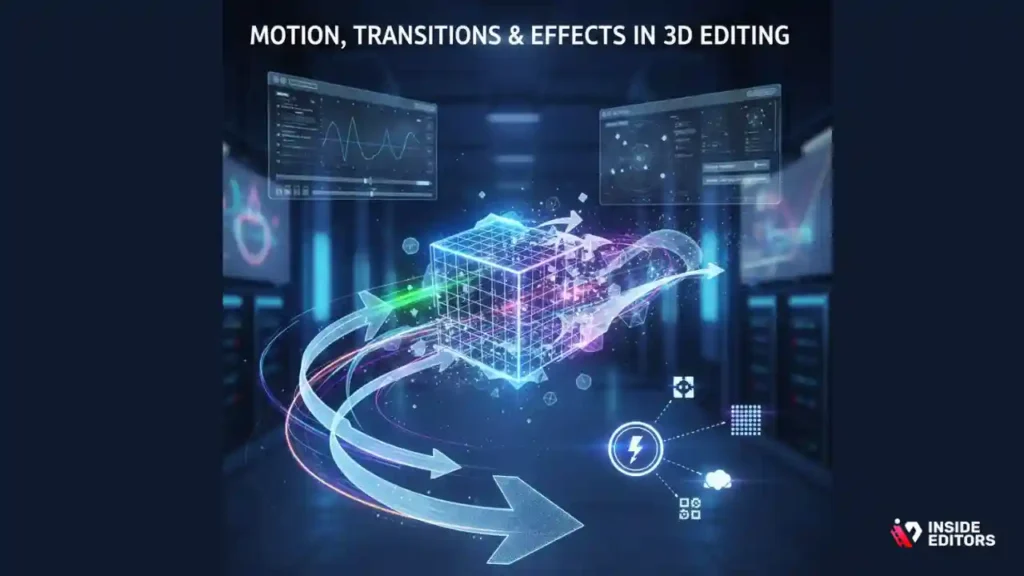
How Motion Adds Realism and Energy to 3D Scenes
Motion is one of the most powerful tools you have in 3D editing. When used intentionally, it can create energy, build tension, or add realism. However, motion also has the potential to make scenes disorienting when not handled with care. Quick pans, shaky handheld shots, and sudden depth changes are more intense in 3D than 2D.
That’s why many editors focus on stabilizing movement before anything else. Smooth, natural motion helps viewers stay oriented and immersed. If you’re working with handheld footage, applying stabilizing filters early in the edit prevents jarring depth shifts later. Even small corrections can significantly improve comfort, especially when viewers are watching on VR headsets or large screens.
The key is to think of motion as a storytelling tool. Ask yourself what the camera movement adds to the viewer’s experience. Does it guide their attention? Create a sense of place? Increase emotional impact? When you choose motion intentionally, you give your 3D video a more polished, cinematic feel.
Transitions That Look Beautiful in 3D
Transitions behave differently in 3D. What looks smooth in 2D can feel chaotic when objects suddenly jump forward or backward. That’s why professional editors handle transitions with extra care. Rather than using flashy effects, they rely on simple, fluid transitions that support the narrative, such as gentle cuts, soft fades, or depth-aware wipes.
One of the biggest mistakes beginners make is overusing complex transitions. These might include zoom spins, whip pans, or multi-layer transitions that shift depth abruptly. While these effects can look impressive, they often introduce misalignment or break depth consistency, making the video uncomfortable to watch.
Instead, think about what your story needs. If you want a dynamic transition, try adjusting depth gradually leading up to the change. This creates a smoother flow without sacrificing visual interest. The goal is to maintain immersion, not distract from it.
Special Effects and Compositing for 3D Videos
Compositing in 3D requires more attention to detail than in 2D because every added element must integrate seamlessly into the depth of the scene. When visual effects float at the wrong depth or move independently from the camera, viewers immediately notice something feels “off.”
A good approach is to treat effects like physical objects. Imagine where they would exist in 3D space – in front of the subject, behind them, or somewhere in between. Then match their lighting, motion, and shadows accordingly. This helps maintain realism and ensures your effects enhance the story.
If you’re new to compositing, start with simple additions like particles, floating text, or subtle lens effects. As you gain confidence, you can explore more advanced techniques such as depth-mapped environments, volumetric lighting, or animated holographic elements. In 2025, software advancements make these effects easier than ever, especially with AI-assisted depth tracking.
Fixing Common 3D Editing Mistakes
Solving Parallax Issues That Cause Headache or Eye Strain
Parallax problems are among the most common challenges in 3D editing. They occur when the left and right eye images don’t align properly. Sometimes the issue comes from differences in camera angles; other times, it’s caused by incorrect depth settings in the editing timeline.
If you’ve ever watched a 3D video that made your eyes work too hard, that’s usually parallax at play. The good news is that modern tools offer automatic parallax correction. But understanding how the issue arises gives you more control.
One simple trick is to monitor parallax levels throughout your project and adjust them before color grading or effects. This prevents inconsistencies from stacking over time, keeping the final export clean and professional. If you’re unsure where to start, many editors use zero parallax (the point of comfortable focus) as a reference when correcting shots.
Fixing Depth Inversion and Misalignment
Depth inversion – when objects appear inside-out or reversed – is one of the easiest mistakes to make and one of the hardest for viewers to ignore. It usually happens when left and right eye footage gets swapped or when depth adjustments go too far in the wrong direction.
Fortunately, inversion is easy to fix once you learn to spot it. Most editing software includes simple flip or swap tools, and once you know what the inverted image looks like, you’ll catch it immediately. Consistent file naming and a careful timeline structure reduce your chances of encountering this issue.
Stabilizing Footage Without Flattening Depth
Stabilizing 3D footage can be tricky because you want movement to feel natural without flattening the depth of the scene. Some stabilizers remove too much motion, making your 3D environment feel artificial or stiff. To avoid this, choose depth-aware stabilizing tools that consider both eye tracks.
If your software doesn’t offer depth-aware stabilization, try applying a gentler stable pass rather than a strong correction. This preserves the organic feel of the footage while still improving comfort for viewers. VR and action footage especially benefit from this approach, helping your scenes feel immersive without overwhelming the audience.
Optimizing Your 3D Video for Export and Sharing
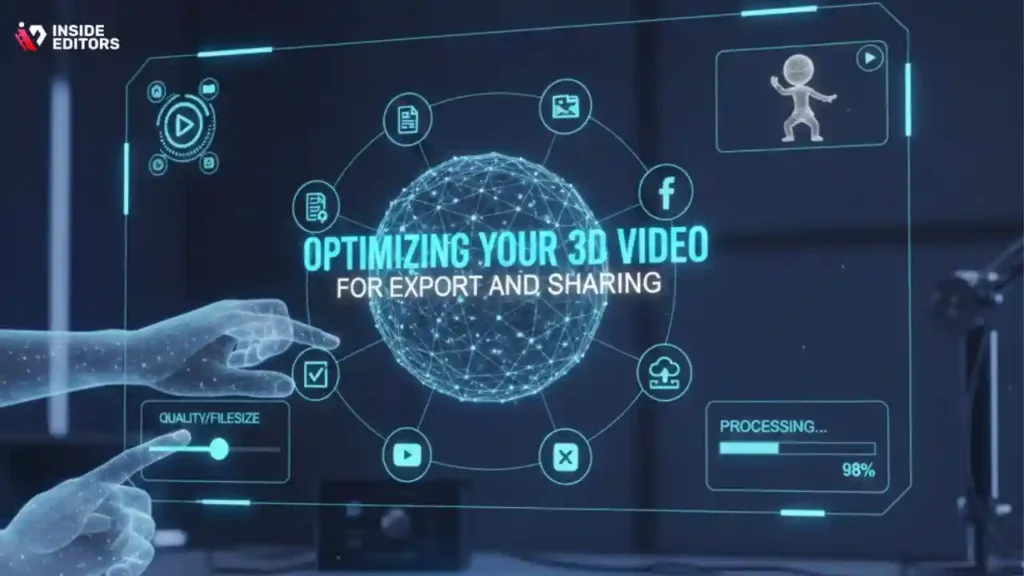
Choosing the Right Format for Your Final Output
Exporting 3D videos can feel confusing because different platforms support different formats. YouTube, VR players, and 3D TVs all have unique requirements, and exporting in the wrong format can lead to playback issues.
The most common formats in 2025 include side-by-side, over-under, and anaglyph. Each has pros and cons depending on your goals. Side-by-side preserves more detail and works well for VR headsets, while over-under often compresses better. Anaglyph is the easiest to view but sacrifices some color accuracy.
The best approach is to identify where your audience will watch the video and choose your export settings accordingly. Most editors create multiple versions optimized for different platforms. This ensures your hard work looks great wherever it’s viewed.
Why Bitrate and Compression Matter for Depth Clarity
Compression artifacts are more noticeable in 3D videos. Blocks, noise, and ghosting can disrupt depth perception, making your footage feel low-quality even if the original looks perfect. That’s why editors often choose higher bitrates for 3D exports.
If you’re uploading to YouTube or other streaming platforms, check their recommended 3D settings. Using the proper codec and bitrate helps preserve your depth cues and ensures your viewers experience your video the way you intended.
When to Consider Hiring a Professional Editor

Why Professional Editing Makes a Visible Difference
Even skilled editors sometimes struggle with the complexity of 3D workflows. A professional editor brings experience, efficiency, and an artistic eye that elevates the final product. They know how to balance depth, fix alignment issues, and color-grade footage so it feels cohesive from start to finish.
For many creators, hiring a professional isn’t about lack of skill – it’s about saving time. Instead of spending days aligning footage or fixing parallax, you can focus on writing, filming, or growing your brand.
If you’re working on commercial projects, training videos, or high-value content, collaboration with experts like the team at Inside Editors can ensure your 3D videos look polished, engaging, and ready for any platform.
How Inside Editors Helps You Bring Your Vision to Life
Inside Editors specializes in transforming raw footage into stunning visual stories. Whether you’re creating a product showcase, educational content, or immersive 3D visuals, a professional editor can help you refine your message and enhance viewer engagement.
Instead of getting stuck on technical obstacles, you can rely on experts trained in advanced depth workflows, color grading, and motion design. This makes your final video not only more professional but more impactful.
If you’re ready to take your 3D footage to the next level, you can explore Inside Editors’ full range of editing services – including , home video editing , social media editing, Amazon video editing, online course video editing, and more.
Conclusion : Best 3D Videos Begin With Smart Editing
By now, you’ve learned the core techniques, workflows, and creative strategies shaping 3D video editing in 2025. You know how depth, color, motion, and organization all influence viewer comfort and emotional impact – and how modern tools can make the entire process feel more intuitive.
The most important thing to remember is that great 3D editing isn’t about complexity. It’s about clarity. When you understand your tools and approach each scene with purpose, your videos naturally feel more polished, immersive, and memorable.
Whether you’re editing simple clips or crafting cinematic experiences, the practical tips in this guide will help you work smarter and create content that stands out. And if you ever want expert help bringing your vision to life, the team at Inside Editors is here to make your ideas shine.
If you’re ready to elevate your 3D videos from good to truly captivating, explore Inside Editors’ professional editing services – crafted to help creators like you save time, reduce frustration, and create stunning results that audiences remember.
FAQs : Best 3D Video Editing Tips
How can I trust a 3D video editor with my footage and revisions?
Professional editors typically provide clear revision policies, NDAs on request, and sample work to verify quality; ask for a revision limit (e.g., 2–3 rounds) and turnaround guarantees. Check whether the editor stores originals securely and who retains ownership after final delivery – many studios transfer final rights while keeping backup copies for a limited period. For extra protection, request a simple contract that covers privacy, file handling, and a clause for additional revisions if the first rounds don’t match your brief.
How do DIY 3D video editing tools compare to hiring a pro?
DIY software can save money (often free to $50/month) and is great for basic stereo alignment or simple depth effects, but pro editors bring calibrated workflows, color science, and efficiency that reduce revision cycles. Professionals can also deliver broadcast-quality exports, custom depth maps, and cross-platform optimization that most consumer tools don’t. If your project is commercial, high-visibility, or time-sensitive, pro work usually offsets its cost by saving time and improving viewer retention.
What should I expect to pay for professional 3D video editing?
Pricing varies by complexity: simple edits or short social clips often run $150–$500, mid-range projects (multi-camera stereo, color grade, effects) typically cost $500–$2,000, and high-end cinematic/VR jobs may exceed $3,000. Always confirm what’s included – e.g., stereo alignment, color grading, one round of revisions, and final exports – and ask about extras like rush delivery or layered project files. Request a written quote that lists deliverables so you avoid scope creep and surprise costs.
How long does a typical 3D editing project take, and are rush options available?
Turnaround depends on length and complexity: a short social clip can be done in 2–5 business days, a 5–15 minute polished piece usually takes 1–3 weeks, and complex VR or multicam projects may need 3–6 weeks. Rush options are common but usually cost 25–100% more depending on how fast you need it. Provide well-organized source files, clear creative notes, and preferred formats to speed up the process and reduce back-and-forth.
What practical steps should I follow to prepare footage for 3D editing?
Organize footage with consistent naming (left/right or L/R tags), include timecode or slate info when available, and provide a simple edit brief with target runtimes and reference videos; this reduces alignment errors and revision time. Check exposure, white balance, and camera sync at capture – fixing those issues later takes far longer. Export a low-res proxy set if you want fast review rounds; high-res masters are only needed for the final render.
Who owns the final 3D video and the original project files after delivery?
Ownership depends on your contract: many studios transfer final video rights to the client upon full payment while retaining a copy for backups; source project files (timelines, depth maps) may be provided as an add-on. Ask for explicit language about intellectual property and distribution rights in your agreement to avoid ambiguity. If privacy is a concern, request deletion timelines and confirm secure transfer methods (SFTP, encrypted cloud links).
What are common 3D editing mistakes and how can I avoid them?
Frequent problems include swapped L/R channels, excessive parallax that causes viewer strain, inconsistent color between eyes, and overuse of flashy transitions that break depth continuity. Avoid these by labeling files clearly, monitoring parallax values, balancing color per-eye before grading, and using depth-friendly transitions. If in doubt, run a quick playback on your target device (VR headset or 3D display) to catch issues early.
Which export formats should I use for YouTube, VR, and web sharing?
For YouTube and most VR platforms, side-by-side (SBS) or equirectangular stereo formats are standard – choose the one recommended by your platform and upload a high-bitrate master (e.g., H.265/HEVC or H.264 with high bitrate). For web previews, over-under or anaglyph (red/cyan) can be useful for compatibility but sacrifice color or resolution. Always export multiple versions (master, streaming, mobile) to preserve depth quality across devices.


