

Publishing consistently polished videos on YouTube isn’t just about creativity – it’s about workflow. Whether you’re a solo creator or part of a production team, mastering the best practices for YouTube video editing workflows can save hours, reduce stress, and help your content truly stand out.
Editing is where storytelling takes shape – where raw footage transforms into a message that keeps viewers watching. But without an efficient system, even talented editors lose time to cluttered timelines, mismatched assets, and endless revisions.
Let’s break down how you can build a YouTube-ready workflow that’s both professional and sustainable – one that lets you focus on what matters most: creating videos your audience loves.
Understanding the Core of an Efficient YouTube Editing Workflow
Every great workflow starts with clarity. Before opening your software, you need to know why you’re editing and who you’re editing for.

Planning Before Editing Saves Time Later
It might sound obvious, but pre-production planning is the secret behind most professional-looking videos. Defining your goal – whether it’s engagement, education, or sales – influences everything from pacing to sound design.
Think of your editing process like a road trip. Without a map, you’ll wander. With a plan, every turn has purpose. Write down your video structure (intro, body, outro) and note where visuals, overlays, or graphics will go. This reduces creative hesitation once you’re in the editing phase.
Organizing Assets Is Half the Battle
Before importing a single clip, create a structured folder system. Name your folders logically:
- Footage/ for raw clips,
- Audio/ for music and voiceovers,
- Graphics/ for titles and thumbnails,
- Exports/ for final renders.
Consistent naming conventions prevent confusion later – especially when you revisit projects or collaborate with others. Many creators underestimate this step, yet it’s one of the simplest best practices for YouTube video editing workflows.
Choosing the Right Editing Software for Your Needs
Selecting your editing software isn’t just about features – it’s about fit. The “best” tool depends on your goals, hardware, and editing style.
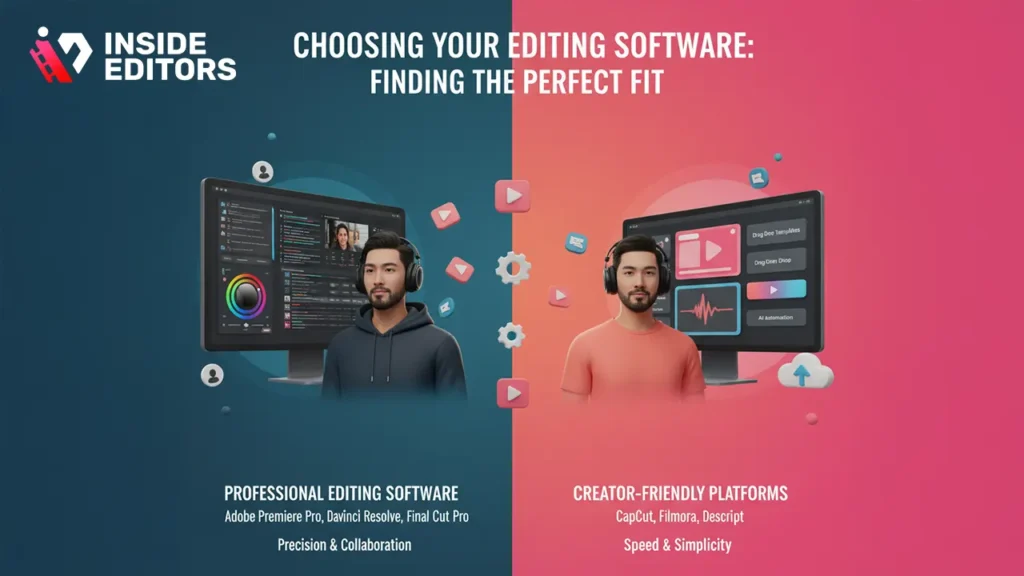
Professional Editors vs. Creator-Friendly Platforms
If you’re producing cinematic content or commercial projects, tools like Adobe Premiere Pro, DaVinci Resolve, or Final Cut Pro provide unmatched precision. These programs offer professional-grade color correction, advanced timeline controls, and collaboration features.
However, if you prioritize speed and simplicity, platforms like CapCut, Filmora, or Descript integrate AI-driven automation, templates, and cloud syncing – perfect for YouTubers producing high volumes of content.
The key is to choose a tool that reduces friction, not adds it. Fancy features mean little if they slow you down.
Compatibility and Performance Matter More Than You Think
An efficient workflow also depends on performance. Software that constantly crashes or lags destroys creative momentum. Always check compatibility with your system specs – RAM, GPU, and storage speed can drastically affect render times and playback smoothness.
Investing in SSD storage and sufficient memory (16–32 GB) often makes a bigger difference than switching editors. After all, no creative flow survives an unexpected system freeze.
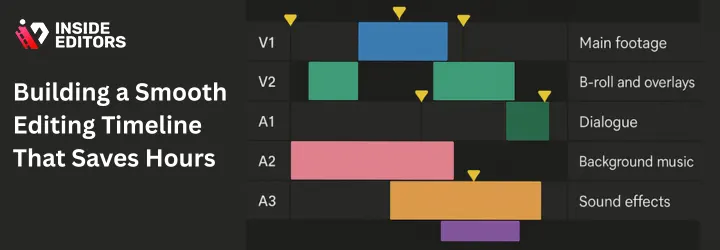
Building a Smooth Editing Timeline That Saves Hours
Once your tools are ready, it’s time to optimize the editing environment itself. The timeline is your creative workspace – keeping it clean and logical directly impacts your productivity.
Use Color Labels and Markers to Stay Organized
Professional editors rely heavily on visual markers. Color-coding your clips helps instantly identify b-roll, interviews, voiceovers, and overlays. Markers can indicate where cuts, transitions, or effects should go.
This color-coded approach not only makes editing faster but also helps if you’re collaborating remotely. Anyone joining your project can understand your timeline at a glance.
Edit in Layers, Not Chaos
Stacking audio, effects, and graphics on separate layers (instead of dropping them randomly) ensures easy control and avoids destructive edits. For example:
- V1: Main footage
- V2: B-roll and overlays
- A1: Dialogue
- A2: Background music
- A3: Sound effects
A layered approach reflects one of the most effective best practices for YouTube video editing workflows – clarity and control. You’ll spend less time searching and more time storytelling.
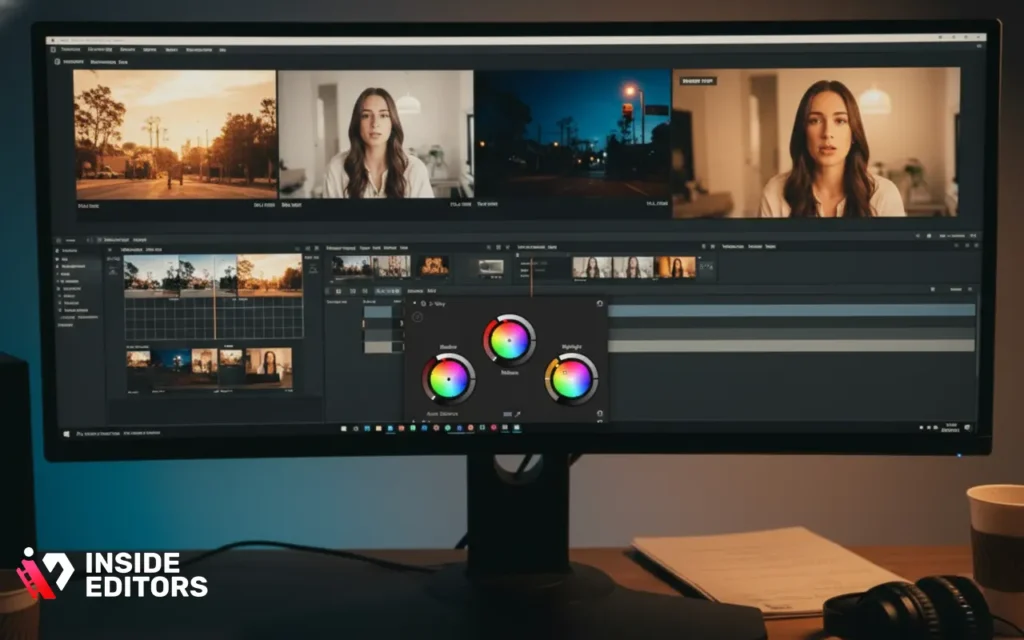
Streamlining Your Color Grading and Visual Consistency
Color tells emotion – and consistency across your videos builds brand identity. If your colors shift wildly from one scene to another, viewers subconsciously sense disconnection.
Use LUTs and Presets Wisely
LUTs (Look-Up Tables) speed up color grading by applying predefined color profiles. For recurring content – like tutorials or vlogs – creating or purchasing a LUT that matches your brand look can save hours.
But remember: LUTs are starting points, not shortcuts. Always fine-tune exposure, contrast, and white balance to match the lighting of your scene.
Match Shots for a Seamless Look
YouTube videos often combine clips from different cameras or lighting conditions. Use your software’s “Match Color” or “Auto Balance” tools to unify tones. The goal is cohesion – the video should feel like one continuous visual story, not a patchwork of sources.
When your visuals feel balanced, viewers stay focused on your message rather than your mistakes.
Optimizing Audio for Professional-Level Quality
Viewers may forgive a slightly uneven frame – but they won’t tolerate poor sound. Great audio distinguishes amateurs from professionals.

Clean Audio Is the Foundation of Good Editing
Start by removing background noise with tools like Adobe Audition’s DeNoise, Audacity’s Noise Reduction, or DaVinci’s Fairlight FX. Then normalize your levels so that dialogue sits around -6 to -3 dB, and background music remains subtle at -20 to -15 dB.
Balancing audio tracks prevents listener fatigue and makes your content sound more polished.
Use Music and Effects to Reinforce Emotion
Audio isn’t just technical – it’s emotional. Use background music to establish mood: upbeat for tutorials, cinematic for storytelling, minimal for interviews.
Sound effects can emphasize transitions or highlight visuals. Just ensure they complement rather than compete with dialogue. Subtlety often feels more professional than extravagance.
Speeding Up Post-Production Through Automation and Templates
Time is a YouTuber’s most valuable resource. That’s why automation has become a core pillar of modern workflows.
Leverage Presets, Macros, and Batch Exports
If you find yourself repeating actions – like resizing for different platforms or applying the same intro – automate them. Premiere Pro, Final Cut, and Resolve all support templates, adjustment layers, and export presets.
These small efficiencies compound over time. What once took 15 minutes per video can be done in seconds.
AI-Powered Tools Are the Future of Editing

AI isn’t replacing editors – it’s empowering them. Tools like Runway ML, Descript, and AutoPod can transcribe, cut silences, or even synchronize multiple camera angles automatically.
Adopting these tools strategically gives you back creative time for storytelling and design – areas no algorithm can replace.
Maintaining Consistency Across Multiple Projects
As your channel grows, maintaining a consistent editing style becomes essential for branding and recognition.
Create a Reusable Project Template
- Establish a master project containing your intro animation, color settings, title fonts, and end screen elements. Each time you start a new video, duplicate this project.
- This ensures visual and tonal consistency without repetitive setup work. It’s one of the simplest but most effective best practices for YouTube video editing workflows – ensuring every video “feels” like part of your channel identity.
Document Your Workflow
- Whether you’re a solo creator or managing a team, documenting your process prevents chaos. Create a short SOP (Standard Operating Procedure) describing folder structure, naming conventions, export settings, and publishing steps.
- When you onboard editors or outsource work, they can follow your system immediately – no guesswork, no quality drop.
Collaboration and Cloud-Based Editing Workflows
Modern YouTube teams rarely sit in the same room – cloud workflows have changed how creators collaborate.
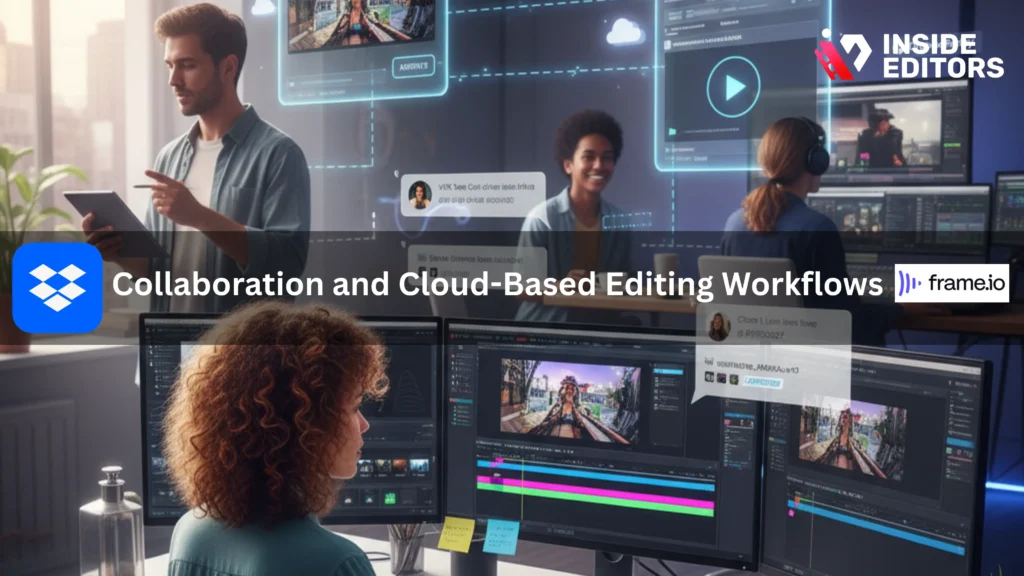
Real-Time Collaboration Tools Boost Efficiency
- Platforms like Frame.io, Blackmagic Cloud, or Dropbox Replay allow editors, producers, and clients to review timelines, leave frame-accurate comments, and approve edits without long email threads.
- This reduces feedback cycles dramatically – what used to take days now takes hours. For agencies or creators managing multiple clients, this is a productivity game-changer.
Version Control Prevents Mistakes
- Nothing’s worse than overwriting a good cut. Use version naming conventions like “ProjectName_v01”, “v02_approved”, etc. Cloud backups also protect your work from hardware failures.
- Inside Editors’ own professional workflows rely on such systems to maintain consistency and prevent costly rework – an approach you can easily replicate at any scale.
Exporting for Quality, Speed, and Platform Optimization
Even perfect edits can fall flat if exported poorly. Optimizing exports ensures your hard work translates well on every device.
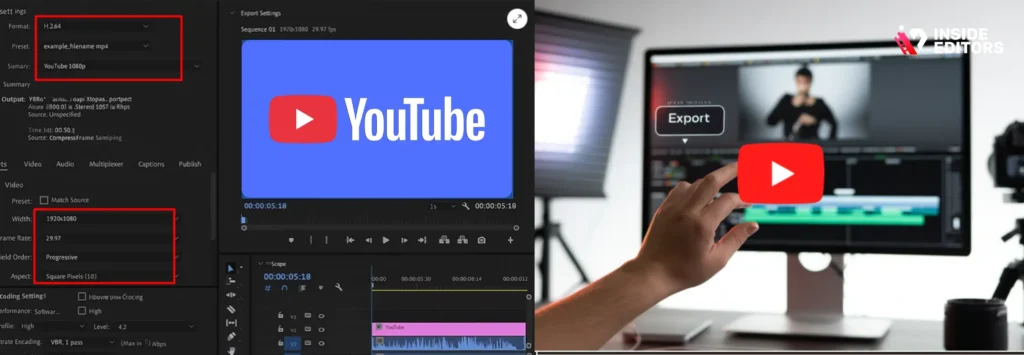
Understand YouTube’s Recommended Settings
YouTube recommends exporting in H.264 format with a .mp4 container, 1080p or 4K resolution, and progressive scanning. Bitrate should be 8 Mbps for 1080p and 35–45 Mbps for 4K.
Using the wrong settings can cause compression artifacts or extended upload times. Always preview your exported file before uploading to confirm sharpness and sync accuracy.
Automate Your Export Workflow
Most editors let you queue exports or set up watch folders that automatically render using predefined settings. This means you can edit one video while another exports in the background – true multitasking that saves hours weekly.
Enhancing Workflow Efficiency with AI, Plug-Ins, and Cloud Libraries
As editing technology evolves, integrating smart tools into your workflow isn’t optional – it’s how professionals stay competitive.
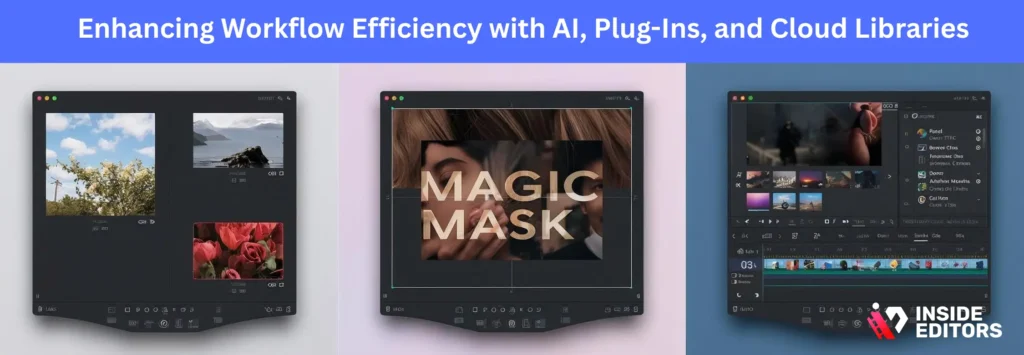
AI Tools for Speed and Precision
Recent AI-driven features like Adobe’s Auto Reframe, Resolve’s Magic Mask, and FCP’s Smart Conform automate previously tedious tasks. They analyze footage, track subjects, and adjust framing for different aspect ratios – perfect for repurposing YouTube videos into Shorts or Reels.
Such tools don’t just save time; they also maintain consistency across content platforms – critical for creators managing multi-channel strategies.
Centralized Asset Libraries Keep You Organized
Using platforms like Google Drive, Dropbox, or Frame.io Libraries lets you store reusable assets – logos, intros, sound effects – in one place. This prevents duplication and ensures everyone on your team uses the latest version.
When combined with project templates, centralized libraries form the backbone of a scalable YouTube editing workflow.
Why Professional Editors Still Matter in the Age of Automation
With so many tools simplifying editing, you might wonder: Do I still need a professional editor? The short answer is – often, yes.
AI can speed up mechanics, but storytelling is still human. Professional editors understand rhythm, emotion, and brand tone. They know when to cut for impact, when to pause for tension, and how to keep viewers engaged to the final second.
For creators juggling multiple projects or aiming for brand-level polish, outsourcing to professionals – like the team at Inside Editors – can transform raw footage into narrative-driven, audience-ready videos.
By delegating editing, you can focus on ideation, filming, and audience engagement – the creative core that drives growth.
Avoiding Common Workflow Mistakes That Slow You Down
Even seasoned editors fall into habits that quietly kill productivity. Recognizing these pitfalls early helps you maintain a clean, efficient workflow – and keeps your creative energy focused where it belongs.
Skipping Pre-Organization Leads to Chaos Later
Many creators dive straight into editing after importing footage. It feels faster in the moment – until they’re halfway through and can’t find the right clip. This leads to constant interruptions and lost time.
Instead, dedicate the first 15 minutes of every project to organizing folders, naming files, and syncing audio. Think of it as “editing setup.” That short investment can save you hours of frustration later.
Overusing Transitions and Effects
Transitions should guide the viewer – not distract them. Beginners often rely on flashy effects between every cut, but excessive transitions break immersion and make the video feel amateurish.
Professional editors use simple, purposeful transitions like cuts, fades, and dissolves – emphasizing story flow over visual noise. When in doubt, let pacing and emotion drive the rhythm, not effects.
Neglecting Backup and Version Control
Nothing kills motivation faster than losing progress. Always keep two backups – one local, one cloud-based. Automate incremental saves or enable auto-save features in your editor.
Naming versions properly (e.g., “Tutorial_v03_final”) prevents confusion, especially in team settings. Losing even a few hours of editing due to corruption or overwriting can derail your entire schedule.
Collaboration Etiquette: Working Smoothly with Teams or Clients
If you collaborate with clients or co-editors, communication becomes just as important as technical skill.
Set Expectations Before Editing Begins
Before touching the timeline, clarify scope, deliverables, and turnaround times. Misaligned expectations often lead to unnecessary revisions. Ask:
- What tone or pacing does the client prefer?
- Are there visual references or previous examples?
- Who provides the final approval?
This initial alignment reduces revision rounds and maintains workflow integrity.
Use Comment-Friendly Platforms
Reviewing edits via email threads or large file attachments is inefficient. Tools like Frame.io, Dropbox Replay, and Wipster allow collaborators to comment directly on the video timeline.
These platforms turn feedback into actionable notes, speeding up revisions while keeping communication clear. Many agencies and editing teams – including Inside Editors – use this system to manage multiple clients efficiently.
Respect Creative Boundaries
Collaboration works best when roles are clear. Editors shouldn’t have to redesign branding elements mid-project, and clients should trust editors’ pacing choices. Clear division of creative responsibility keeps projects smooth and morale high.
How Data and Analytics Can Refine Your Editing Workflow
Editing doesn’t stop at the export button. Analytics tell you what worked – and what to improve next time.
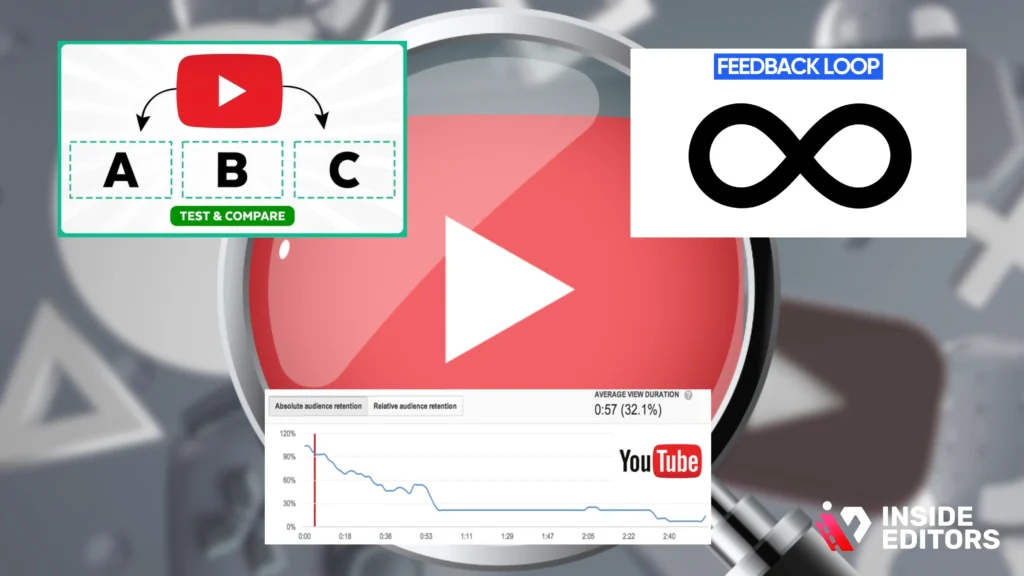
Study Viewer Retention Data
YouTube Analytics shows exactly where audiences drop off or rewatch sections. If you notice dips after long intros or repetitive shots, it’s a signal to tighten pacing.
Editing decisions based on data – rather than assumptions – lead to continuous improvement. Small refinements, like shortening intros or improving hooks, can increase average watch time significantly.
Test and Compare Video Styles
Experiment with pacing, thumbnail design, or background music style across similar videos. Track metrics like CTR (click-through rate) and AVD (average view duration).
These metrics don’t just improve engagement – they guide your editing strategy. Once you identify what resonates, build templates around those elements for consistency.
Use Feedback Loops
Encourage comments or surveys asking viewers what they liked most. Community feedback offers qualitative insights that analytics can’t always capture – such as emotional tone or clarity.
Combining viewer data with human feedback creates a full picture, ensuring your workflow evolves intelligently with your audience.
Integrating Brand Identity into Every Edit
Viewers remember consistency. The best YouTube channels aren’t just defined by what they say, but how they say it – visually and emotionally.
Create Visual Continuity Through Design
Consistent fonts, lower-thirds, and color palettes build instant recognition. These elements should match your channel’s logo and thumbnail style. Tools like Canva or After Effects templates make brand uniformity simple to maintain.
A viewer should know they’re watching your content within three seconds – even without seeing the logo.
Tone and Pacing Reflect Personality
Editing style communicates personality as much as visuals do. Fast cuts suggest energy and humor; slower pacing feels cinematic or reflective. Choose a rhythm that matches your channel’s voice and your target audience’s expectations.
For example, fitness channels often use upbeat transitions and driving music, while educational channels prefer smoother pacing and clear audio narration.
Consistency Builds Trust
When viewers know what to expect – visually, sonically, and structurally – they’re more likely to subscribe and return. Each upload reinforces your professionalism and attention to detail, traits that algorithms and audiences both reward.
Scaling Your Workflow as Your Channel Grows
Growth brings complexity – more videos, collaborations, and platforms. To stay efficient, your workflow must evolve too.
Batch Your Editing Tasks
Instead of editing one video from start to finish, batch similar tasks across projects. For example:
- Edit all intros for the month in one session.
- Apply color correction to multiple videos back-to-back.
- Export thumbnails together.
Batching reduces context switching – a major hidden time drain – and helps maintain stylistic consistency.
Outsource or Delegate Strategically
As your workload expands, outsourcing parts of the workflow becomes inevitable. Delegating rough cuts, subtitles, or color correction frees you to focus on storytelling and direction.
At Inside Editors, professional teams handle every stage of editing – from timeline assembly to final delivery – allowing creators to scale output without compromising quality.
Document and Automate Repetitive Steps
Use workflow management tools like Notion, ClickUp, or Trello to track projects, deadlines, and deliverables. Automate repetitive tasks like file naming or export uploads using scripts or plugins.
Automation isn’t about removing creativity – it’s about protecting it from burnout.
Real-World Example: How a YouTuber Cut Editing Time by 40%
Take the case of Maya, a tech reviewer producing weekly videos. Initially, her editing process took over 10 hours per video due to disorganized assets and repetitive color grading.
After implementing a structured workflow – including labeled folders, reusable templates, and cloud storage – she reduced editing time to six hours per video. More importantly, she maintained consistent branding and saw a 20% rise in audience retention.
Her key takeaway? Streamlined workflows don’t just save time; they boost creativity by removing friction.
This mirrors what Inside Editors has seen with hundreds of clients: when workflow complexity goes down, creativity goes up.
Key Takeaways: What the Best YouTube Editors Do Differently
Let’s distill the lessons into actionable insights:
| Focus Area | Common Mistake | Best Practice | Benefit |
| Pre-Production | Skipping planning | Define goals and video structure | Saves hours in post-editing |
| Organization | Unlabeled assets | Folder hierarchy and naming | Faster navigation |
| Timeline Management | Random clip stacking | Use color labels and layers | Cleaner, scalable workflow |
| Audio Editing | Ignoring noise levels | Normalize and mix properly | Professional sound |
| Color Grading | Inconsistent tones | Use LUTs and shot matching | Visual cohesion |
| Exporting | Wrong formats | Follow YouTube recommendations | Better quality and speed |
| Scaling | Manual repetition | Use templates and automation | Consistent branding |
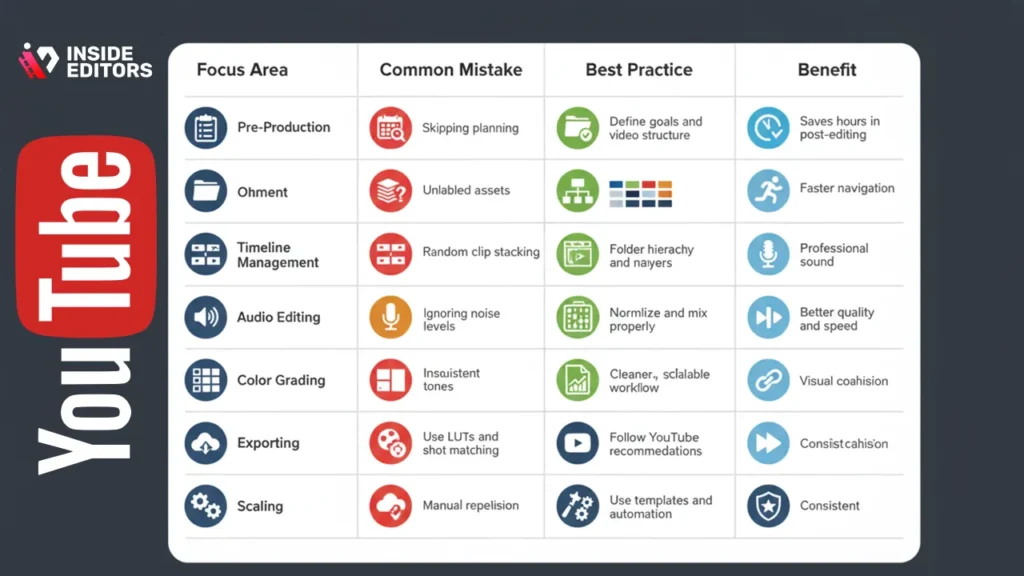
These habits separate efficient editors from frustrated ones. Once you integrate them into your process, editing feels less like a chore and more like creative storytelling.
The Future of YouTube Editing: AI, Cloud, and Human Creativity
The next generation of workflows blends technology and artistry. AI tools handle repetitive labor, but creativity – pacing, storytelling, emotional tone – remains uniquely human.
AI as a Creative Partner
Future editing will rely more on AI-assisted pattern recognition, smart previews, and predictive color correction. Already, tools like Adobe Sensei or Runway ML suggest cut points or remove silence automatically.
These aren’t threats; they’re collaborators. The editor’s role is evolving from technician to creative director – focusing on vision, emotion, and story coherence.
Cloud-First Collaboration Becomes Standard
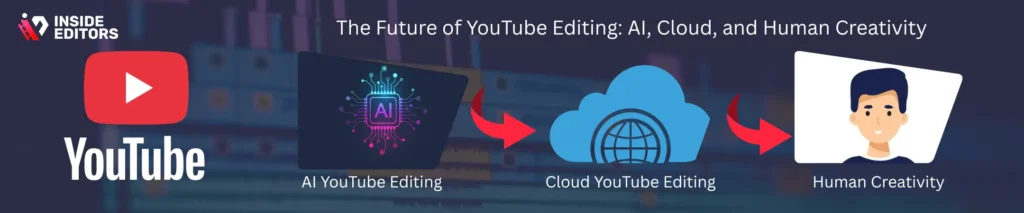
With remote work becoming the norm, cloud editing platforms enable teams across continents to share assets, sync edits, and publish faster. This flexibility makes YouTube production scalable and resilient.
Inside Editors, for instance, uses hybrid cloud systems combining speed with security – a model increasingly adopted by top creative studios.
Human Intuition Still Wins
No algorithm can yet replicate human empathy, humor, or nuance. The magic of storytelling still depends on your judgment – knowing why a moment feels right, not just how it’s structured.
That’s what makes editing both art and science – and why human editors will always matter.
Bringing It All Together
Mastering the best practices for YouTube video editing workflows isn’t about rigid rules – it’s about balance. The ideal workflow feels invisible, allowing creativity to flow without technical distractions.
Here’s the mindset to carry forward:
- Plan before you cut. A structured start means smoother storytelling.
- Simplify your process. Organization is power.
- Adapt continuously. Use data and feedback to refine your craft.
- Collaborate smartly. Tools and teams amplify results.
- Prioritize storytelling. Because great edits serve emotion, not just motion.
Once you align these principles, editing stops feeling overwhelming – it becomes instinctive.
When to Call in the Professionals
Sometimes, you simply don’t have the hours (or patience) to perfect every frame – and that’s okay. Professional editors exist to bring your vision to life faster, sharper, and with industry-level polish.
At Inside Editors’ Video Editing Services, we help YouTubers, brands, and creative teams streamline their entire editing process – from raw footage to upload-ready storytelling. Whether you’re creating product reviews, travel vlogs, or fitness tutorials, our editors craft workflows that save time and elevate quality.
Explore Inside Editors’ Video Editing Services to see how we can help you focus on creativity while we handle the post-production.
Your Workflow Is Your Signature
Every creator has a unique rhythm – and your workflow should reflect yours. By refining how you edit, organize, and deliver videos, you’re not just saving time – you’re shaping your creative identity.
Great editing isn’t defined by flashy effects but by effortless precision. When viewers can’t tell how much work went into your video, that’s when you know your workflow truly works.
So, as you refine your process, remember: consistency builds trust, clarity builds confidence, and smart workflows build freedom – the freedom to create more, better, and faster.
FAQs
How do you ensure quality and trust when outsourcing editing?
Start by requesting recent samples and an edit checklist that shows final deliverables, revisions, and export settings. Ask about version control, backup procedures, and client references; a reputable provider will share process details and examples. Clear milestones and a short trial or paid test edit (1–2 minutes) are the fastest way to confirm quality and build trust.
What are the main differences between DIY editing and hiring a pro?
DIY editing gives you full creative control and lower direct cost but typically takes more time, learning, and equipment investment. Hiring a pro speeds up delivery, improves polish, and reduces technical errors (color, audio, pacing), though it costs more; many creators use a hybrid approach – they keep ideation and rough cuts in-house and outsource final polish.
How much does professional YouTube editing typically cost?
Pricing varies: basic trims and cuts often start around $20–$75 per video, mid-level editing (color, sound, graphics) usually ranges $150–$600, and high-end cinematic edits can run $800+ per video. Packages may include 1–3 revisions, royalty-free music, or captions; confirm what’s excluded (stock footage, extra rounds of revisions, or rush fees) before committing.
What turnaround times should I expect and are rush options available?
Typical turnaround is 48–120 hours (2–5 business days) depending on complexity; simple social clips can be done in 24 hours if requested. Many teams offer rush delivery (24–48 hours) for an extra fee, but expect higher costs and limited revision windows – provide organized assets and a clear brief to avoid delays.
Who owns the final files and how is privacy handled?
Standard practice is that clients retain ownership of final deliverables while editors keep working files or source versions unless otherwise agreed. Ensure your contract or terms clarify copyright transfer, usage rights, and storage length; ask about secure file transfer and deletion policies if privacy or NDA protections are required.
What’s a simple step-by-step process I can follow to speed up editing?
Start with organized folders and consistent naming, then create a master template (intro, lower-thirds, color LUT, audio levels) to reuse; batch tasks like color and audio across projects, use markers and color labels on your timeline, and export using YouTube’s recommended settings. These best practices for YouTube video editing workflows cut friction and save hours per project.


