

Choosing the right video editing app for your iPad can feel like sorting through an entire toolbox when all you really want is the one perfect tool for your style. Maybe you’re a YouTuber who edits every day. Maybe you’re a student working on a project, a business owner creating product videos, or someone who just wants to turn everyday footage into something memorable. Whatever your reason, this guide was created to help you find the best video editing app for iPad-not just in theory, but in the way real creators actually work.
What makes this guide different is simple: you’re reading something written with actual editing experience behind it. At Inside Editors, we’ve worked with thousands of raw clips, from high-stakes commercial ads to silent home videos waiting for the right touch. We know the apps that save you hours, the features that make your videos shine, and the limitations that often stay hidden until you’re too deep into a project to switch. If you’ve ever wished you had someone to walk you through the choices with honesty and clarity, you’re in the right place.
Before we dive into comparisons, features, and practical examples, let’s start with the core question every reader asks-why does choosing the right iPad editor matter so much in the first place?
Understanding Why Your Editing App Matters More Than You Think
Choosing an editing app might seem straightforward. After all, iPads today are incredibly powerful-especially the newer M1, M2, and M4 models that can handle multi-layer timelines almost as well as laptops. But if you’ve ever tried editing on the wrong tool, you already know why the decision matters. The right app can make editing fast, smooth, and enjoyable; the wrong app can slow you down, crash when your project gets heavy, or leave you limited right when you need flexibility.
How Workflow Efficiency Shapes Your Final Video
When people talk about video editing, they often focus on features: transitions, effects, templates, and so on. What rarely gets discussed is workflow. Workflow is everything-how quickly you can import footage, how intuitively you can arrange clips, and how smoothly you can adjust audio or color without getting lost in menus. A great editing app helps you forget the tool and focus on the story.
Imagine trimming a clip with one gesture instead of three. Or adjusting color using sliders that feel natural, not clunky. Or exporting a project in minutes instead of waiting for an app to catch up. These differences may look small on paper, but across an entire project, they save hours. And if you’re someone who edits regularly, efficient workflow is the difference between loving the process and dreading it.
Where Creativity Meets Technical Power
Another reason the right tool matters is creativity. Many editors don’t realize how much their creative confidence depends on the app they use. When your tools support you-letting you move quickly, experiment easily, and undo safely-you become more willing to try new styles. You learn faster. You create better. You feel less frustrated because the app is working with you, not against you.
This is especially true on iPads, where the touchscreen adds a different sense of freedom. Pinch-to-zoom on the timeline, swipe to rearrange clips, tap to correct exposure-it’s a tactile experience that many find more enjoyable than mouse and keyboard. But only if the app is optimized for touch. Not every editor is.
The Hidden Costs of the Wrong App
Perhaps the most overlooked factor is cost-not just subscription fees but the cost of time. Many free editors make big promises but slow down once your project becomes complex. Or they add limitations like watermarks, resolution caps, or locked effects that push you into upgrades at inconvenient times. The worst offenders are the apps that seem easy at first but fall apart during pro-level tasks-multicam, color grading, LUT support, or high-bitrate exports.
When that happens, you end up restarting in a new app, losing time, losing work, and often losing motivation. That’s the cost we want to help you avoid.
So now that you understand why choosing wisely matters, let’s explore what makes an iPad editor truly powerful-and how you can identify the right one for your goals.
The Editing Features That Actually Make Your Videos Stand Out
Every app lists features on its website-transitions, effects, timelines, filters, templates. But not all features carry the same weight when you want a professional, polished video. Below, we’ll walk through the editing features that make a real difference in your final output. Think of these as the foundation of smart editing, the tools that define how your video will look, feel, and flow.
The Importance of Intuitive Timeline Control
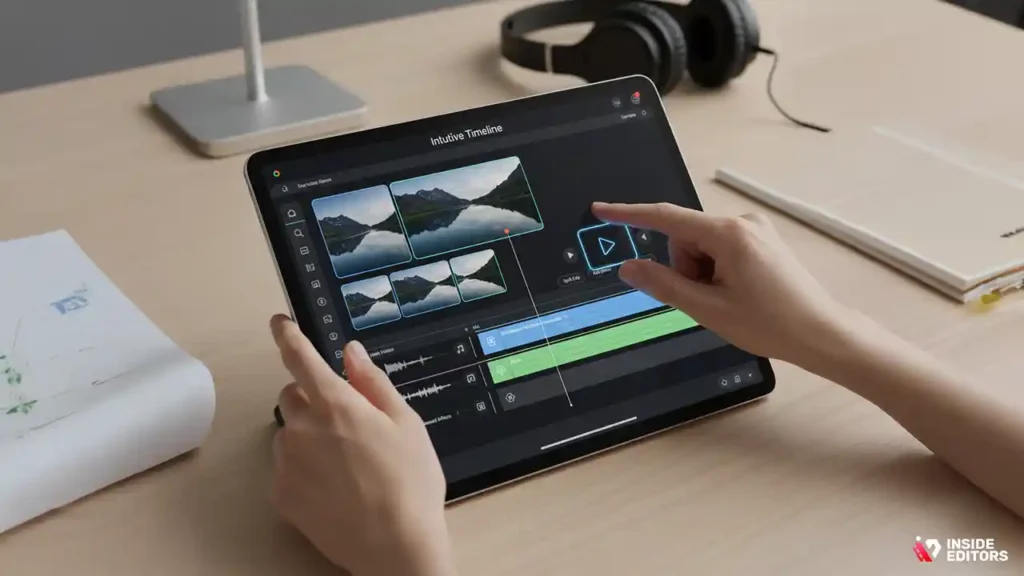
The timeline is the heart of any editing app. It’s where your clips live, where your story takes shape, and where you spend most of your time. On iPad, timeline control is even more important because everything revolves around touch. The best editors let you pinch to zoom, drag with precision, and split clips instantly. They respond quickly, without lag, even when your project grows to multiple layers.
A poor timeline can be frustrating-clips move unpredictably, gestures don’t register, or the interface feels cramped. Over time, this steals your focus and drains your energy. The best apps, on the other hand, make the timeline feel natural. They encourage rhythm. They help you experiment. They let you treat your project like a living canvas, not a puzzle.
Why Strong Audio Tools Transform Your Edits
Most people think video editing is about visuals. But if you’ve ever watched a beautifully shot clip with poor audio, you already know that sound can make or break your impression. Great editing apps include more than basic volume controls. You want an app that offers noise reduction, equalizer settings, multiple audio layers, and the ability to sync audio with footage smoothly.
Consider this: when you remove background noise or smooth out harsh peaks in a voice recording, your video instantly feels more professional. Even small adjustments, like fading in a soundtrack at the perfect moment, can change how viewers feel. That emotional influence is why strong audio tools matter.
Why Color Controls Matter in Every Video You Create
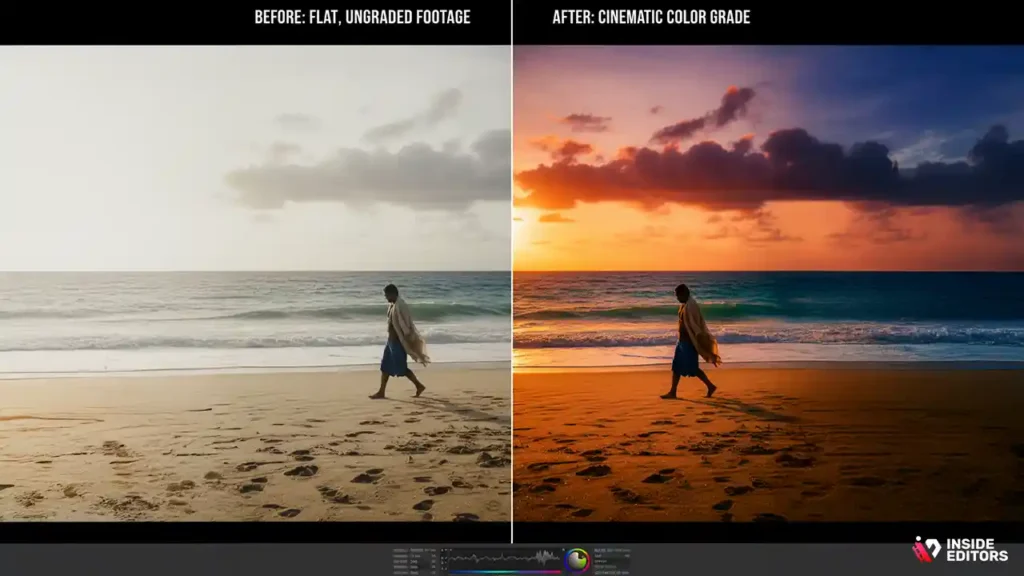
Color grading is one of the easiest ways to upgrade the quality of any video. Even if you’re not editing a film, adjusting color temperature, contrast, exposure, and saturation helps bring life into your footage. A good app offers built-in presets for quick fixes and manual tools for precise adjustments.
Some apps support LUT files-a powerful feature if you want your videos to have a consistent, cinematic look. A LUT acts like a professional color filter and can save you a lot of time. If you create content regularly, choosing an app with strong color controls can dramatically improve your overall style.
Effects That Complement, Not Distract
It’s tempting to choose an app based on its effects-transitions, animations, templates. But quality matters more than quantity. Many free apps offer hundreds of flashy effects that can easily distract from your message. Professional apps offer fewer effects, but they’re tasteful, subtle, and just as polished as the tools used by filmmakers.
A good rule of thumb: if an effect pulls attention away from your content, it’s too much. The best apps help you enhance your story, not overwhelm it.
Export Settings That Save Time and Protect Quality
When you finish your edit, everything comes down to the export. A strong editor lets you control resolution, bitrate, frame rate, codec, and aspect ratio. These settings matter tremendously. For example, if you upload videos to YouTube, you’ll want high resolution and a generous bitrate. If you make social media content, you’ll want fast encoding and pre-optimized formats like vertical or square frame sizes.
A weak export system can ruin a great edit by compressing your footage too much or limiting your choices. That’s why many creators eventually switch to a more advanced app-they simply outgrow the beginner tools.
How to Match the Right iPad Editing App with Your Creative Goals
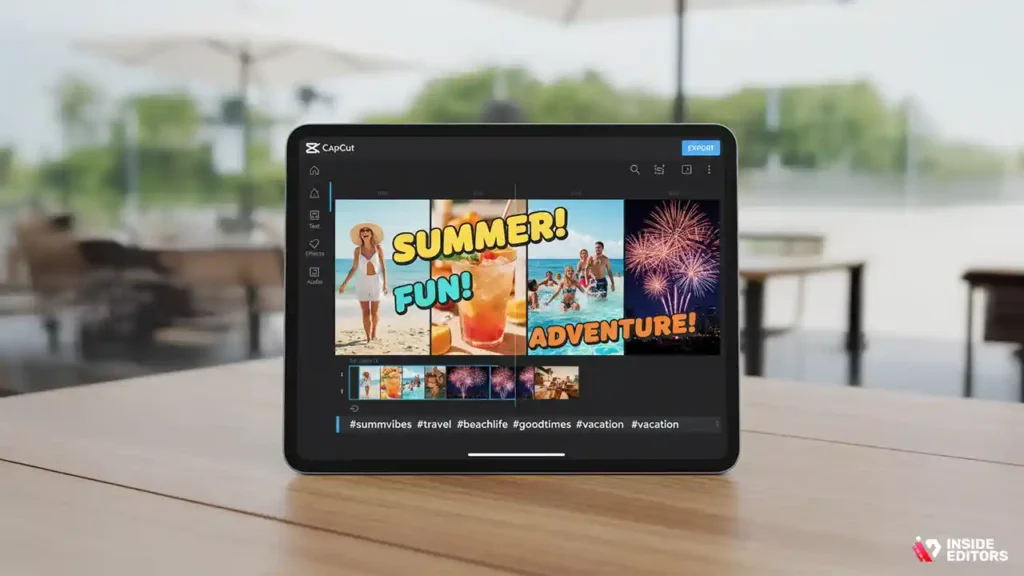
Now that you understand the essential features, the next step is matching an app to your creative style. The truth is, no single app is perfect for everyone. A YouTuber may need something fast and reliable for multiple uploads per week. A filmmaker might need multi-layer editing and color grading. A business owner may want quick templates for branded content. The key is choosing the app that aligns with what you actually do.
When You Need Fast, Flexible Editing for Social Media
Social media creators often need speed. You’re working with short clips, fast transitions, quick storytelling, and a need to publish frequently. In this case, you want an app that loads quickly, offers templated options, and supports vertical editing. Touch-friendly timelines are especially helpful here, along with drag-and-drop asset tools.
If you primarily create TikTok or Reels, you want an editor that supports sound libraries, on-screen text, and quick color tools. Choosing an app that feels light, fast, and intuitive will save you hours across the month.
When You Want Professional Control for YouTube or Film Projects
Long-form videos require patience and precision. You’re dealing with multiple audio tracks, B-roll footage, cuts, transitions, and storytelling flow. Here, you need an app with a stable timeline, strong color tools, and powerful export options. You’ll likely benefit from LUT support, multi-layer editing, advanced audio controls, and a large working space.
If you’re editing documentaries, cinematic videos, or any type of storytelling, choose the app that gives you full creative control-even if it comes with a learning curve.
When You Create Business, Branding, or Marketing Videos
Business videos often need clear messaging, clean design, and consistency. You might prefer apps with built-in templates for intro screens, lower thirds, or calls-to-action. You may want tools that make adding text or graphics easy and professional. If you manage multiple videos per month, speed matters-but so does brand consistency. The right app will help you maintain a recognizable look without having to rebuild everything from scratch.
When You Want Creativity Without Complexity
Not everyone wants advanced features. Many creators simply want an app that takes care of the technical work for them. If you like experimenting but don’t want to learn complex controls, choose an app with automated tools-AI clipping, auto-enhance features, smart color, or auto-captioning. These tools don’t replace skill, but they make editing enjoyable and remove anxiety.
Each goal aligns with different apps, which is why the next section dives into detailed comparisons. But before we explore those, we need to address one of the biggest challenges new editors face: understanding the mistakes that slow them down.
Top Video Editing Apps for iPad: In-Depth Comparison
Now that we’ve covered why features and workflow matter, let’s dive into some of the top video editing apps for iPad – looking closely at what makes each one great, who it’s best for, and where it may fall short. By the end, you’ll have a strong sense of which apps align with your creative goals.
LumaFusion: The Pro’s Choice on iPad
LumaFusion is widely considered the gold standard for serious editing on iPad. With a one-time purchase model and powerful tools, it’s built for creators who want to push the boundaries without recurring subscription costs.
- Strengths: LumaFusion supports multi-layer video and audio tracks, making it possible to mix B-roll, sound effects, voiceovers, and music in a complex timeline. It also includes advanced color correction, LUT support, stabilization, keyframing, and export presets. According to Mobile Marketing Reads, its magnetic timeline and professional effects are a big part of why it stands out.
- Performance: Because it’s optimized for iPad, even detailed projects run smoothly on modern devices. On M1 or M2 iPads, its performance is often very close to desktop editing.
- Pricing: A one-time fee (around $29.99, according to pricing tables) – no subscription, which many creators prefer for long-term value.
- Drawbacks: The learning curve is steeper than basic apps; beginners may feel overwhelmed. Also, because it’s iOS-specific, you can’t easily switch to Android.
As one editor on Reddit put it:
“LumaFusion is far far more professional and fully featured … you own it and get updates, not a subscription … well worth the money.”
If you’re editing content for YouTube, documentaries, or more creative projects – and you don’t mind investing in a powerful app – LumaFusion is extremely compelling.
DaVinci Resolve for iPad: Hollywood-Grade Color and Collaboration
For those who want desktop-level power on their tablet, DaVinci Resolve is a standout. According to TechPP, the iPad version includes the same editing page and color correction tools found on desktop versions.
- Strengths: Professional color grading using DaVinci’s color page, built-in Fairlight audio tools, and compatibility with Blackmagic Cloud for real-time collaboration.
- Compatibility: The iPad version works with iPad Pro, iPad Air, and supports external storage (like USB-C drives), which is great for large files.
- Pricing: The base app is free, but you can upgrade to DaVinci Resolve Studio via in-app purchase for powerful premium features.
- Drawbacks: Because of its depth, the UI can feel complex. It’s not the fastest app for very quick social edits, and lower-powered iPads may struggle with high-resolution or heavily layered projects.
If color grading is your priority – say, for a cinematic short or a branded project – DaVinci Resolve offers features you’ll rarely find in mobile editors.
CapCut: Best for Social Media & On-the-Go Creativity
CapCut is a favorite among creators who make short-form content, thanks to its easy-to-use interface, AI-powered effects, and tight integration with social media platforms.
- Strengths: One-tap effects, auto-captioning, a vast music and sound library, and animated overlays. It’s designed for speed, making it ideal for TikTok, Reels, or any vertical video.
- Performance: Lightweight and responsive. It handles quick cuts, text overlays, and basic color correction very well.
- Pricing: Free, with no mandatory subscription.
- Downsides: Not built for heavy multi-track projects. If you plan on doing layered cinematic editing, you might outgrow CapCut.
For creators who publish frequently and value speed + style over deep control, CapCut is a go-to tool.
iMovie: Simplicity, Reliability and Apple Integration
iMovie comes preinstalled on many iPads, and for a reason: it’s straightforward, stable, and a solid starting point for beginners.
- Strengths: Very user-friendly. It supports drag-and-drop editing, basic transitions, titles, and green-screen effects. Since it’s made by Apple, it integrates seamlessly with other Apple apps and devices.
- Ideal For: Beginners, casual editors, students, or anyone who wants something simple and reliable without an extra cost.
- Limitations: Limited in advanced features. The effects library is modest, and you don’t get multi-track editing like in LumaFusion or DaVinci.
- User Feedback: Some iPad users report performance issues, especially with larger or high-frame-rate projects:
“Scrolling through will cause it to slow down and freeze … I’ve considered buying LumaFusion …”
If you’re just starting or working on simple clips, iMovie is a dependable choice – but it may feel limiting as you grow.
KineMaster: Layer Power with Flexibility

KineMaster strikes a balance between feature-rich editors and ease of use. According to AppFillip, it offers multi-layer editing, green screen (chroma key), and advanced audio mixing.
- Strengths: You can use several video and audio tracks, apply chroma key effects, and do keyframe animation. These features make KineMaster powerful without becoming too overwhelming.
- Pricing: Freemium model – there’s a free version (with watermark), but you can pay (monthly or yearly) to unlock export options and remove limitations.
- Ideal Use: Social media creators, educators, vloggers, and anyone who needs multi-layer flexibility but doesn’t require full professional color grading.
- Cons: The free version’s watermark can be annoying for content meant for an audience. Also, compared to LumaFusion, KineMaster doesn’t feel quite as “pro-grade.”
Final Cut Pro for iPad: Apple’s Pro Desktop App, Tablet-Style
Apple has brought Final Cut Pro to iPad, though with some caveats. On the plus side, you get access to familiar Pro-level tools-multi-angle editing, audio filters, and professional transitions.
- Strengths: High-end color tools, pro-level transitions, and powerful timeline control.
- Limitations: According to user reports, the iPad version has restrictions (e.g., limited video layers, lack of some editing modes) compared to desktop Final Cut.
- Device Needs: Best suited for newer, more powerful iPads-especially those with Apple Silicon.
If you’re already familiar with Final Cut Pro on Mac and want to continue similar workflows on your iPad, this is one of the few tools that feels truly “pro.”
How to Choose the Right App: A Decision Framework
Given these options, how should you decide? Here’s a simple decision framework to match your goals, workflow, and device to the right app:
| If you… | Then this app is likely best for you |
| Edit long-form videos, or need full control over color, audio, and layers | LumaFusion – powerful, stable, pro-grade, one-time cost |
| Work in teams, need desktop-grade color grading or VFX | DaVinci Resolve – professional, collaborative, high power for free or paid |
| Make short-form social content (TikToks, Reels), or prefer fast, stylish edits | CapCut – quick, fun, AI-powered effects, free |
| Are a beginner or casual editor who wants something built-in and stable | iMovie – ultra simple, no extra cost, reliable |
| Need layer-based editing but don’t want to pay a big one-time fee | KineMaster – multi-layer, flexible, subscription-based option |
| Already use Final Cut Pro on Mac and want a familiar pro-level iPad experience | Final Cut Pro for iPad – pro tools + Apple ecosystem, but with some iPad-specific limitations |
Common Mistakes Creators Make When Picking an iPad Video Editor
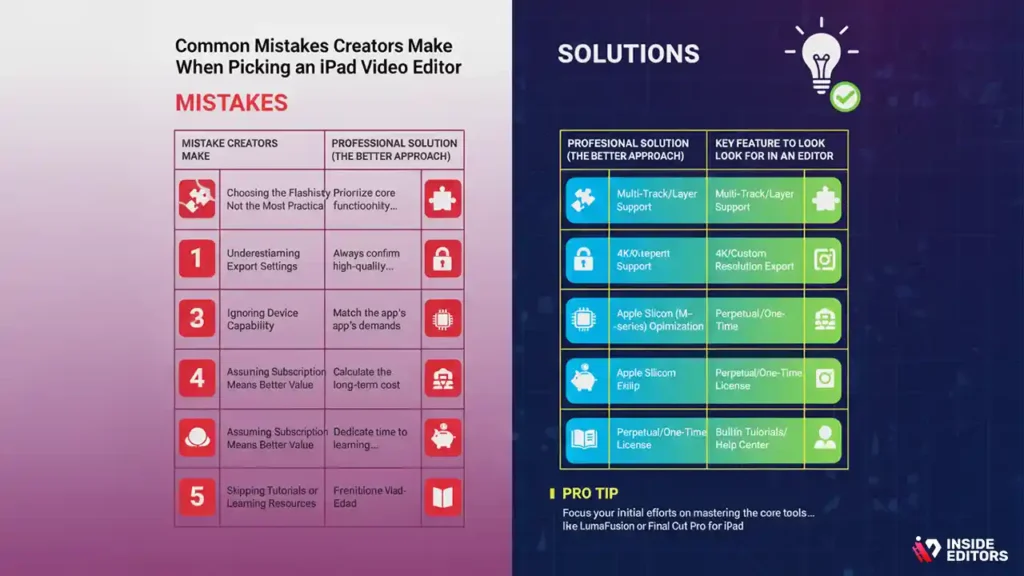
When creators start, they often fall into common pitfalls. Knowing these ahead of time can save you frustration, time, and money.
Mistake 1: Choosing the Flashiest App, Not the Most Practical
Many users pick the editor with the coolest effects or most buzz, without considering whether it actually fits their workflow. In reality, flashy templates matter less than timeline responsiveness, export flexibility, and real editing tools. If you just need quick, fun edits, by all means use a flashy app – but if you’re serious about growth, go for power and stability.
Mistake 2: Underestimating Export Settings
Some free or beginner editors limit your export options to lower resolutions or lower bitrates. This might be okay for social media, but if you want clean, professional-looking video (for YouTube, brand work, or client projects), limited export options will hurt you. Always check whether the app supports 4K, custom bitrate, or pro codecs.
Mistake 3: Ignoring Device Capability
Not all iPads are created equal. Editing a full-resolution 4K video with color correction demands a powerful iPad (like Pro or Air with Apple Silicon). If you try to run heavy apps on older or lower-powered iPads, you’ll likely run into lag, crashes, or long export times. Match your app to your hardware.
Mistake 4: Assuming Subscription Means Better Value
Subscription models might seem cheap month-to-month, but over time, recurring costs add up. Many users eventually pay more in a year than the cost of a pro app purchased outright. If you plan to edit long-term, a one-time cost tool (like LumaFusion) can be much more economical.
Mistake 5: Skipping Tutorials or Learning Resources
Even powerful apps need a bit of learning. Skipping tutorials or assuming you can figure everything out by trial and error often leads to inefficient workflows. A few hours invested in learning will save you far more time later on when editing projects become more complex.
Tips & Expert Advice from Inside Editors
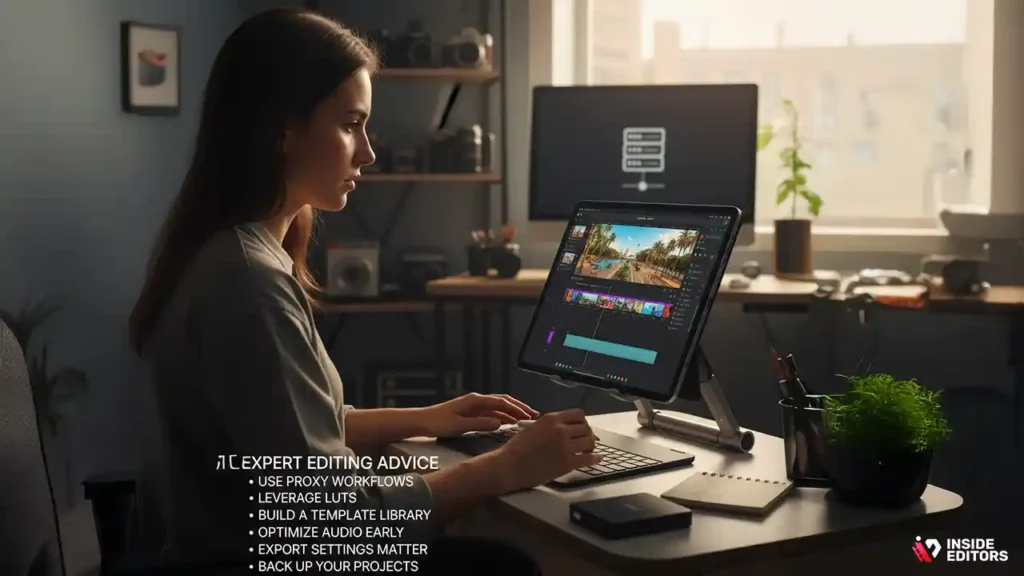
Here are some insider practices and advice we’ve gathered from real editors working across styles and industries. Use these to get more from whichever iPad app you choose.
- Use Proxy Workflows Where Possible
When working on large 4K or high-bitrate files, consider editing with proxy (lower-resolution) versions first. This reduces lag and speeds up your timeline. Once the edit is locked, switch back to full-resolution media for final color and export. - Leverage LUTs for Consistent Style
If you produce videos regularly (for brand, YouTube, or clients), export and import LUTs to apply a consistent look. In LumaFusion or DaVinci, save your grade as a LUT, then reuse it across projects for consistency and speed. - Build a Template Library
In any app, build and save reusable templates – title sequences, lower thirds, color-graded sequences. Reusing templates saves time and ensures a consistent brand feel. - Optimize Audio Early
Fix audio first. Use noise reduction, equalization, and keyframe volume adjustments before you focus too much on visuals. Clean, balanced audio makes a huge difference and often matters more to viewers than fancy transitions. - Export Settings Matter
For online platforms like YouTube or Instagram, use export presets optimized for those platforms (resolution, bitrate, FPS). Customize when needed – for example, increase bitrate for archival or client deliveries to preserve quality. - Back Up Your Projects
Use iCloud, external SSDs, or Dropbox to store both your project files and media. Losing a project mid-edit is a nightmare; frequent backups make your workflow safe and professional.
Final Thoughts & Recommendation
There’s no one-size-fits-all when it comes to choosing the best video editing app for iPad – but there is a best app for you. If you’re serious about full-featured, professional editing, tools like LumaFusion or DaVinci Resolve will pay off in power and flexibility. If speed, fun, and social media workflow are more important, CapCut or KineMaster might be better fits. And if you’re just starting out, iMovie gets you editing quickly without a learning barrier.
Whatever you choose, make sure it aligns with your device, your goals, and your editing habits. And remember: the tool is only half of the equation -a your vision, workflow, and consistency are what will truly make your videos shine.
FAQs
1. What is the best video editing app for iPad for beginners?
Beginners usually prefer apps with simple timelines, templates, and guided tools. iMovie or CapCut work well because they require almost no setup, and both support fast exports for social content. If you want room to grow later, LumaFusion provides stronger controls without overwhelming new users.
2. Is LumaFusion better than DaVinci Resolve on iPad?
LumaFusion is faster to learn and uses a one-time purchase, making it ideal for solo creators. DaVinci Resolve offers superior color grading, collaboration, and pro audio tools, but it demands a more powerful iPad and has a steeper learning curve. Choose LumaFusion for speed; choose Resolve for cinematic control.
3. Do I need a powerful iPad to edit 4K video?
For smooth 4K timelines, an iPad with Apple Silicon (M1 or newer) is recommended. Older models can still edit 4K but may lag during playback, color grading, or heavy layering. If you export frequently or use pro apps like DaVinci Resolve, stronger hardware will noticeably reduce render times.
4. Are paid editing apps worth it compared to free ones?
Free apps like CapCut are great for quick social videos, but paid tools offer multi-layer timelines, color grading, and higher-bitrate exports. For YouTube, client work, or long-form content, these advanced features save hours over time. If editing is part of your workflow, a paid app becomes cost-effective quickly.
5. How much does a good iPad video editing app cost?
Prices range widely: free for CapCut, $30 one-time for LumaFusion, and subscription options for tools like KineMaster or Final Cut Pro for iPad. The main cost difference comes from export quality, advanced features, and layer limits. Consider whether you’ll use pro tools enough to justify the investment.
6. How long does it take to edit a video on an iPad?
Simple social videos can be edited in 10-20 minutes using templates, while more complex multi-layer projects may take several hours. Export time depends on resolution and device power-an M-series iPad can render 4K clips noticeably faster. Using presets, templates, and proxy workflows helps shorten overall turnaround.
7. Is editing on an iPad as good as editing on a laptop?
For many creators, yes-modern apps offer desktop-level tools, especially in LumaFusion and DaVinci Resolve. The main limitations are smaller screen size and fewer plugin options, but portability and touch controls often offset those trade-offs. For most YouTube or brand work, an iPad is fully capable.
8. Will my projects remain private when editing in free apps?
Most reputable apps store projects locally unless you choose cloud features. However, some free tools sync elements like templates or AI effects, so review their privacy settings. For maximum control, offline-focused apps such as LumaFusion or DaVinci provide stronger data ownership and transparent policies.


