

If you’ve ever watched a video and felt instantly pulled in by a transition, a color shift, or a dramatic sound cue, you’ve already experienced how powerful special effects can be. For new creators, learning the basics of visual effects isn’t about going “Hollywood” or mastering complicated software. It’s simply about gaining tools that make your videos clearer, smoother, and more emotionally engaging. Modern platforms reward creativity, but they also reward clarity-and special effects give you both when used with intention.
Even simple beginner-friendly effects can transform ordinary footage into something polished and memorable. Whether you’re making YouTube videos, travel edits, product showcases, or short-form content like Reels and TikTok, mastering the fundamentals of video editing special effects is one of the fastest ways to level up your visual storytelling. And if you ever want advanced polishing, professional teams like Inside Editors can help you turn raw ideas into refined, consistent visuals.
Before diving into specific techniques, workflows, and tools, it’s important to understand the basics-what special effects are, why they matter, and how new creators can use them without feeling overwhelmed.
Understanding Special Effects in Video Creation

Why Effects Aren’t Just Decoration -They’re Storytelling Tools
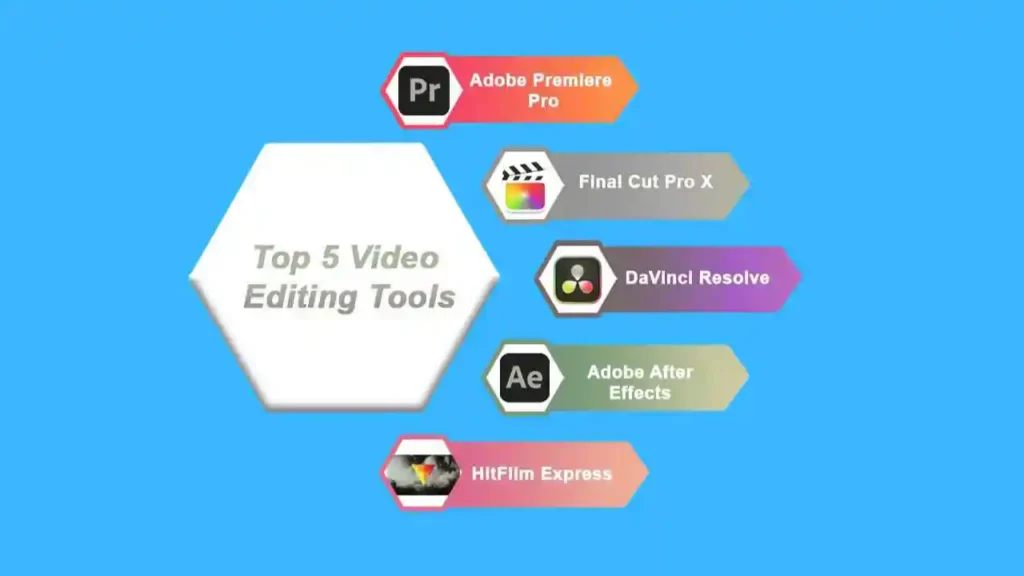
Special effects have changed a lot over the years. What used to be expensive, complex, and reserved for professionals is now accessible inside beginner-friendly apps like CapCut, DaVinci Resolve, and Adobe Premiere Rush. But the real value of these effects isn’t the visual flair -it’s the role they play in shaping the viewer’s experience.
Think of effects as visual language. A subtle zoom can draw attention to an important moment. A soft glow can make a scene feel warm and inviting. A quick glitch can create tension or emphasize a point. These aren’t random decorations; they guide how your audience feels and what they notice. When new creators understand this, they start using effects not just to impress, but to communicate.
New creators often assume they need dozens of dramatic effects to stand out, but most high-performing videos use only a handful -applied with intention and consistency. This balance is what separates polished creators from those who rely on random presets.
How Simple Effects Help Build Your Editing Confidence
The first steps into editing can feel intimidating, especially when you open your software and see endless menus, timelines, and effect panels. The good news is that you don’t have to master everything. Start with just a few effects and focus on how each one influences the mood and pace of your video.
As you experiment, you’ll begin noticing patterns: how transitions affect flow, how color changes influence style, and how text animations impact communication. These discoveries build your editing instincts. And once you have instincts, learning more advanced tools becomes much easier.
At this point, many creators realize that video editing special effects aren’t just something they apply at the end. They become part of your creative thinking from the moment you start planning your shots. This shift in mindset sets the stage for smoother workflows -which we’ll dive into next.
Beginner Workflow for Using Special Effects

Starting with a Clean Timeline Makes Everything Easier
Before you add any visual effects, you need a stable foundation. One of the biggest mistakes new creators make is applying effects too early. When the timeline is messy -clips untrimmed, audio unbalanced, unnecessary footage still included -those effects quickly become chaotic.
A good beginner workflow usually follows this order:
- Import and organize clips
- Select the best takes
- Trim and arrange them into a clear sequence
- Adjust audio and remove background noise
- Add text, basic timing markers, or placeholders
- Apply special effects only after the core story is established
This approach ensures that effects enhance your video instead of covering up disorganization. It also saves time because you’re not applying effects to clips that may later be removed.
Using Effects to Support Your Story Rather Than Distract from It
A common beginner problem is falling in love with every effect available. It’s tempting -you’ve got fire bursts, neon streaks, light leaks, pop-up animations, and hundreds of transitions waiting for you. But the truth is that restraint is the key to quality.
As you learn, aim for consistency. If your story is emotional or calm, avoid high-energy glitch transitions. If your video is fast-paced, don’t rely on slow fades. The goal is harmony -every effect should match the tone and rhythm you’re building.
Professional editors at studios like Inside Editors follow the same principle. They choose effects that support the message rather than distract from it. This is one of the fastest ways new creators can elevate their work: stop thinking “What effects can I add?” and start asking “What effect improves this moment?”
Previewing, Adjusting, and Refining Your Effects
The final step in your workflow is refinement. Many beginners apply an effect once and move on, but subtle adjustments often make the biggest difference. For example:
- Lowering the intensity of a zoom effect keeps it from looking dramatic
- Shortening a transition makes the cut feel cleaner
- Slight color grading adjustments can unify the look of your entire video
- Softening drop shadows on text prevents it from feeling outdated
Instead of chasing perfection, aim for balance. Watch your video from start to finish several times, focusing on how each effect blends with the next. If something pulls your attention too strongly -unless it’s meant to -it probably needs adjustment.
This habit puts you on the path of thoughtful editing, which leads naturally into learning the most essential beginner effects.
Essential Special Effects Beginners Should Master

Why These Starter Effects Are the Foundation of Professional Editing
New creators often jump straight to advanced effects like green screen keying or 3D motion graphics, but the real magic starts with simple techniques. Mastering these core effects not only makes your videos look professional but helps you build the intuition needed for more complex edits.
These beginner essentials appear in almost every type of project -travel vlogs, product promos, fitness edits, tutorials, and more. They’re universal because they improve clarity, pacing, and visual engagement without overwhelming the viewer or editor.
Before we break down each effect individually, here’s why these core tools matter: they teach timing, motion, emotion, and visual rhythm. Once you understand these fundamentals, you’re ready to apply more advanced techniques without confusion.
1. Smooth Transitions That Keep Your Story Moving
Transitions are one of the most recognizable video editing special effects for beginners, and they’re also one of the most misunderstood. Many creators overuse flashy transitions, thinking they add excitement. But professional editors use transitions sparingly-usually only when they help guide attention or signal a shift in time or space.
Simple cuts, cross-dissolves, and quick zooms often outperform complex transitions because they blend naturally into the viewer’s expectations. These are the hidden tools behind seamless storytelling, and learning when to use each one helps you gain a sense of rhythm in your edits.
Simple Effects That Level Up Your Editing

Color Grading Basics: How to Make Every Clip Feel Cohesive
Once you’re comfortable with transitions and trimming, the next big leap is color grading. Imagine your footage shot in different lighting conditions -without consistency, one clip feels warm and sunny, the next cold and blue. That inconsistency distracts viewers. By applying basic color grading -adjusting exposure, contrast, and white balance -you create a unified visual tone across your video. This is part of mastering effective video editing special effects because it ties together all your footage and makes it feel like one polished piece.
As a new creator, aim first for consistency rather than perfection. Most software offers a one-click preset (often labeled “cinematic” or “warm tone”) which you can apply as a baseline and then tweak. The goal isn’t to match Hollywood, but to remove jarring shifts.
When you watch the final video, ask: “Do the clips feel like they belong together?” If yes, you’ve succeeded. Once this feels comfortable, you’ll naturally move into layering more visual effects.
Motion Graphics & Text Animations That Look Pro-Level but Feel Simple
Adding animated titles, lower thirds, or subtle motion graphics is another key area. These are among the video editing special effects that beginner creators often overlook -yet they significantly elevate quality. For example, a moving text intro can help brand your video instantly, while animated icons or text cues guide the viewer’s attention when you introduce new topics.
For beginners, keep it minimal: Choose one consistent style and avoid mixing dozens. For example, use a simple fade-in for your lower third rather than a dramatic zoom-flip. Consistency builds visual identity.
A realistic scenario: You’re editing a YouTube tutorial. You add your name and channel logo at the start, a lower third when you mention a key point, and a subtle “thanks for watching” graphic at the end. These animated elements don’t distract -they reinforce your brand and help viewers digest information.
If it feels overwhelming, remember: you don’t have to animate every element. The most effective motion graphics often serve just one purpose: clarity.
Sound Effects & Visual Layers That Enhance Impact Without Overwhelm
Effects aren’t only visual. Sound is a critical part of editing that pairs with video editing special effects to deliver impact. A swoosh when a graphic enters, a subtle whoosh when a scene changes, or ambient background sounds -they all contribute to how the viewer perceives your work. One common mistake is ignoring audio altogether, which makes even good footage feel flat.
Beginner-friendly terms:
- Layer 1: Your main video and audio track (dialogue, narration, footage).
- Layer 2: Ambient background (music, room tone).
- Layer 3: Effects (whooshes, impact sounds, stingers).
When adding effects, watch your volume levels. One loud “impact” sound can ruin the flow or feel amateur. Lowering voices during a swoosh or fading music as you switch scenes adds polish.
By combining visual transitions, color grading, motion graphics and good sound design, you’re using a full suite of beginner-level video editing special effects that feel professional-without complex software or high-cost equipment.
Avoid These Mistakes to Improve Your Work
Over-Using Effects: Less Is Often More
As mentioned earlier, it’s tempting to try every effect you see in a tutorial or template pack. But most creators -even professionals -use only a handful of effects consistently. The issue is not the number of effects you apply; it’s whether each one has a purpose.
If a transition, zoom, or color shift doesn’t support your story or set a consistent mood, it risks distracting the viewer. For example: switching between a high contrast cinematic style and a flat mobile-friendly style in the same video confuses the viewer.
A good rule: apply an effect, then ask “Does this help the viewer focus or understand better?” If the answer is no, remove or modify it. This simple filter helps you use effects intentionally, which is what separates “good” from “finely crafted”.
Ignoring Export Settings: Vision Lost In Rendering
Even if your editing is strong, poor export settings can ruin your results. After you apply your suite of special effects, pay attention to codec, resolution, frame rate, and bit-rate. Beginners often export in a low quality setting to save time, then wonder why their vivid color grading or smooth motion looks muddy on YouTube or Instagram.
Example: If you filmed in 4K at 60fps but exported at 1080p 24fps with heavy compression, fine details drop out, color shifts degrade, and motion becomes jerky -undermining all the effects you carefully applied.
Take time to learn your platform’s ideal output settings (YouTube, Instagram Reels, etc.). Even a mid-range export makes a visible difference -and ensures your visual effects show up as intended.
Skipping Backup and Version Control: Risking Loss of Your Work
Another overlooked mistake: applying multiple effects and refinements without saving incremental versions. Imagine you apply motion graphics, color grading, transitions, then export-but realize later you hate part of the order of shots or the audio mix. If you don’t have a backup you’ll need to revert to scratch. For serious creators this means hours of rework.
Keep naming conventions: “Project_v01”, “Project_v02_with_MotionGraphics”, etc. Save before major effects application. Even cloud-based autosaves (in tools like Adobe Premiere Pro or DaVinci Resolve) help. This habit builds editing resilience and prevents frustration -ultimately making your journey into special effects smoother.
Beginner Tool & Effects Comparison
Here’s a table comparing three popular beginner tools, showing how well they handle the essential effects we’ve discussed (transitions, color grading, motion graphics, sound effects). It will help you pick the right software for your goals and budget.
| Tool | Transitions | Color Grading | Motion Graphics & Text | Sound Effects / Audio Layers |
| Tool A (Free / Entry-Level) | Basic presets only | Limited (quick LUTs) | Simple text + templates | Basic audio layer support |
| Tool B (Mid-Range Subscription) | Wide library of presets + customization | Advanced controls + LUTs | Full motion graphics integration | Multi-layer audio & effects |
| Tool C (Professional) | Full flexibility, keyframes, custom transitions | Complete grade workflow | 3D motion graphics, plugin support | High-end audio design & sound library |
For example, free tools can deliver great results for many beginners -as long as you focus on clean work and fundamentals. If your ambition grows, mid-range tools unlock new effect possibilities. And if you scale or handle high-end projects, professional tools give full creative freedom.
As you grow, you can always revisit your editing workflow -starting simple is smarter than diving into complexity too early. That foundation means the suite of video editing special effects you use will always support your storytelling rather than overwhelm it.
When to Consider a Professional Editing Service

Even as a beginner, you’ll reach a point where outsourcing makes sense -especially when you’re focused on content creation rather than spending hours editing. That’s where services like those offered by Inside Editors become valuable. They handle complex timelines, advanced visual effects, color grading, motion graphics and polished audio -allowing you to focus on concept, performance and audience.
Here are some signs you’re ready for external help:
- Your raw footage is high quality, but your edits still look amateur despite applying special effects.
- You’re spending more time editing than filming or promoting.
- Your upload schedule is slipping because you can’t keep up with post-production.
- You want a consistent style across videos (branding, motion graphics, audio) that requires more advanced skill or resources.
If you reach this stage, check out services tailored for your niche -for example:
Choosing to partner with the right service isn’t a shortcut -it’s a strategic choice so you can scale your content without reversing the quality you’ve built. Think of it as extending your creative team, not surrendering control.
Conclusion: Your Next Steps to Confident Special Effects Editing
By now you’ve learned:
- What editing effects do and why they matter for creators.
- A beginner-friendly workflow that builds confidence and reduces chaos.
- The essential special effects every new creator should master: transitions, color grading, motion graphics, sound layers.
- Common mistakes to avoid so your work stays polished and professional.
- A comparison of editing tools to find your best fit, and when to consider outsourcing to services like Inside Editors.
Here’s your actionable next step: open your editing software right now, pick one clip, and apply one of the effects we discussed -maybe a simple dissolve transition or a color grading preset. Then watch the result end-to-end. Focus on how it affects pacing, mood and clarity. That simple exercise will shift your mindset from “I have to use effects” to “I choose the effect that improves this moment.”
And remember: applying the right effect at the right time is better than applying every effect. As you grow, you’ll discover your own style and visual voice. Until then, stay intentional, keep your edits clean, and let your ideas lead -not the effects.
If you’re ready to take your videos from simple to stunning, the team at Inside Editors can help bring your ideas to life-smoothly, affordably, and with expert precision. Explore Inside Editors’ full range of video editing services and pick the service that fits your goals.
FAQs For Video Editing Special Effects Service
Q1 -How do I know if a video editor or service is trustworthy for special effects?
Look for clear examples of past work, client testimonials, and transparent revision policies before hiring. A trustworthy editor or service will show before/after samples, explain their process, and list what’s included (revisions, project files, revisions limits). If you want a quick check, review a portfolio on a provider page like Inside Editors’ services and ask about turnaround, ownership, and privacy before you pay.
Q2 -What’s the difference between learning effects yourself and hiring a pro?
DIY learning builds control and lowers costs but takes time and practice; hiring a pro saves hours and delivers a polished finish faster. Beginners often do basic cuts, transitions, and color grading themselves, then outsource complex tasks like advanced motion graphics or full grading. If you value speed and consistent quality, working with a service can be more efficient than the steep learning curve.
Q3 -How much do basic special effects services usually cost?
For beginner-level edits-transitions, simple color grading, and basic motion graphics-expect roughly $50–$250 per video depending on length and complexity. More advanced packages (3D motion, full color grade, and custom graphics) typically start around $300–$800. Always confirm exactly which deliverables are included (source files, revisions, commercial rights) to avoid surprises.
Q4 -What are typical turnaround times and rush options?
Standard turnaround for a short, simple edit is usually 2–7 business days; more complex edits with custom motion graphics or lengthy revisions can take 7–14 days or longer. Many services offer rush delivery (24–48 hours) for an extra fee; check whether rush work still includes the same number of revisions. Plan timelines around filming and client approvals to avoid bottlenecks.
Q5 -Who owns the final files and how is privacy handled?
Ownership terms vary-some editors deliver final MP4s only while others supply project files and raw edits on request; confirm commercial rights and source-file transfer before work begins. Reputable services include a clear clause that you retain ownership or receive a license for commercial use, and offer secure file transfer (WeTransfer, Google Drive, or private FTP) and NDA options for privacy when needed.
Q6 -What simple step-by-step process should a beginner follow to add effects?
Start with a lean workflow: organize clips, trim to the story, fix audio, add one consistent color grade, then apply simple transitions and tasteful text animations. Test each effect at low intensity, preview full playback, and save versions before major changes. This keeps edits clean and makes it easy to revert if something doesn’t work.
Q7 -Which tools are best for beginners who want professional results?
Beginner editors can get excellent results with free or affordable tools: DaVinci Resolve (free/paid) for grading and editing, Adobe Premiere Rush for quick edits, and CapCut for short-form content; upgrade to Premiere Pro or Final Cut Pro for advanced control. For templates and motion graphics, consider Motion Array or Envato Elements; pair tools with good audio resources for polished results e.g- Adobe Creative Cloud guides
Q8 -What are common beginner mistakes and how do I avoid them?
Overusing flashy presets, inconsistent color grades, and poor audio mixing are the top beginner traps-each distracts from the story. Avoid them by choosing a small, consistent effect set, matching white balance across clips, and using simple audio ducking for music under dialogue. Back up versions regularly and ask for feedback from peers before final delivery.


