

If you edit video regularly, your choice of machine affects everything from how smoothly timelines play back to how quickly exports finish. A well-chosen Mac keeps you focused on storytelling instead of waiting on render bars and swapping drives. Whether you make YouTube videos, short films, client ads, or wedding highlights, the right balance of CPU/GPU power, memory, and storage will save you hours and reduce frustration. This guide walks you through the practical differences between Apple’s pro desktops and laptops, explains the specs that actually matter in real projects, and recommends configurations so you can buy with confidence.
How to pick the right Mac for your workflow
Choosing a Mac isn’t about buying the most expensive model; it’s about matching hardware to the way you work. Start by identifying three things: the resolution you edit (1080p, 4K, 6K+), whether you need portability, and the software/plugins you use (Final Cut Pro, Premiere Pro, DaVinci Resolve, After Effects). For example, a wedding videographer who travels needs a different balance of weight and battery life than a colorist grading 8K footage in a studio. Once you know your primary tasks, you can prioritize GPU power for realtime playback, unified RAM for large timelines, and fast SSDs for quick media access.
Performance guidance in this guide reflects recent Mac updates: Apple’s Mac Studio and MacBook Pro lines currently lead for pro editing workloads because of their higher-end M-series chips and expanded memory options. These models are widely recommended by reviewers for demanding creative work.
The real specs that change your day-to-day editing
Not all specs matter equally. CPU core counts sound impressive, but for many edit tasks GPU cores and memory bandwidth determine whether a timeline plays smoothly at native resolution. Unified memory (Apple’s shared RAM) helps with large projects because the CPU and GPU use the same pool of fast memory – that reduces copying and speeds up effects, color grades, and multi-cam editing. Storage speed matters for timelines that stream multiple 4K or RAW streams; aim for NVMe-class SSDs (built-in or external) with sustained write/read speeds that match your codec demands.
When comparing models, also check ports (Thunderbolt 4/5 for fast external drives and monitors), external GPU options (less relevant on Apple silicon), and cooling performance – thin laptops throttle earlier under long encodes, while desktops sustain peak performance longer. Recent Mac Studio models have been positioned specifically to sustain heavy creative loads for long sessions.
The Key Editing Tools That Make Your Videos Stand Out
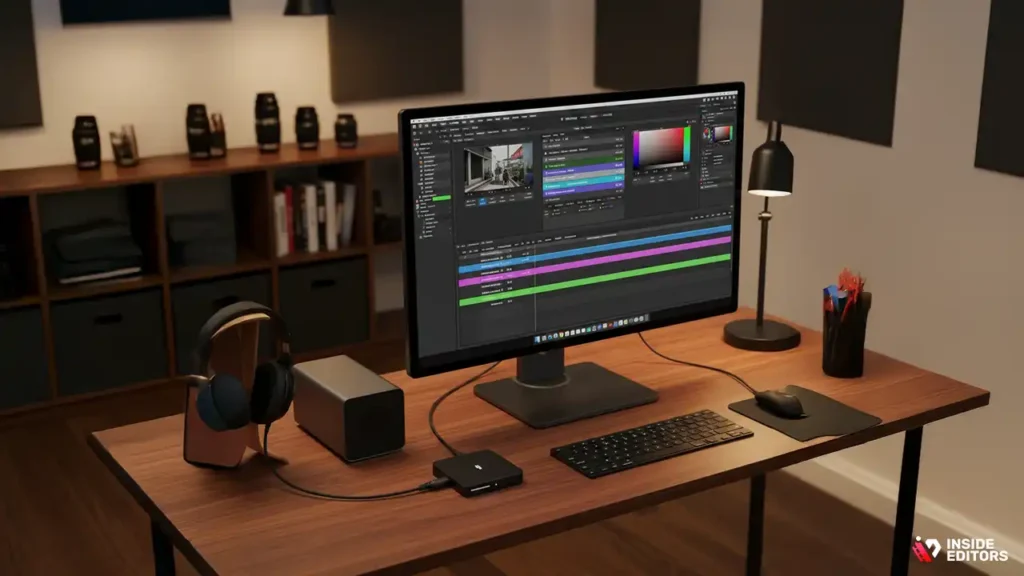
Great software features only matter if your machine can run them without interruption. Modern editing suites use GPU acceleration for effects, decoding, and export. For example, color grading in DaVinci Resolve offloads heavy processing to the GPU; if your Mac lacks GPU muscle or memory, you’ll experience dropped frames and sluggish scrubbing. Similarly, Final Cut Pro’s Metal optimizations run best on M-series silicon with higher GPU core counts and wide memory bandwidth.
Practically, that means when you’re deciding between similar Macs, favor configurations with more GPU cores and higher unified memory over small increases in storage you can add later. If your work involves RAW codecs (ProRes RAW, RED, Blackmagic RAW) or frequent color-grade passes, a Mac with a top-tier M-series chip and 64GB+ unified memory will noticeably reduce render time and preview lag. Recent reviews show the Mac Studio and the latest MacBook Pro lines offering the best balance for pro workflows.
Top Mac choices and who each one is for
Below is a concise comparison to help match common editor profiles with the right Mac family. After the table, I’ll unpack each recommendation with real-world advice.
| Model family | Best for | Minimum recommended RAM | Quick note |
| Mac Studio (M4 Max / M3 Ultra) | Studio editors, colorists, small post houses | 64GB | Desktop performance with sustained pro workloads; best all-rounder for demanding edits. |
| MacBook Pro 14 / 16 (M4 / M3 Pro / Max) | Traveling pros, on-set editors, hybrid workflows | 32GB | Portable power; choose 16″ M4 Pro/Max for heavier timelines and large monitors. |
| Mac mini (M4 / M4 Pro) | Budget desktop for 4K editing, second edit suite | 16-32GB | Best value for single-editor setups; upgrade external storage/monitoring. |
| MacBook Air (M4) | Beginner editors, creators who prioritize portability | 16GB | Good for 1080p and light 4K editing; not ideal for long pro renders. |
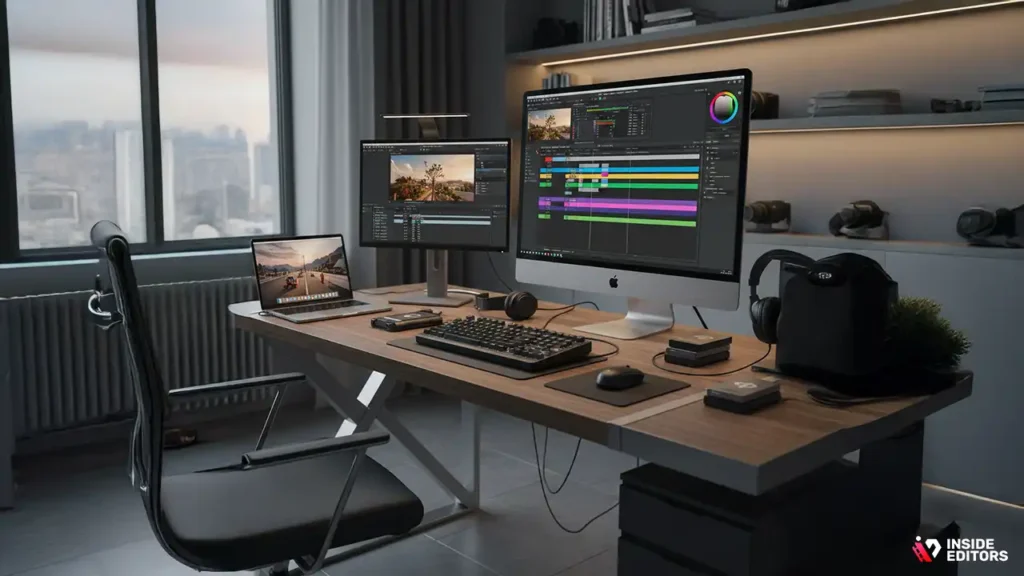
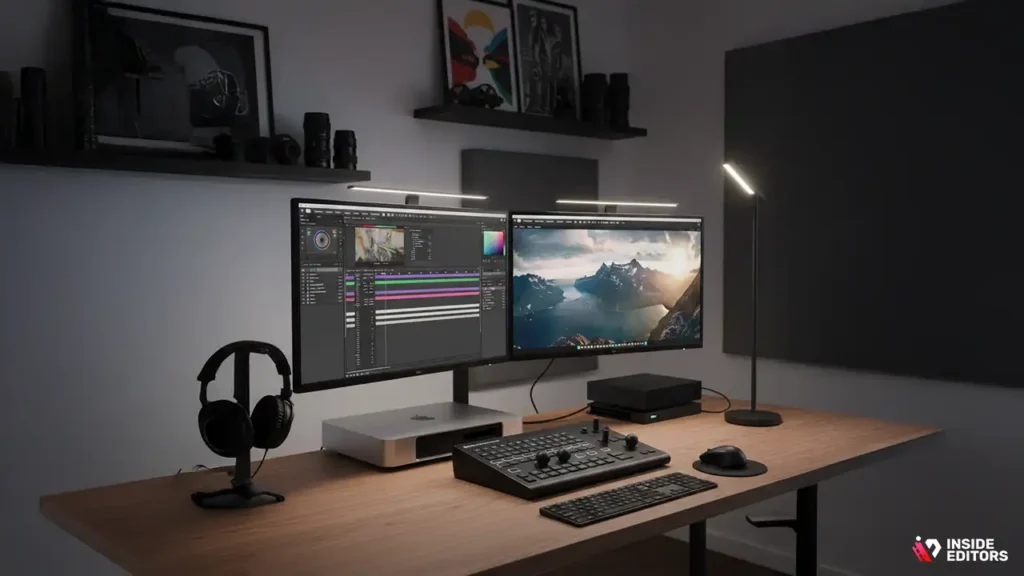
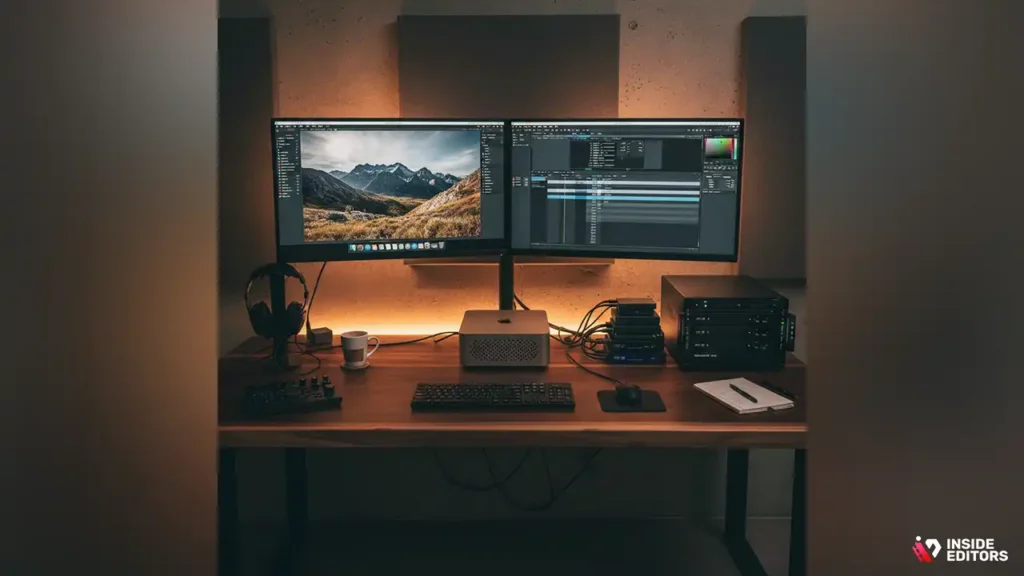
Mac Studio – the practical studio powerhouse

If your timeline regularly uses multiple 4K streams, GPU-heavy effects, or long color-grade passes, the Mac Studio sits squarely in the sweet spot. Its higher-end M4 Max and M3 Ultra configurations give you more GPU cores, higher memory ceilings, and sustained thermal performance compared with laptops. For example, reviewers note the Mac Studio’s sustained performance under long encodes and heavy GPU loads, which translates into fewer exported jobs running overnight and more time in creative work. If your budget allows, prioritize unified memory and a larger SSD over slightly faster CPU clocks – those items reduce workflow friction the most.
MacBook Pro – when portability still needs pro power
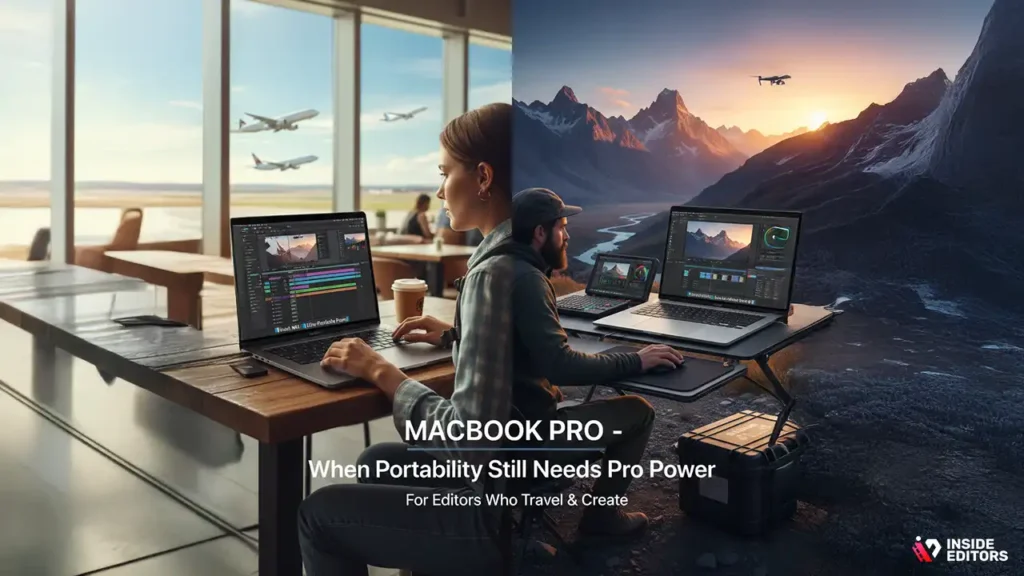
For editors who travel or prefer to work on the go, the MacBook Pro 14-inch and 16-inch models remain the best compromise between power and mobility. The M4 (and prior M3 Pro/Max) chips deliver impressive GPU acceleration and battery life, and the 16-inch is especially beneficial if you use an XDR display or grade HDR footage on the road. If you edit long-form content or 4K multicam projects, opt for the Pro/Max chips and at least 32GB of unified memory; these options give you smoother scrubbing and shorter export times. Recent hands-on reviews recommend the 14-inch M4 for frequent travelers and the 16-inch M4 Pro/Max for studio-level mobile editing.
Spend now vs. defer: real advice
When budgeting, think in terms of workflow multipliers: spend where it reduces friction. Upgrading unified memory, choosing a larger internal SSD, and getting a model with more GPU cores are the fastest ways to improve everyday editing speed. External items like Thunderbolt SSDs or high-refresh monitors are important but can be purchased later as your workflow matures.
If you must choose only two upgrades, prioritize memory and GPU (or GPU cores via chip choice). For editors working with long 4K/RAW timelines, 64GB or more is the practical sweet spot; for creators editing smaller projects and delivering to social platforms, 16-32GB is often sufficient. If budget-constrained, choose a configuration with a moderate internal SSD and plan to use a Thunderbolt external SSD for media pools – this is a cost-effective path that still keeps playback smooth when paired with proxy workflows. Recent industry tests show that higher memory and GPU resources produce the biggest day-to-day improvements for editors.
Which Mac fits your editing style?

1. For YouTubers & Online Creators
If your workflow involves fast turnaround, mixed media, and lots of graphics/text animations, you need a Mac that stays responsive even with multiple layers. For most creators, the MacBook Pro 14-inch (M4 Pro) strikes the ideal balance. It handles timelines with effects, LUTs, and b-roll overlays without lag. The portability helps if you shoot often, edit in cafés, or travel for content.
Recommended config:
- Chip: M4 Pro (or M4 Max for heavy After Effects use)
- Memory: 32GB
- Storage: 1TB (minimum)
- External SSD: Yes, for project files
Why it works: You get excellent GPU power for color grading, smooth playback, and fast exports. Battery life stays strong even during background rendering.
2. For Wedding Filmmakers & Event Editors
Wedding films often include multi-cam 4K timelines, color-intensive stylized edits, and long sequences. Because your projects run 30-60 minutes, you’ll feel memory limitations faster than YouTubers.
If your workflow is studio-based, go with the Mac Studio (M4 Max).
If you need mobility for on-location editing, choose the 16″ MacBook Pro (M4 Max).
Recommended config:
- Memory: 64GB
- Storage: 2TB (weddings generate large RAW + audio files)
- GPU: Prefer Max-tier GPU cores
- External RAID or Thunderbolt SSD recommended
Why it works: Wedding edits demand strong GPU acceleration and high sustained performance. The Mac Studio’s cooling and memory ceiling handle these long projects without slowing down.
3. For Commercial Editors & Colorists
If you work with 6K/8K RAW, heavy color grading, film emulation plugins, and large timelines, you need the absolute highest GPU + memory combination. In this case, nothing beats a Mac Studio with M3 Ultra or the latest high-end Max chip.
Recommended config:
- Memory: 64GB or 128GB
- Storage: 2TB or 4TB internal
- Monitors: 4K/6K reference + secondary GUI monitor
- Connectivity: Multiple Thunderbolt ports for RAID storage
Why it works: Color grading stacks LUTs, curves, noise reduction, and masks, all of which demand GPU power. The Mac Studio maintains full performance under these loads while remaining more affordable than the Mac Pro.
4. For Students, Beginners & Budget Creators
If you’re starting out, building a portfolio, or editing simpler content, the Mac mini (M4) or MacBook Air (M4) is more than enough for 1080p and light 4K.
Recommended config:
- Memory: 16GB
- Storage: 512GB or 1TB
- External SSD: Highly recommended
- Software: Final Cut Pro (fastest on Apple silicon)
Why it works: Students and beginners don’t need the highest GPU or memory levels. These machines deliver smooth edits for standard social content without overspending.
Storage & proxies: your speed secret
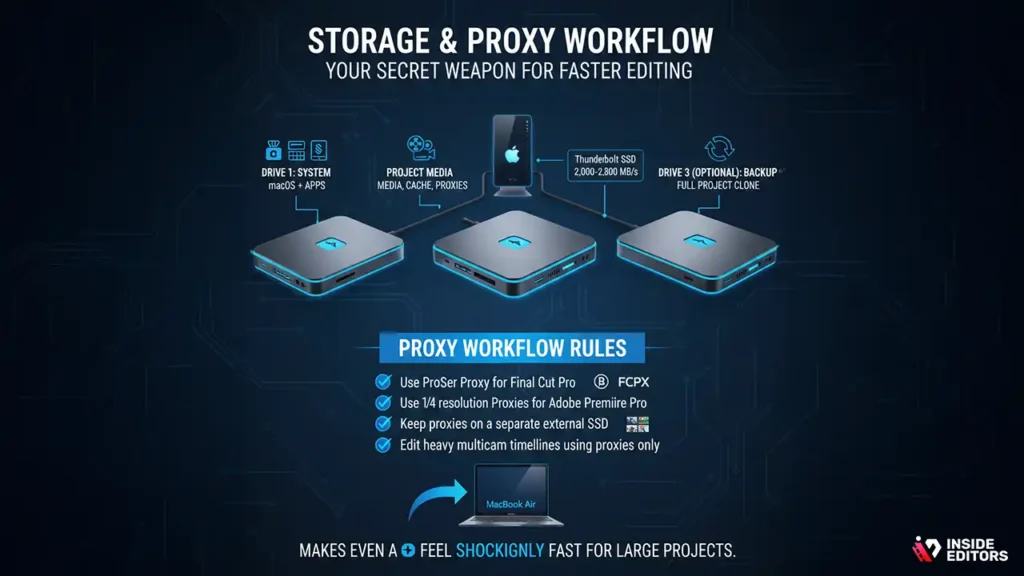
Even with the fastest Mac, storage bottlenecks can make editing feel slow. To avoid that:
Always separate your drives into:
- Drive 1: System (macOS + apps)
- Drive 2: Project media, cache, proxies
- Drive 3 (optional): Backup
Thunderbolt SSDs (2,000-2,800 MB/s) keep 4K playback smooth and eliminate beachballs.
Proxy workflow rules:
- Use ProRes Proxy for Final Cut Pro
- Use 1/4 resolution Proxies for Adobe Premiere Pro
- Keep proxies on a separate external SSD
- Edit heavy multicam timelines using proxies only
This setup makes even a MacBook Air feel shockingly fast for large projects.
Essential Accessories for a Smooth Editing Workflow
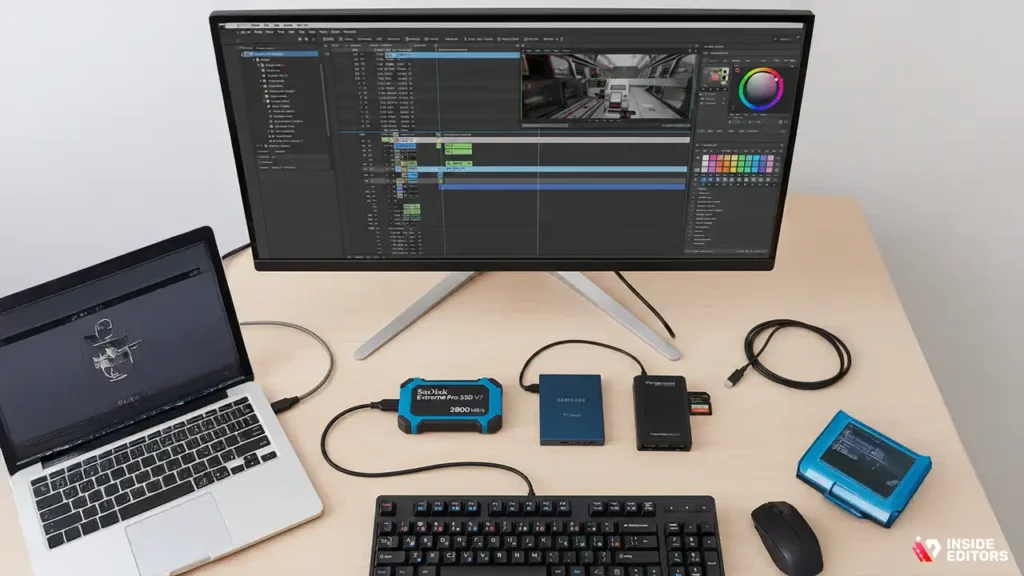
1. External SSD (Non-Negotiable)
Look for NVMe SSDs with at least 1,000-2,800 MB/s read/write speeds.
Popular options:
- Samsung T7
- SanDisk Extreme Pro
- Crucial X10 Pro
2. Color-accurate Monitor
If you color grade, your built-in display is not enough long term.
Look for:
- IPS or mini-LED
- 100% DCI-P3
- Factory calibration
3. Fast SD/CFexpress Card Reader
Cuts ingest time by 50-80%.
4. A comfortable editing keyboard
Final Cut Pro or Premiere shortcut keyboards speed up editing dramatically.
Common Mistakes to Avoid When Buying a Mac for Video Editing
Mistake 1: Choosing too little memory
16GB is often not enough for pro 4K editing. For smooth performance:
- 32GB for growing creators
- 64GB+ for professionals
Mistake 2: Overspending on CPU instead of GPU
Video editing relies far more on GPU cores and memory bandwidth.
Choose Max versions when possible.
Mistake 3: Buying too small of an SSD
macOS + apps eat 100GB.
Always get 1TB or 2TB minimum, then add an external SSD.
Mistake 4: Relying only on cloud storage
Cloud is backup – not an editing drive. It slows down timelines.
Mistake 5: Ignoring thermals
Thin laptops throttle under heavy load.
Desktops like the Mac Studio maintain full speed for hours.
Quick Buying Guide – TL;DR for Busy Editors
Here’s a fast cheat sheet you can screenshot:
Best overall for professionals
Mac Studio (M4 Max / M3 Ultra) – 64GB RAM, 2TB SSD
Best portable pro machine
MacBook Pro 16″ (M4 Max) – 32-64GB RAM
Best budget desktop
Mac mini (M4) – 16-32GB RAM
Best budget laptop
MacBook Air (M4) – 16GB RAM
Best for 4K weddings
Mac Studio (Max chip) – 64GB RAM, 2TB SSD
Best for color grading
Mac Studio Ultra – 128GB RAM
Best for YouTubers & creators
MacBook Pro 14″ M4 Pro – 32GB RAM
FAQs
1. What should I look for in free wedding video editing software?
Look for essential features like trimming, color correction, audio controls, and high-resolution export. Tools with wedding-friendly presets or LUTs can speed up your editing workflow. Also check for limits such as export watermarks, restricted timelines, or reduced performance on older devices. Free software is often enough for clean, polished wedding highlights.
2. Is free software good enough for professional-quality wedding edits?
Yes-top free editors like DaVinci Resolve, HitFilm, and CapCut Desktop can deliver professional results when used correctly. They include color grading, transitions, audio syncing, and multi-layer editing. The limitation is usually hardware performance and a steeper learning curve. For fast turnaround or advanced cinematic effects, paid tools may be more efficient.
3. How does DIY editing compare to hiring a professional wedding editor?
DIY editing saves money but requires time, technical skills, and patience with complex tools. A professional editor brings storytelling expertise, polished color grading, and advanced audio cleanup that creates a more cinematic wedding film. Pros also handle revisions, backups, and delivery formats. DIY works for simple highlight cuts; pros are best for emotional, high-impact videos.
4. How much does professional wedding video editing typically cost?
Basic wedding editing packages cost about $150-$600 depending on length, style, and revision limits. High-end cinematic edits with advanced grading and storytelling usually range from $800-$2,000. Most packages include 1-2 revision rounds, with extras like drone footage, multi-camera syncing, or rush delivery priced separately. Always compare what’s included before choosing an editor.
5. How long does wedding video editing normally take?
Highlight videos typically take 5-10 days, depending on footage volume and the editor’s process. Full-length documentary edits can take 2-4 weeks due to detailed syncing, audio cleanup, and grading. Rush delivery is often available for an added fee. Timelines speed up significantly when clients provide well-organized, high-quality footage.
6. What’s the simplest workflow to edit a wedding video for beginners?
Start by organizing your clips into clear folders: ceremony, speeches, reception, and couple shots. Build a basic timeline around emotional moments, then trim for pacing. Add music, light color correction, and smooth transitions to keep the story flowing naturally. Export in 1080p or 4K, review once for audio balance, and make small revisions before final delivery.


