


Canva has revolutionized design, making professional-grade graphics accessible to everyone. But in the rapidly evolving digital landscape of 2026, its video editing capabilities have become a game-changer. Whether you are a small business owner, a social media manager, or a course creator, mastering Canva video editing is essential for producing engaging, high-quality visual content without the steep learning curve or high cost of traditional software.
This comprehensive guide is designed to transform you from a video novice into a confident Canva video editor in just ten structured steps. We will delve into the platform’s most powerful features, explore best practices for efficiency, and ensure your final product meets the high standards audiences expect today.
I. Setting the Stage: Understanding the Canva Video Ecosystem

Before diving into the timeline, it is crucial to understand what Canva offers and how it stacks up against dedicated video editing software. Canva provides a cloud-based, intuitive environment perfect for quick edits, short-form content, and branded videos. Its strength lies in its massive library of templates, stock footage, and integrated design tools.
The Evolution of Canva for Video
Canva’s video features have matured significantly. What started as basic trimming and merging has evolved into a robust suite that includes advanced features like background removal, multi-track editing, and sophisticated animation controls. This evolution is driven by the demand for rapid content creation, particularly for platforms like TikTok, Instagram Reels, and YouTube Shorts.
“The democratization of design tools like Canva means that the barrier to entry for high-quality content creation is virtually non-existent. Success now hinges on creative execution and efficiency, not just access to expensive software.” – Sarah F., Digital Content Strategist
Why Choose Canva for Video Editing?
While professional tools like Adobe Premiere Pro offer granular control, Canva excels in speed and brand consistency. If your primary goal is to produce consistent, branded social media content quickly, Canva is often the superior choice. It eliminates the need to export assets from a design tool and import them into an editor; everything lives in one place.
However, it is important to recognize its limitations. For complex narrative films, extensive color grading, or highly specialized visual effects, dedicated software remains necessary. For 90% of marketing and social media needs, however, Canva is more than sufficient.
II. Step-by-Step Mastery: The 10 Stages of Canva Video Editing
Mastering Canva video editing involves a structured workflow, ensuring efficiency from concept to final export. Follow these ten steps to streamline your process and maximize the quality of your output.
Step 1: Defining Your Vision and Project Setup

The first step is always planning. What is the video’s purpose (e.g., brand awareness, sales, education)? What is the target platform (e.g., YouTube, Instagram)?
Start by selecting the correct template size. Canva offers pre-set dimensions for every major platform (16:9 for YouTube, 9:16 for Reels, 1:1 for Instagram posts). Naming your project clearly and setting up your brand kit (colors, fonts, logos) ensures consistency from the outset. This foundational work saves hours in later revisions.
Step 2: Importing and Organizing Your Media Assets
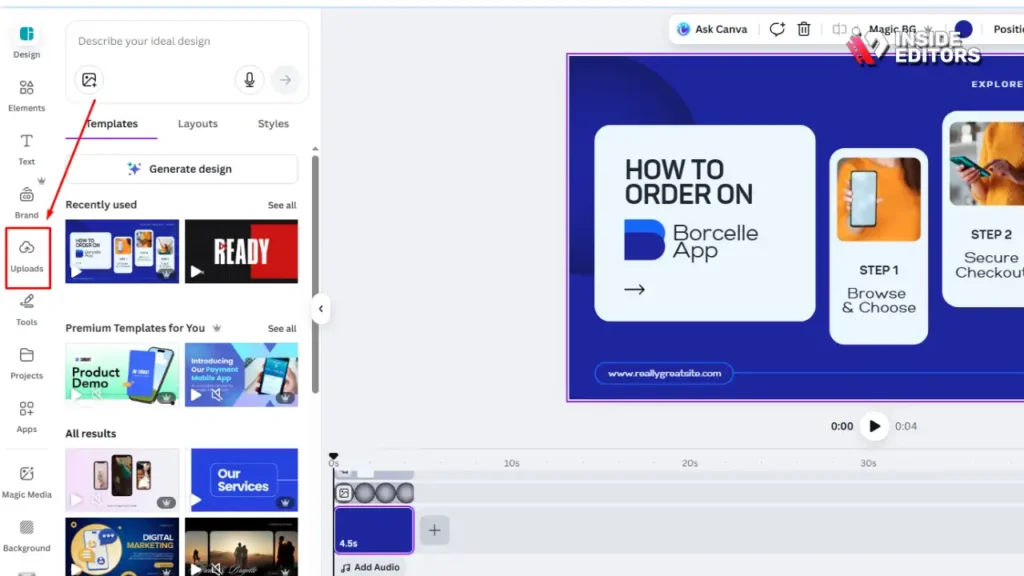
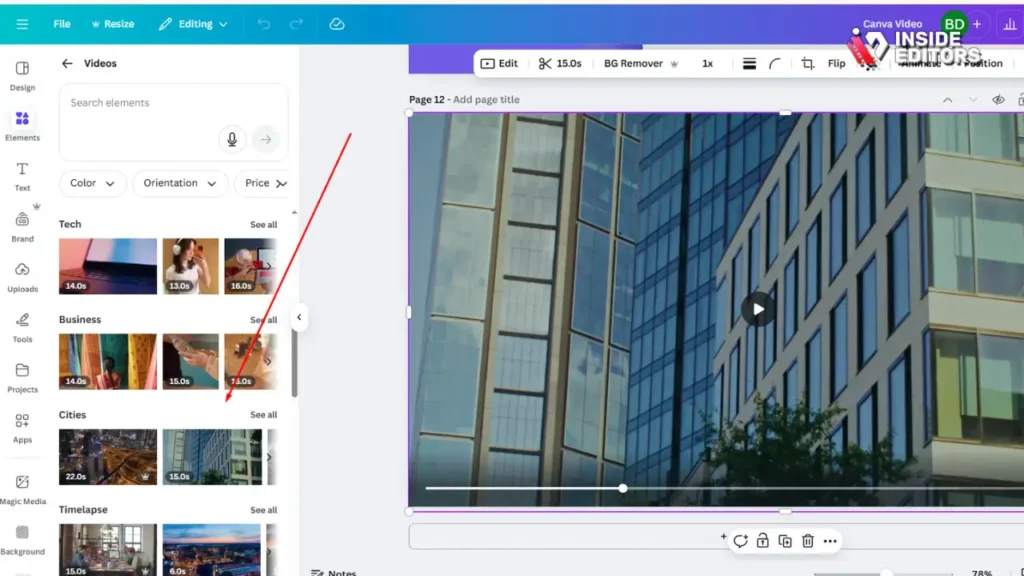
Once the canvas is ready, upload your raw footage, images, and audio files. Canva allows drag-and-drop uploading directly into the project folder. A critical organizational tip: use separate folders within your Canva project for footage, audio, and graphics. This prevents clutter, especially in longer projects.
If you lack footage, utilize Canva’s extensive stock library. Remember that while the free library is vast, the Pro subscription unlocks premium, high-resolution clips that often look more professional.
Step 3: Mastering the Timeline and Scene Management
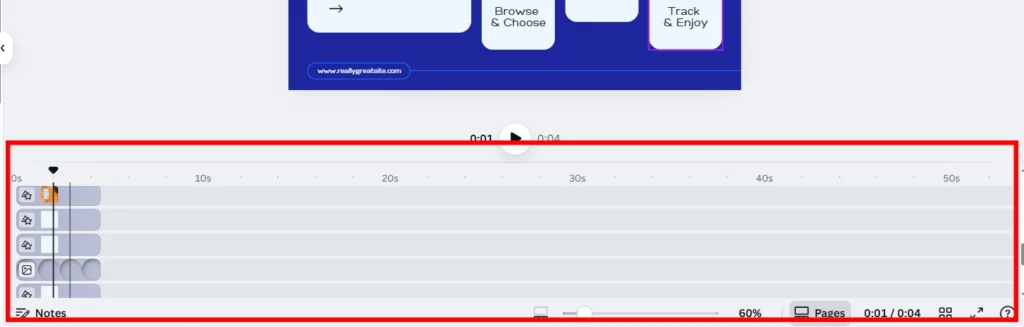
The Canva video editor uses a scene-based timeline, similar to a storyboard. Each scene acts as a separate slide.
- Trimming and Cutting: Click on a scene to adjust its duration by dragging the edges. For precise cuts, use the scissors icon to split a scene.
- Reordering: Drag and drop scenes to change the flow of your narrative.
- Transitions: Add smooth transitions (like dissolve or slide) between scenes using the “+” button. Avoid overuse; simple transitions are usually best for professional content.
Step 4: Enhancing Visuals with Graphics and Text Overlays

This is where Canva shines. Use the “Elements” tab to add arrows, icons, shapes, and animated stickers. When adding text, adhere to your brand kit. Use clear, legible fonts and ensure contrast against the background footage.
A key best practice in Canva video editing is the use of dynamic text. Animate your titles and lower thirds using the “Animate” feature to make them pop. Choose subtle, professional animations like “Typewriter” or “Rise” rather than overly distracting ones.
Step 5: Integrating High-Quality Audio and Music
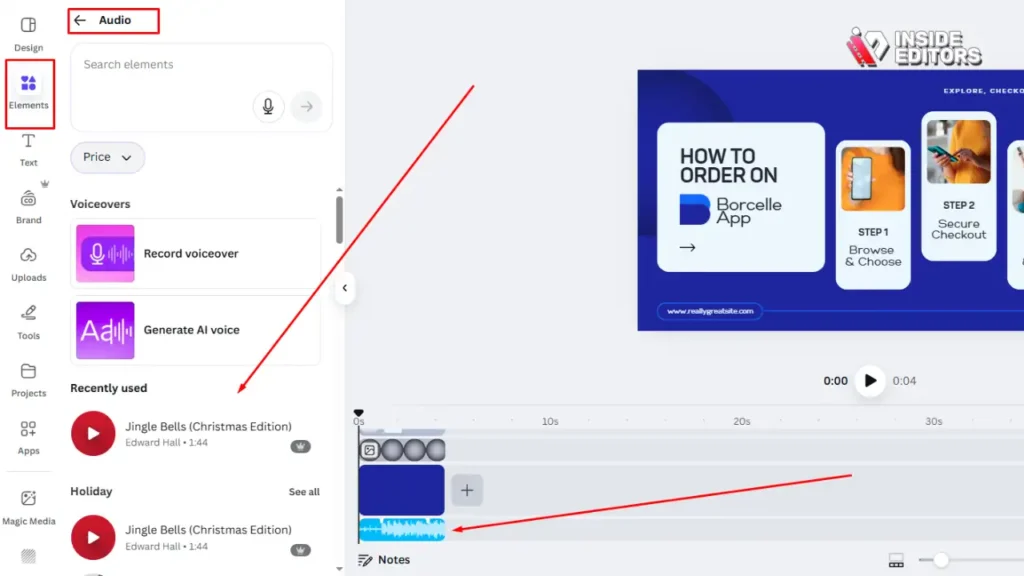
Audio quality is paramount. A video with poor audio is often perceived as unprofessional, regardless of its visual quality.
- Background Music: Select tracks from Canva’s audio library, filtering by mood or genre. Crucially, adjust the volume of the music so it sits comfortably beneath any voiceover or primary audio track (usually 10-20% volume).
- Voiceovers: You can record a voiceover directly within Canva or upload a pre-recorded file. Ensure the voice track is clear and free of background noise.
Step 6: Utilizing Dynamic Effects and Animations

Canva now offers powerful effects that mimic professional software.
- Background Remover: For footage where you want to isolate a subject (like a talking head), the Pro version offers a one-click background remover, saving immense time compared to traditional green screen methods.
- Magic Animate: Apply complex animation paths to elements or entire scenes to create movement and draw the viewer’s eye. Remember the principle: animation should enhance the message, not distract from it.
Step 7: Color Correction and Grading for Consistency

Color grading sets the mood and ensures visual consistency across your clips. Go to the “Adjust” panel to modify brightness, contrast, saturation, and temperature.
- Consistency Check: If you are merging footage shot in different environments (e.g., indoor and outdoor), use the color adjustment tools to make the colors match as closely as possible. This seamless look is a hallmark of professional editing.
Step 8: Reviewing, Refining, and Seeking Feedback
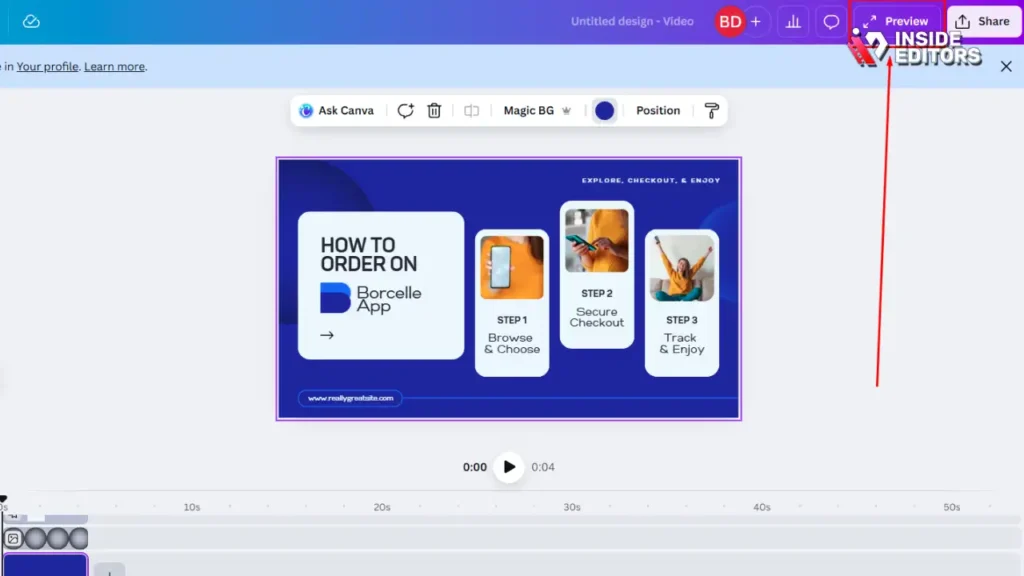
Never export the first draft. Watch the entire video multiple times, focusing on pacing and clarity. Does the message land? Are the cuts too jarring?
Canva’s collaboration features are excellent for feedback. Share the project link with a colleague and allow them to leave comments directly on specific scenes. This iterative process is crucial for quality assurance.
Step 9: Optimizing for Platform and Export Settings

The final step before downloading is ensuring the settings match the destination platform.
| Feature | YouTube (Long-Form) | Instagram Reels (Short-Form) | LinkedIn (Professional) |
| Aspect Ratio | 16:9 (Landscape) | 9:16 (Vertical) | 1:1 or 16:9 |
| Resolution | 1080p or 4K | 1080p | 1080p |
| File Type | MP4 | MP4 | MP4 |
| Length Focus | Detail, Retention | Hook, Speed | Clarity, Authority |
Always download as an MP4 file, ensuring the highest possible resolution (1080p or 4K, if available).
Step 10: Troubleshooting and Common Mistakes to Avoid
Even experienced editors make mistakes. The most common error in Canva video editing is inconsistent branding (using too many different fonts or colors). Another common pitfall is poor pacing-either too slow, causing viewers to drop off, or too fast, making the content incomprehensible.
- Mistake: Neglecting audio levels.
- Fix: Always check the audio meter to ensure primary audio peaks around -6dB and background music stays low.
- Mistake: Using low-resolution stock footage.
- Fix: Filter the stock library for high-definition or 4K clips only.
III. When to Scale: Recognizing Canva’s Limitations
Canva is an incredible tool for efficiency, but as your content demands grow, you may encounter limitations. If you find yourself needing highly complex motion graphics, multi-camera syncing, or detailed sound design, it might be time to consider professional assistance.
Canva vs. Professional Video Editing Services

| Feature | Canva (DIY) | Inside Editors (Professional Service) |
| Expertise | User’s skill level | Professional editing team with 10+ years experience |
| Complexity | Basic to intermediate edits | Advanced color grading, sound mixing, complex effects |
| Time Investment | High (requires learning and execution time) | Minimal (submit footage, receive final product) |
| Consistency | Dependent on user adherence | Consistent brand style across all videos guaranteed |
| Turnaround | Immediate download | Fast turnaround (24-72 hours) |
The Power of Professional Partnership

For businesses, marketers, and course creators who need consistent, high-volume, and professional-grade video content, outsourcing is the most scalable solution. This is where a dedicated partner like Inside Editors becomes invaluable.
We offer professional video editing services designed to take the burden of post-production off your shoulders, allowing you to save time and focus on content creation. Our key features include a professional editing team with over a decade of experience, ensuring every video meets broadcast-quality standards. We prioritize speed with a fast turnaround (24-72 hours) and guarantee your satisfaction with unlimited revisions until you are happy.
Our services include meticulous color grading and audio enhancement-two areas where DIY tools often fall short. By choosing Inside Editors, you gain professional quality that builds trust and a scalable solution for growing your channel or marketing efforts. If you are reaching the point where editing is consuming too much time, explore how our Video Editing Services can elevate your brand effortlessly.
IV. Advanced Techniques and Workflow Optimization
To truly master Canva video editing in 2026, you must move beyond basic cuts and embrace workflow optimization. Efficiency is the ultimate competitive advantage in content creation.
Creating and Utilizing Templates for Speed
The most powerful time-saver in Canva is creating your own reusable video templates. If you produce a weekly series, design the intro, outro, and lower-third graphic placement once. Save this as a template. For the next video, simply swap out the raw footage and update the text. This ensures brand consistency and drastically reduces production time.
“In the modern content economy, speed is currency. Tools that allow for rapid iteration and deployment, like templated video editing, are essential for maintaining audience engagement.” – Dr. Michael Chen, Media Production Consultant
Leveraging AI Features for Efficiency
Canva is rapidly integrating AI to automate tedious tasks. Look for features that automatically:
- Sync Audio to Beat: Helps match cuts to the rhythm of the background music.
- Generate Captions: Essential for accessibility and engagement (especially on social media where videos are often watched silently).
- Magic Write for Scripts: Use the integrated AI writing tool to refine your video scripts or descriptions before production.
Pros and Cons of Exclusive Canva Video Editing
While Canva is powerful, understanding its trade-offs is key to managing expectations.
Pros:
- Extremely intuitive and easy to learn.
- Massive library of stock footage, music, and graphics included.
- Excellent for maintaining brand consistency across design and video.
- Affordable (or free) entry point compared to professional suites.
- Cloud-based collaboration is seamless.
Cons:
- Limited control over complex sound design (e.g., mixing multiple audio tracks).
- Lacks advanced features like masking, complex keyframing, and 3D effects.
- Performance can slow down with very long, high-resolution projects.
- The free version’s stock library is often overused.
V. Finalizing Your Masterpiece and Next Steps

You have executed the ten steps, refined your visuals, and optimized your audio. The final stage involves distribution and strategic planning for your next project.
Ensuring Accessibility and Compliance
Before publishing, ensure your video is accessible. This means adding accurate captions or subtitles. In 2026, accessibility is not just a best practice; it is often a regulatory requirement and a massive driver of engagement. Viewers who watch without sound rely entirely on your captions.
For those producing educational content, consider how your video integrates with other materials. If you need assistance translating your video content into engaging, written formats like blog posts or course materials, our service for Content Repurposing can help you maximize the value of your video investment.
The Continuous Learning Curve
The world of video editing, even within a simplified platform like Canva, is constantly evolving. Commit to regularly checking Canva’s “What’s New” section. New tools and AI features are deployed frequently, and staying current ensures your content remains fresh and competitive.
If you find yourself spending more time editing than creating, or if the quality of your output is bottlenecked by the limitations of DIY tools, remember that professional quality is accessible. Inside Editors is dedicated to providing high-quality, reliable, and affordable video editing services. We handle the technical complexity and creative refinement, ensuring your videos resonate with your audience and deliver results.
Ready to elevate your video content without the editing headache? Let our professional team take over your post-production needs. Learn more about our process and get started today by visiting our Professional Editing Services page.
Frequently Asked Questions
Is Canva Pro necessary for advanced video editing?
While the free version offers robust basic tools, Canva Pro unlocks essential features like Brand Kits, 100GB storage, and the Magic Resize tool, which is crucial for quick aspect ratio adjustments (e.g., 9:16 to 16:9). For professional, high-volume video editing, the Pro subscription is highly recommended for access to premium stock footage and templates.
How long does it take to create a 60-second clip?
A simple 60-second video, following the 10 steps outlined in the 2026 guide, typically takes 30 to 60 minutes for beginners, including asset gathering. Experienced Canva video editors can often complete a polished draft in under 20 minutes. Consistent practice significantly reduces this timeline.
What is a ‘B-roll’ and how do I add it in Canva?
B-roll is supplementary footage used to illustrate the main narrative (A-roll), adding visual interest. To add it, simply drag and drop clips from the ‘Videos’ library or your uploads onto the timeline above your main track. Ensure the B-roll clips are trimmed to fit the corresponding voiceover or text for seamless flow.
Can Canva replace professional software like Premiere Pro?
Canva excels in quick, social media-focused video editing and design integration, making it ideal for marketing teams. However, it lacks the complex color grading, multi-camera editing, and advanced audio mixing capabilities of dedicated software like Premiere Pro. Canva is best for efficiency and ease of use, not high-end cinematic production.
What are the key steps for effective video transitions?
Effective transitions enhance visual flow. The key steps include selecting the ‘Transition’ button between clips on the timeline and choosing a subtle effect like ‘Dissolve’ or ‘Slide.’ Avoid overly complex transitions (e.g., ‘Page Curl’) for professional content. Aim for a transition duration of 0.5 to 1.0 seconds for smooth results in your Canva video editing projects.


