


Short answer up front: there’s no single “best” – but for most YouTubers the practical winners are Adobe Premiere Pro (professional, feature-rich), Final Cut Pro (fast on Mac, one-off purchase), DaVinci Resolve (powerful free tier), and increasingly CapCut (fast, AI-rich, free). Which one you should pick depends on your budget, platform, and how much time you want to spend learning the tool. If you want a quick recommendation: Premiere Pro or DaVinci Resolve if you want pro-level control; Final Cut Pro for Mac users who prefer speed and one-off cost; CapCut or Filmora if you need fast, low-cost results.
The editor can make or break your YouTube channel
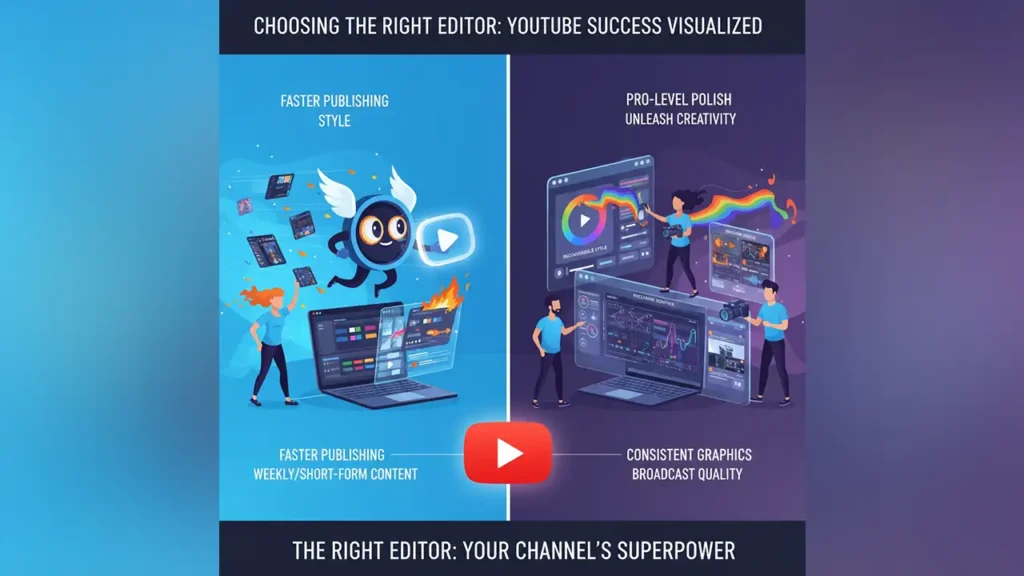
Picking video editing software isn’t just about features – it changes how fast you publish, how polished your videos look, and how consistently you can deliver content. An editor that matches your workflow shortens turnaround time (vital for weekly or short-form content), helps you maintain a recognizable style (consistent graphics, color grading, and pacing), and reduces frustration when revisions come back from collaborators or clients. Imagine spending hours battling an interface or waiting for renders every time you want to test a cut – that friction adds up fast and kills momentum.
Beyond speed, the right editor affects creative flexibility. Advanced tools (multicam, audio repair, motion tracking, AI-assisted edits) let you achieve broadcast-level polish without hiring a team. But those features only matter if you’ll actually use them: for many creators, a simpler editor that streamlines trimming, subtitles, and export to YouTube is more valuable than a complex suite of tools. The key is to match features to goals – faster uploads and crisp thumbnails for daily vloggers; refined color and audio for documentary-style creators.
Top contenders and why creators love them
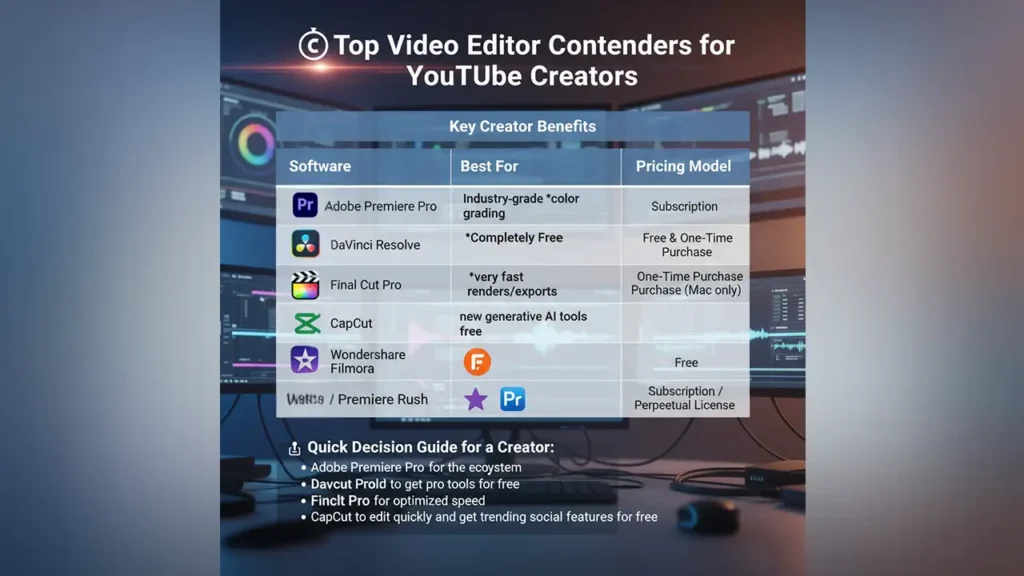
Adobe Premiere Pro – the industry standard for flexibility and power
Premiere Pro remains the professional default for YouTubers who plan to scale, collaborate, or deliver high-quality long-form work. It integrates tightly with After Effects (motion graphics), Audition (audio), and Adobe’s cloud services, and recent updates added generative-AI tools (caption translation, search by text, and content-aware extend) that speed repetitive tasks. Its timeline, proxy workflows, and export presets make it easy to produce consistent YouTube deliverables for different resolutions and platforms. For teams or creators already in Adobe’s ecosystem, Premiere is the safe, future-proof choice.
Final Cut Pro – speed, battery life, and one-time purchase (Mac only)
If you edit on a Mac, Final Cut Pro is a compelling option: it’s optimized for Apple silicon, delivers very fast renders and exports, and uses a magnetic timeline that some editors find dramatically speeds up assembly. Final Cut is a one-time purchase (no subscription), which many creators view as excellent value if they’ll use it for years. It also pairs nicely with Motion for motion graphics and Compressor for custom exports, making it a turnkey Mac workflow that’s particularly strong for solo creators who value speed and stability.
DaVinci Resolve – pro-level color and a very capable free version
DaVinci Resolve has two huge selling points: its color grading suite (industry-grade) and a generous free tier that includes many pro features. For creators who want broadcast-quality color, node-based grading, and Fusion for compositing, Resolve delivers without forcing a subscription. The Studio paid upgrade unlocks advanced noise reduction, multi-user collaboration, and some AI tools, but many YouTubers manage perfectly well with the free version. If budget is a major factor and you want to grow into advanced color and finishing tools, Resolve is a smart pick.
CapCut – fast, AI-first, and free for quick YouTube & short-form edits
CapCut has exploded in popularity because it’s free, lightweight, and includes simple but powerful AI features: auto captions, auto-reframe, smart search, and a large library of effects and templates. It’s especially attractive for creators producing short-form clips or who want to repurpose longer uploads into reels and YouTube Shorts quickly. While it’s not as flexible as Premiere or Resolve for complex projects, CapCut’s speed and zero cost make it a frequent first choice for new creators and social-first workflows.
Wondershare Filmora and other beginner-friendly editors
Filmora targets creators who want an approachable UI with handy templates and AI-assisted features. It’s cheaper than full pro suites and offers lots of creative assets, transitions, and simple effects that help videos look polished quickly. The downside is less granular control compared to pro tools; if you foresee needing advanced color grading, complex keyframing, or deep audio tools, Filmora may feel limiting – but for many educational, lifestyle, and hobby channels it’s a great time-saver.
iMovie, Premiere Rush and mobile-first options
For creators who work entirely on phones or tablets, iMovie (free on Apple devices) and Premiere Rush (Adobe’s mobile/lightweight editor) are sensible starting points. They’re simple, export-ready for YouTube, and perfect when you need to edit on the move. As channels grow, many users start here and migrate to desktop tools for more control.
Key editing tools that matter for YouTube success

Fast timeline editing and multicam for content that relies on dialogue or live events
If your channel uses interviews, panels, or multi-camera shoots, multicam editing is essential – it saves hours syncing and cutting different angles. Look for automatic sync (by audio waveform or timecode), easy angle-switching, and responsive timelines. Premiere Pro, Final Cut Pro, and Resolve all handle multicam well; simpler editors either don’t support it or provide a clunkier process.
Audio repair and mixing – viewers forgive shaky footage but not bad sound
Audio quality is an often-overlooked differentiator. Built-in noise reduction, automatic normalization, and simple routing for background music vs. dialogue prevent a lot of headaches. Editors with solid audio tools let you fix hums, reduce room reverb, and keep voices clear without outsourcing to an audio engineer.
Export presets and direct-to-YouTube publishing
Export presets for YouTube (recommended codecs, bitrates, and 16:9 vs Shorts formats) eliminate guesswork and speed publishing. Some editors enable direct uploads to YouTube with captions and description fields pre-filled – a real time-saver for weekly creators.
How to choose software based on goals and constraints

Budget, hardware and platform limits
Start with platform: Mac users should seriously consider Final Cut Pro or iMovie; Windows users will likely choose Premiere, Resolve, or Filmora. Next, budget: if you want no ongoing fees, Final Cut’s one-time cost or Resolve’s free tier is attractive. If you’re comfortable with subscription models and need cloud collaboration or advanced AI, Premiere Pro is justified. CapCut and Filmora offer low-cost or free paths that still produce competitive results for many niches.
Workflow: solo creator vs. team and collaboration needs
If you work with editors, motion graphics artists, or sound designers, tools that support project sharing and consistent asset management are critical. Premiere Pro integrates with Adobe cloud and After Effects for easier handoff; DaVinci Resolve Studio includes collaboration features in its paid version. Solo creators may prioritize speed and simplicity over collaboration features.
Learning curve and community resources
Consider how much time you’ll invest learning the tool. Premiere and Resolve have steeper learning curves but vast communities and tutorials. Filmora and CapCut have gentler learning curves and will get you to publish-ready videos faster – which is ideal if you prefer learning by doing and want to focus on content rather than tooling.
Editor selection mistakes and how to avoid them

One common error is choosing software solely for one standout feature (e.g., “it has great transitions”) without checking the daily workflow. If rendering or simple tasks feel slow, that one feature won’t matter when you’re late posting. Test the entire workflow with a real project – import, cut, grade, render, and upload – before committing.
Another mistake is ignoring platform compatibility and future growth. A cheap, easy editor might be fine for the first 50 videos, but if your channel scales, migrating projects between ecosystems can be painful. Consider how easy it is to export XML/AAF/EDL files and whether there’s a clear upgrade path inside the same brand ecosystem.
Finally, don’t underestimate hardware. Even excellent software performs poorly on underpowered machines. If you plan to use Resolve’s color tools or Premiere’s effects, allocate budget to a decent CPU/GPU, fast SSDs, and enough RAM – otherwise, workflow friction will eat your creative time.
Quick comparison table – features, cost and best use case
| Software | Cost model (typical) | Strengths | Best for |
| Adobe Premiere Pro | Subscription | Pro features, integration, AI tools | Professional creators, teams, advanced workflows. |
| Final Cut Pro | One-time purchase (Mac) | Speed on Apple silicon, optimized renders | Mac-based solo creators seeking speed. |
| DaVinci Resolve | Free tier / paid Studio | Industry color, strong free features | Creators on a budget who want pro color tools. |
| CapCut (Desktop) | Free | Fast edits, AI templates, auto captions | Short-form creators, repurposing content fast. |
| Filmora | Low-cost subscription/one-time | Easy UI, lots of templates | Beginners and hobby creators who want speed. |
| iMovie / Premiere Rush | Free / Subscription light | Mobile editing, simple export | Editing on phones/tablets, quick vlogs |
Practical workflow tips – get more polished videos, faster

When you’re starting a project, create a consistent folder structure (footage, audio, graphics, exports). Use proxies for 4K footage – this keeps timelines responsive and saves time on edits. Build a reusable template: a project with your channel’s intro/outro, lower-thirds, and export presets reduces repetitive setup work and keeps your brand consistent. For captions, use AI-assisted transcription (many editors have built-in tools) and always proofread – auto-closed captions still need human review for accuracy and tone.
If collaboration matters, export XML or use cloud project sharing so other editors or motion-graphics artists can jump in without rebuilding timelines. And always check final exports on a phone and a larger screen – YouTube viewers use both, and something that looks good on one may not translate to the other.
When professional help (like Inside Editors) makes sense
Even with the right software, editors cost time. If you’d rather focus on content ideas, audience building, and on-camera work, hiring experienced editors saves hours each week and usually improves quality. Inside Editors can take raw footage and deliver finished YouTube uploads with polished color, clean audio, custom thumbnails, and optimized metadata – which means you spend more time creating and less time troubleshooting.
If you want to try before you commit to a full-time editor, consider a single-episode trial edit or a monthly package for a fixed number of videos. This lets you evaluate turnaround, communication, and creative match before scaling. Explore Inside Editors’ services to see what fits your channel and budget.
YouTube creator types and the right editor for each

Matching the editor to your content style and production demands
One of the biggest reasons people struggle to choose the “best” editor is because YouTube creators are not all the same. A vlogger who posts daily 8-minute videos has completely different needs from a gaming creator who exports two-hour streams, or a cinematic storyteller who spends weeks polishing a single film. The editor you choose should support the pace, complexity, and style of your content-not work against it. When you understand your creator category, the decision becomes far clearer and more intuitive.
For example, gaming creators often deal with long footage blocks, multicam overlays, and high-res screen captures. This favors tools like Premiere Pro or DaVinci Resolve, which have stable timelines and good GPU optimization. Meanwhile, tutorial creators who need clean screens, quick zooms, and on-screen annotation prefer something lightweight like Final Cut Pro or Filmora. Once you map your content needs to the strengths of each editor, you avoid the frustration of fighting a tool that doesn’t match your workflow.
Vloggers and lifestyle creators
If you’re a vlogger, speed matters. You need something that lets you cut quickly, maintain a casual tone, and publish consistently. Final Cut Pro’s magnetic timeline is a popular choice for many vloggers because it eliminates accidental gaps and keeps complex edits tidy. The fast rendering on Mac is another major advantage for creators who upload several times a week. Premiere Pro is also common among vloggers who eventually grow into more advanced transitions, color presets, or motion graphics as their channels scale.
New vloggers often start with CapCut or Filmora because of their ease of use and built-in templates. These tools make it simple to add fun text, transitions, and AI-generated captions. If your content is casual, conversational, and personality-driven, these editors give you plenty of polish with minimal effort. But as your channel grows, you may find yourself wanting the advanced color grading or audio cleanup that the pro editors offer-so keep future growth in mind when choosing.
Why Color Grading Is Now a Critical Part of YouTube Videos

Viewers expect cinematic visuals-even in simple videos
A few years ago, only filmmakers cared about color grading. Today, even simple commentary channels add subtle color correction to make footage look clean and professional. With YouTube’s rise in 4K content and the rapid shift to cinematic vlogging styles, creators are learning that color grading isn’t a luxury anymore; it’s an essential part of standing out. Good color makes skin tones look natural, enhances product shots, and sets emotional tone-all key to audience retention.
DaVinci Resolve leads the industry in color grading, which is why many creators choose it specifically for this feature. Its node-based workflow lets you perform precise corrections that tools like iMovie or CapCut simply can’t replicate. Premiere Pro and Final Cut Pro offer powerful color tools as well, especially when paired with LUTs (color presets). These subtle enhancements make your footage look clean even if your lighting wasn’t perfect.
How different editors approach color
Resolve gives you the most control with professional scopes, HDR grading, noise reduction, and masking tools. It’s the best option if color is a major part of your brand identity-beauty channels, travel vloggers, and storytelling creators benefit from its precision. Premiere Pro offers a great middle ground with its Lumetri Color panel, which is intuitive enough for beginners but powerful enough for pros. Final Cut Pro’s color tools are fast and Mac-optimized, making them attractive for creators who value speed.
Editors like CapCut and Filmora offer filters and basic grading tools that work well for beginner creators who want quick improvements without diving into complex color science. But as your visual style evolves, these simple tools may start to feel limiting. If your long-term goal is cinematic quality or brand consistency, upgrading to Resolve or Premiere is usually the next logical step.
Audio Editing Tools That Save Your Videos From Bad Sound
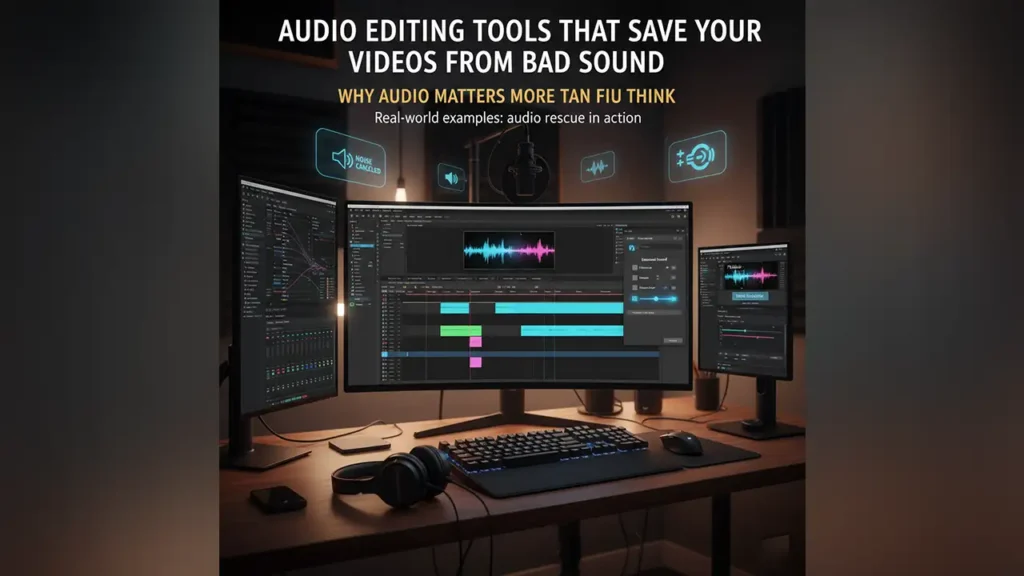
Why audio matters more than you think
Most YouTubers assume video quality is the priority, but studies consistently show that viewers tolerate bad video far more than bad audio. If the dialogue is muddy, if there’s echo, or if there’s background noise, most viewers simply click away. This is why choosing an editor with solid audio tools is essential for growth. You don’t need studio-level mixing, but you do need tools that repair, clean, and balance sound quickly.
Premiere Pro shines here because of its seamless connection to Adobe Audition. Many YouTubers use dynamic noise reduction or the essential sound panel to fix inconsistent audio. Final Cut Pro also includes impressive tools like voice isolation and loudness normalization, which drastically improve clarity with a few clicks. DaVinci Resolve’s Fairlight audio page is extremely powerful, offering tools typically seen in professional audio stations-EQs, compressors, de-noise, and advanced routing.
Real-world examples: audio rescue in action
Imagine filming a travel vlog in a windy location. Your built-in mic picks up gusts, but your speech is recognizable. A good editor can isolate voice frequencies and remove wind rumble, making the footage usable instead of forcing a full re-shoot. Or picture a talking-head video where traffic noise sneaks into your background audio; a strong noise-reduction plugin saves the day. These tiny improvements add up over time and greatly enhance perceived professionalism-one of the most important factors in audience retention.
Essential AI Tools in Modern Video Editors

The rise of assisted editing
AI tools have rapidly changed how creators edit videos. Tasks that used to take an hour now take minutes: automatic captions, voice enhancement, shot detection, background removal, and smart reframing for Shorts or TikToks. These features don’t replace creativity-they remove the tedious steps so creators can focus on storytelling.
Premiere Pro’s AI (Adobe Sensei) is particularly strong, offering transcription-based editing, smart color matching, and enhanced speech tools. CapCut built its entire appeal around AI simplicity, from auto-captions to instant beat-sync effects. DaVinci Resolve’s Studio version includes advanced AI for object tracking, magic masking, super-scaling, and noise reduction. Filmora also includes AI motion tracking and smart editing assistants that help beginners create high-impact videos even without advanced knowledge.
How AI helps YouTube creators publish faster
For example, automatic transcription is a game changer for educational and commentary channels. Instead of manually syncing subtitles, you can edit the timeline using the transcript itself-cut a sentence, and the clip cuts with it. AI reframing is equally useful for creators who repurpose long-form content into YouTube Shorts. And AI color match lets you match shots filmed at different times or locations without tedious manual adjustments.
These tools don’t determine the quality of your storytelling, but they dramatically impact the speed of production-one of the most important elements of YouTube success.
Why editors differ in export and publishing quality
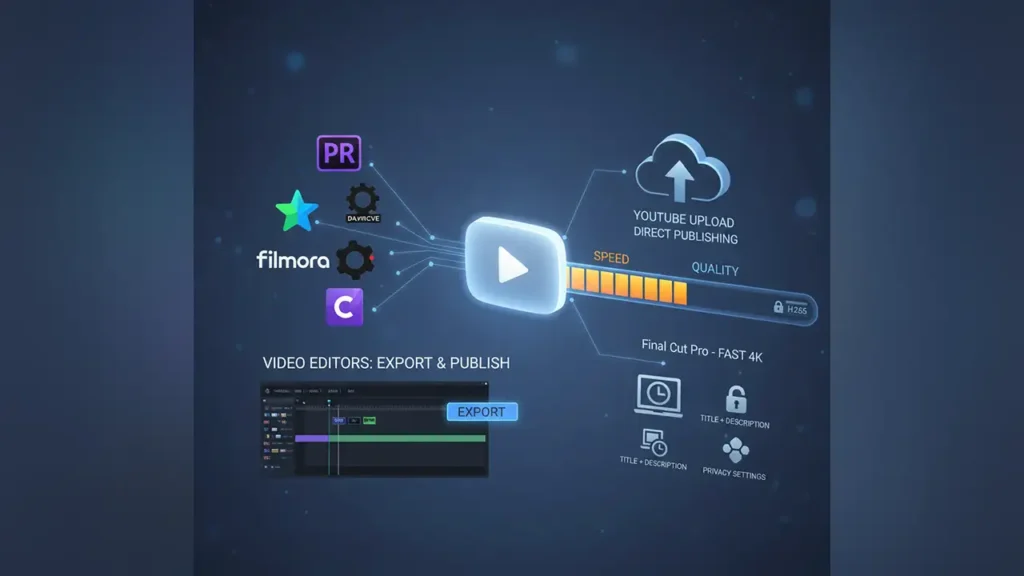
YouTube export settings that matter
Once your video is ready, your editor must export it in a format that YouTube can process quickly and cleanly. YouTube re-encodes every upload, meaning your initial export needs to be high enough quality to survive compression. Ideally, your editor should support H.264 and H.265, variable bitrate, and custom profiles like 4K 60fps.
Premiere Pro, Final Cut Pro, and DaVinci Resolve all offer YouTube-specific export presets so creators don’t have to guess settings. Filmora and CapCut simplify this further with built-in presets labeled “YouTube 1080p” or “YouTube 4K,” which remove confusion for beginners. Faster exports matter for creators working on tight schedules-Mac users often pick Final Cut Pro specifically because it exports 4K faster than most other editors.
Direct publishing to YouTube
Some editors allow you to publish directly to YouTube without leaving the software-useful for creators who upload daily. You can add titles, descriptions, private/public settings, and thumbnails ahead of time. While many creators still prefer manual uploads in YouTube Studio for control, the option to publish directly speeds up workflows, especially during batch production sessions.
How Collaboration Tools Change Your Editing Workflow

Working with assistants, editors or brand partners
As your channel grows, collaboration becomes essential. Maybe you hire a freelance editor, work with a thumbnail designer, or share drafts with brand partners. Good editing software should support simple project sharing, cross-platform compatibility, and safe versioning.
Premiere Pro’s team projects let multiple editors collaborate through Adobe Creative Cloud, which is a major selling point for channels with multiple contributors. DaVinci Resolve Studio enables multi-user collaboration similar to high-end post-production studios, making it ideal for creators with remote teams. Final Cut Pro doesn’t have as many built-in collaboration features but is extremely stable for individual creators who pass project files via cloud storage.
Why cloud collaboration is becoming more important
For creators who publish several videos a week or produce short-form content for multiple platforms, asynchronous collaboration saves hours. You can film your footage, upload proxies to a shared drive, and your editor can begin working immediately-even before footage finishes uploading. This is one of the key reasons mid-sized creators often transition to Premiere Pro or Resolve when they start collaborating with Inside Editors or other professional teams.
Inside Editors: Your pro editing partner for YouTube

How professional editing elevates your content
Even with the best software, editing still takes time-and time is a creator’s most valuable resource. Inside Editors helps creators stay consistent by handling the entire post-production pipeline: cutting, color grading, audio sweetening, motion graphics, subtitles, and even YouTube-optimized thumbnails. This lets you focus on content strategy and creativity while a professional team shapes your raw footage into polished, publish-ready videos.
Whether you make long-form educational videos, cinematic vlogs, product reviews, or short-form content, Inside Editors can match your style and improve your production quality instantly. Our editors work across all major platforms including Premiere Pro, Final Cut Pro, and DaVinci Resolve-so you never have to worry about compatibility.
You can explore our full YouTube editing services here.
Why creators choose a hybrid workflow
Many creators prefer a hybrid approach: they edit simple cuts themselves and let professionals handle complex sequences, color grading, or final polish. This preserves creative control while still saving enormous time. If you’re unsure whether you need a full-time editor or occasional help, Inside Editors offers flexible options-including per-video editing, bundled packages, and ongoing monthly plans.
We also support specialized editing needs like VFX, beauty retouching, talking-head cleanup, and cinematic transitions. As your channel grows, having a reliable editing partner helps you stay consistent and avoid burnout-two major obstacles many creators face.
Final Thoughts: Choosing the Right Editor for Your YouTube Journey
If you’re still wondering what is the best video editing software for YouTube, remember this: the best choice is the one that fits your workflow, skills, and goals-not necessarily the one with the most features. Premiere Pro is the all-round industry favorite; Final Cut Pro is unmatched for speed on Mac; DaVinci Resolve gives you pro tools for free; and CapCut or Filmora help you get polished results instantly with minimal learning curve.
Your editing software won’t make you a great storyteller-but it will either empower your creativity or slow you down. Choose the one that helps you publish consistently, work comfortably, and grow your channel with confidence. And if you ever want expert help, Inside Editors is always here to assist with high-quality professional editing tailored to your style.
FAQs
How can I trust a professional editor with my footage (ownership, privacy, and revisions)?
When you hire a pro editor, ask for a written agreement covering ownership (you retain copyright of original footage and final edits), revision limits (e.g., 2–3 rounds included), and privacy safeguards such as encrypted transfer and deleted copies after delivery. Reputable services provide NDAs and clear revision timelines; if privacy is critical, request local file transfer (SFTP) and confirm the editor’s data-retention policy before sending files.
Will a pro editor guarantee better quality than DIY editing?
Professional editors bring experience, calibrated color grading, and refined audio workflows that typically lift perceived quality – but the final result depends on your footage and brief. DIY editing can match pro quality for simple formats, but hiring pros usually shortens turnaround and improves polish for complex projects like multi-cam shoots or cinematic vlogs. Consider a single trial video to compare results.
How do editing packages and tiers usually differ?
Packages commonly scale by deliverables: basic trims and cuts (single-camera edits), standard packages (color, audio, captions, basic motion graphics), and premium tiers (VFX, multi-cam, extensive revisions, custom thumbnails). Turnaround, file formats, and the number of included revisions also vary-expect basic packages from a few dozen dollars per video and premium work to cost substantially more, depending on complexity.
What are typical pricing ranges and what’s usually included or excluded?
Entry-level editors or services often charge $30–$150 per short edit (simple trims & captions); standard YouTube episodes typically range $150–$600; premium cinematic or VFX-heavy edits may start at $800+. Prices usually include editing, a round of revisions, and one file format; extras like rush delivery, stock music licenses, or custom motion design are commonly billed separately.
How long does a typical professional edit take and are rush options available?
Turnaround depends on complexity: simple trims and captions can take 24–72 hours; standard 8–20 minute YouTube episodes often need 3–7 business days; complex projects (multi-cam, heavy grading) may take 1–3 weeks. Many services offer rush delivery (24–48 hours) for an extra fee-confirm deadlines, file sizes, and whether proxies are acceptable to avoid delays.
DIY vs hiring pros: when should I switch to a professional editor?
Switch when editing becomes a bottleneck: if you’re missing upload deadlines, losing viewers due to inconsistent quality, or spending >8–12 hours per video on post. If your channel earns revenue or your time has higher value spent creating, outsourcing routine editing (cuts, captions, thumbnails) often returns more in audience growth and time savings than the cost.
How to choose the right editing software for my channel (quick step-by-step)?
Start by listing your platform (Windows/Mac), typical video length, and three must-have features (e.g., multicam, color grading, automatic captions). Try a 2-week free option or the free tier (DaVinci Resolve or CapCut) using a real project to test speed and export quality. If you collaborate, prioritize editors with easy project sharing (e.g., Premiere or Resolve Studio).
How do I migrate projects between editors without losing work?
Export XML/AAF/EDL sequences, keep original media in organized folders, and export consolidated proxies for complex timelines-this preserves cuts, timecode, and basic metadata. Note that effects, color grades, and third-party plugin data often don’t transfer perfectly; plan for a short re-finish pass in the new NLE and test a small sequence first.


