
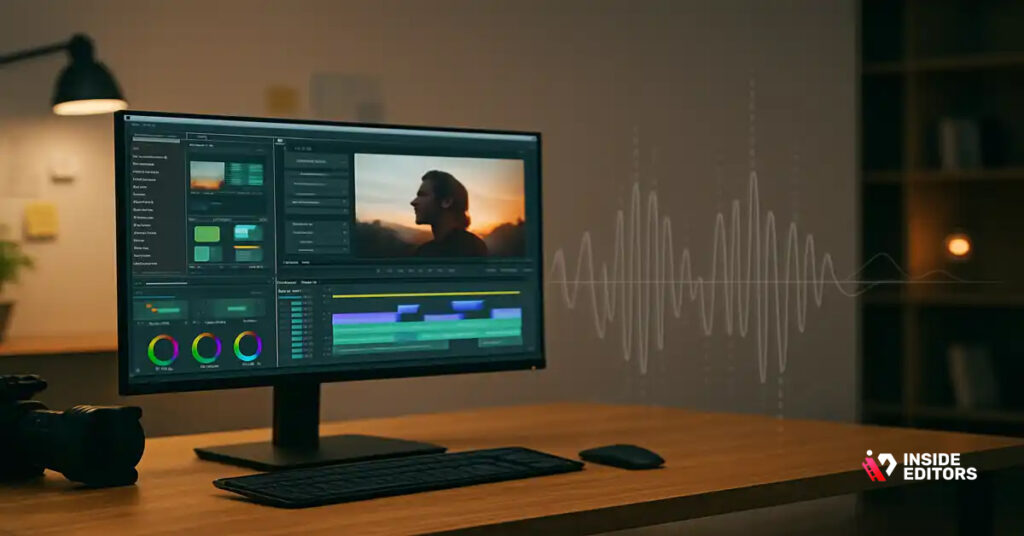
Whether you’re a streamer clipping highlights, a YouTuber building a channel, or a creator polishing montages, learning the right editing workflow makes everything easier. This guide walks you through a practical, course-style path to master gaming video editing – with a focus on free tools so you can start immediately. Along the way you’ll learn which software actually leaves no watermark, why that matters, the key skills to practice, and when to hand work to professionals like Inside Editors.
Why starting with no-watermark software matters

The first step: keep your content clean and shareable
When you’re building an audience, every frame counts. A watermark-even a small logo-looks unpolished and can distract from the gameplay and storytelling you worked to capture. Using gaming video editing software free no watermark removes this early barrier so your videos present as intentional, not amateur. That matters when viewers judge production quality in seconds.
How this choice affects your workflow and brand
Choosing a no-watermark editor also affects speed and flexibility. Editors that don’t force watermarks usually allow full export control (resolution, bitrate, codecs), meaning you can optimize for Twitch VODs, YouTube uploads, or short-form clips without re-encoding and losing quality. In short: start clean, and you’ll spend less time fixing export problems later.
Core skills your gaming editing course should teach
Nail pacing, cuts, and highlight selection
Good gaming edits are mostly about timing. Learn to trim dead time, find the “money moment” in a clip, and pace action with music or sound effects. Practice cutting on beats and creating short highlight reels (20-60 seconds) that hook viewers within the first 3-5 seconds. These techniques are the backbone of both long-form and short-form gaming content.
Level up with transitions, overlays, and audio mixing
Once basic cuts are tight, add polish: animated overlays for kill feeds, clear lower-thirds for usernames, and mix game audio with commentary so speech remains intelligible. A simple audio ducking routine – reduce game audio by 6-10 dB when commentary is present – dramatically improves clarity. These small choices make videos feel professional without spending money on plugins.
The key editing tools that make gaming videos stand out
What features to prioritize in free editors
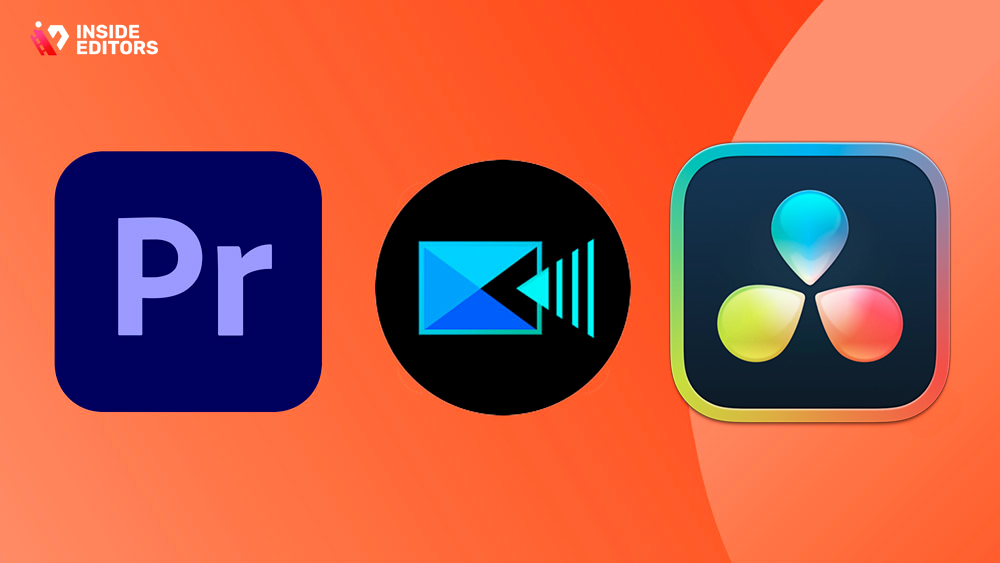
Look for a timeline-based editor with multiclip support, basic color correction, keyframe animation for overlays, and lossless export options. GPU acceleration helps with smoother playback on long timelines. If your editor includes proxy workflows, that’s a big plus for high-resolution gameplay on modest hardware.
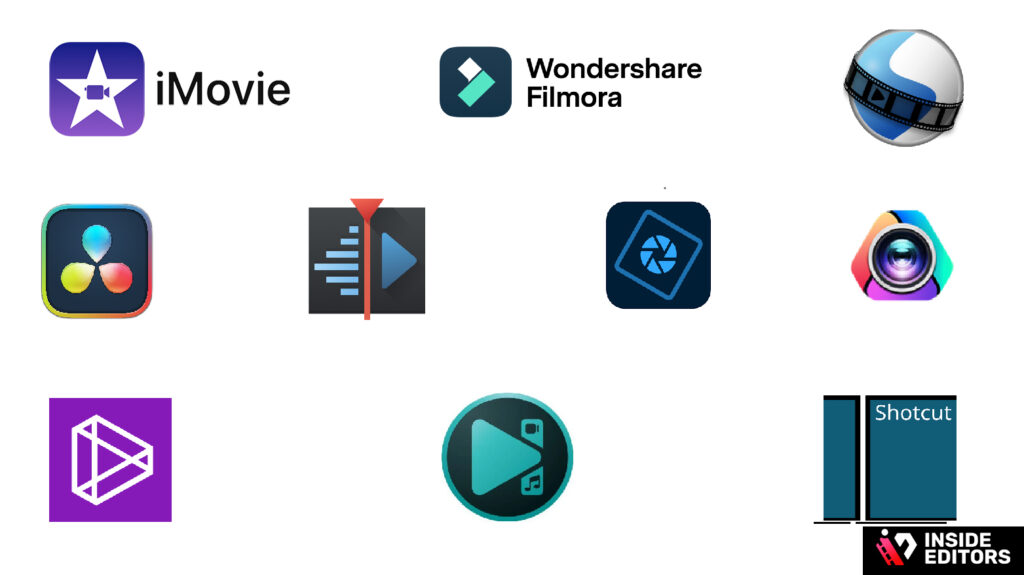
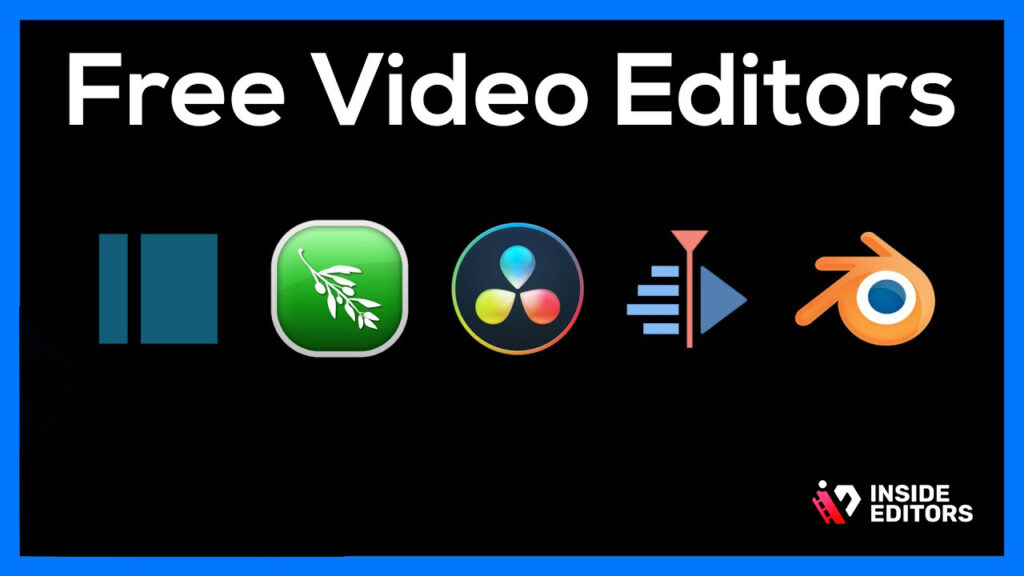
Quick comparison of popular free, no-watermark editors
| Software | Watermark? | Strength | Good for |
| DaVinci Resolve (Free) | No | Pro-level color & audio tools | Streamers aiming to learn pro workflows |
| Shotcut | No | Lightweight, open-source | Beginners on older PCs |
| OpenShot | No | Simple UI, quick edits | Fast clip trimming and text overlays |
| HitFilm Express | No (with free registration) | Effects and compositing | Cinematic montages and VFX practice |
| VSDC Free | No | Windows-only, format exports | Low-spec machines, YouTube uploads |
Each of these options supports watermark-free exports in their free tiers; the best choice depends on your machine, the complexity of edits you want to learn, and whether you intend to scale into advanced color or VFX work. Try one or two to see which UI matches your thinking.
A step-by-step mini course (build your skills in 6 lessons)
Lesson 1 – Project setup and file organization
Start with a consistent folder structure: raw/, audio/, graphics/, exports/. Learn how to set project resolution and frame rate to match your footage (typically 1080p at 60fps for gaming). Proper setup saves time and avoids frustrating re-encodes.
Lesson 2 – Basic trimming and storytelling
Open your editor, create a sequence, and place clips on the timeline. Practice three trims per clip: cut the lead-in, remove silence, and tighten the tail. Build a 30-60 second highlight using these tightened clips to tell a short story – setup, action, reaction.
Lesson 3 – Audio basics and mixing
Import voice commentary and game audio. Use volume envelopes or automatic ducking so commentary cuts through. Add a short music bed at low volume to enhance pacing, and learn simple EQ to reduce harsh frequencies in gameplay audio.
Lesson 4 – Graphics, overlays, and motion
Create simple animated lower-thirds, kill overlays, and a call-to-action end card. Learn keyframing to slide overlays on and off the screen; this small motion adds polish without being distracting.
Lesson 5 – Color correction and export settings
Apply basic color correction: exposure, contrast, and a subtle lift in shadows to enhance clarity. Export using H.264 for YouTube or H.265 for smaller file sizes if supported. Always export a 10-15 second test clip to confirm visual and audio fidelity.
Lesson 6 – Review, feedback, and iteration
Watch your exported clip on multiple devices (phone, laptop, TV). Note pacing and audio balance issues, revise them, and repeat. Constructive feedback from friends or fellow creators accelerates skill growth.
Common mistakes creators make – and how to avoid them
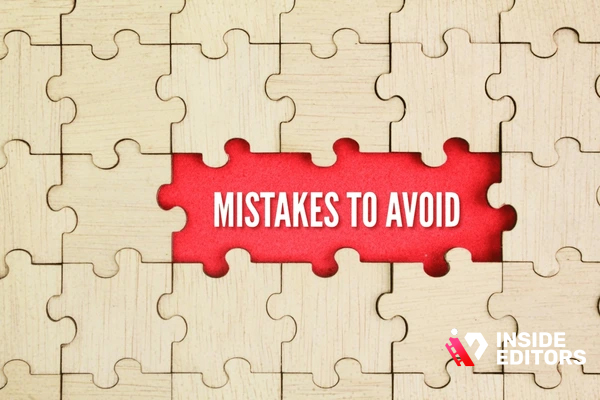
Over-editing and noisy effects
Beginners often overuse transitions and effects. These can distract from the gameplay. Ask whether an effect serves the story; if not, remove it. Subtlety usually looks more professional.
Ignoring audio balance
Many creators focus on visuals and treat audio as an afterthought. Poor audio ruins even the slickest visuals. Prioritize clean commentary and consistent levels across clips – your retention will thank you.
Exporting at the wrong settings
Uploading a video with mismatched frame rate or low bitrate causes stuttering or blockiness on platforms. Match your project settings to your intended platform and choose a bitrate that preserves motion (e.g., 10-20 Mbps for 1080p60 on H.264).
When a pro editor makes sense – Inside Editors can help
Why outsourcing is sometimes the fastest route to growth
If you’re creating consistently and need to scale, outsourcing editing to a team like Inside Editors saves hours each week and raises production quality. Professional editors apply consistent pacing, brand-safe intros/outros, color grading, and audio polish so your uploads appear cohesive and on-brand.
How Inside Editors integrates with your workflow
Inside Editors works with raw files, timestamps, and simple briefs. For creators who want to stay hands-on with creative direction, the team handles routine editing tasks while preserving your voice and final approval. This hybrid approach is perfect once you’ve learned the fundamentals and are ready to prioritize growth over manual edits.
How to Choose the Right Software for Your Style and Goals
Understanding how editing software shapes your creative identity
Every editor eventually develops a style, and the software you choose influences the kind of videos you create. If you love cinematic montages, you’ll prefer tools with strong color grading and effects. If you focus on fast-paced highlights, you’ll benefit from a smooth timeline and quick trimming features. Your software becomes part of your storytelling language, so choose one that feels intuitive and empowers your creativity rather than slowing you down.
Matching your PC or laptop performance with the right tool
Not every beginner has access to a high-end gaming rig capable of handling large ProRes or high-bitrate MP4 files. That’s why understanding your system specs matters. DaVinci Resolve runs beautifully on good GPUs but may lag on older hardware. Meanwhile, Shotcut and VSDC are far more forgiving on low-end machines while still offering watermark-free exports. Selecting software that aligns with your hardware ensures smoother playback, faster exports, and fewer crashes – which makes learning far more enjoyable.
A Practical Comparison: Which No-Watermark Tool Fits You Best?
What matters in real-world editing, not just in feature lists
Feature sheets can look impressive, but what truly matters is workflow. For example, having dozens of effects is meaningless if you rarely use them. What you need is stability, clean interface design, predictable export quality, and enough creative freedom to evolve over time. These experiences impact your day-to-day work more than flashy marketing terms like “AI Filters” or “Ultra-Effects Pack.”
Side-by-side comparison for creators with different goals
| Creator Type | Best Choice | Why It Works |
| Beginner on low-end PC | Shotcut / VSDC | Lightweight, responsive, no-watermark, simple timeline |
| YouTube editor learning pro tools | DaVinci Resolve | Industry-grade color + audio, long-term scalability |
| Streamers clipping highlights | OpenShot | Quick trimming, titles, transitions, easy workflow |
| Montage-focused editors | HitFilm Express | Built-in VFX, compositing, powerful motion tools |
| Creators who want clean exports fast | Any no-watermark tool | Freedom to upload directly without logos |
This breakdown helps you make a confident choice without overthinking. Pick one that aligns with your current setup, then upgrade over time as your skills – and hardware – improve.
Building a Professional Workflow from the Ground Up
Why structure and consistency matter more than fancy effects
Professional editors aren’t faster because they know more shortcuts – though that helps. They’re faster because they follow a workflow that eliminates chaos. Starting with organized folders, consistent naming, and predictable project settings saves hours every month. It also prevents the frustration of missing files, broken timelines, or mismatched export settings.
A sample professional workflow you can borrow
Most editors follow this routine:
- Import → Organize → Rough Cut → Sound Design → Graphics → Color → Export
Following this sequence keeps you focused and prevents you from jumping ahead to “fun” effects before nailing your story. If you’re editing a gameplay kill montage, start by tightening all action clips. Only then add music, transitions, or overlays.
Your future self will thank you – especially when deadlines tighten.
Mastering Audio, Because Viewers Forgive Visual Mistakes More Easily
The surprising importance of clean commentary
Gamers often focus heavily on visuals – resolution, FPS, color grading – but ignore audio. Yet research consistently shows viewers abandon videos faster due to bad sound than bad video. If your commentary is muffled or drowned out by gameplay explosions, even great highlights lose impact. Prioritize clarity, reduce background noise, and use compression to keep your voice consistent.
Balancing music, sound effects, and game audio
Good pacing comes from audio rhythm, not just cuts. Lower music when dialogue enters. Raise footsteps when intensity builds. Increase bass during action peaks. These subtle moves create emotional flow, helping viewers stay immersed without consciously noticing the work behind it.
Why Editing Style Matters More Than the Software You Use
Understanding the storytelling behind every clip
Even a three-second gaming clip has a story: setup, tension, payoff, reaction. Editors who understand this structure make more engaging videos. Instead of dumping raw footage into the timeline, choose clips that build anticipation. For example, showing a near-death moment followed by a clutch win keeps viewers hooked.
Developing your own signature editing style
Over time, you’ll notice patterns in your edits: the pacing you prefer, the transitions you rely on, the color tones that match your game’s vibe. This becomes your brand identity. Viewers begin to recognize your videos not because of your game – but because of your editing. That’s why creators who invest time in style always stand out.
When Free Software Isn’t Enough – And Why That’s Okay
The natural limits of free editors
Free editors can take you far, but as you scale, you may need advanced color tools, LUTs, sound mixing plugins, motion graphics, or faster rendering optimized for professional GPUs. These aren’t essential for beginners, but for competitive creators, they significantly reduce production time and improve overall quality.
How to transition smoothly without losing your workflow
When moving from free to paid tools, keep your folder structure, naming style, and editing habits. Most professional tools – Premiere Pro, Final Cut, DaVinci Resolve Studio – let you import familiar formats. This ensures your transition is smooth, and you don’t lose progress.
If you ever feel overwhelmed, this is exactly when professional editing services help you maintain quality while you focus on content and growth.
How Inside Editors Can Boost Your Process (Gently, Not Salesy)
When outsourcing becomes a smart career move
As your channel grows, you’ll realize editing takes the biggest chunk of your time. Creators often spend 5-10 hours editing what becomes a 3-6 minute final video. Outsourcing isn’t “cheating”-it’s optimizing. It lets you focus on scripting, recording, and connecting with your audience while professionals handle polish.
The Inside Editors approach: simple, collaborative, creator-first
Inside Editors works like an extension of your workflow. You send raw clips or timestamps; the team handles editing, sound design, color, graphics, transitions, and final delivery. You keep creative control while handing off the technical weight. This hybrid model is why creators feel comfortable upgrading their production without losing their voice.
Explore services anytime:
https://insideeditors.com/gaming-video-editing-services/
No pressure – just a resource if you ever need help or inspiration.
Conclusion – Your next steps on the learning path
Learning gaming editing with free, no-watermark tools gives you control and credibility from day one. Start small: pick an editor that suits your hardware, run through the six lessons above, and focus on pacing and audio first – those deliver the biggest improvements fast. When you’re ready to scale or want advanced polish, Inside Editors can step in to keep your channel growing while you focus on content and community.
If you’d like, explore how Inside Editors can support your channel with tailored editing services: https://insideeditors.com/gaming-video-editing-services/ – or try one of the free editors listed above and send a sample cut; we’ll show how professional polish amplifies the same footage.
FAQs
Q1: How can I trust an editor or service with my raw gaming footage and privacy?
A: Trust starts with clear policies: ask for a written NDA or a privacy clause that covers file handling, retention periods, and deletion requests. Reputable teams describe their process for secure transfers (SFTP, private cloud links) and limit access to named editors. If a service hesitates to provide these details, treat that as a red flag.
Q2: Who owns the final video and raw files after editing?
A: Ownership should be defined in your agreement: most creators retain copyright to footage while granting the editor a license to work on it until final delivery. Ask for explicit language that the editor will transfer deliverables and source files upon full payment, or clarify storage/archival fees if they will keep backups long-term.
Q3: How many revision rounds are typical and what if I need more?
A: Standard packages usually include 1-3 revision rounds; extra revisions are billed hourly or per-round depending on the provider. Clarify what counts as a “revision” (trim changes vs. new scenes) and request an example turnaround per revision so you’re not surprised by scope creep. Good services offer a short review window (24-72 hours) for timely feedback.
Q4: How do free no-watermark editors compare to paid software for gaming creators?
A: Free no-watermark editors like DaVinci Resolve, Shotcut, and OpenShot offer surprisingly powerful timelines, export control, and decent audio tools, making them excellent for learning and producing upload-ready content. Paid software adds convenience (plugins, optimized rendering, team features) and faster support; choose free tools to master fundamentals, then upgrade when scale or speed becomes limiting.
Q5: What should I expect to pay for professional gaming video editing services?
A: Pricing varies: simple edits and highlights typically range from $25-$75 per video, mid-tier packages (montages, color, audio) sit around $75-$250, and high-end episodic work or branded series can exceed $500 per episode. Packages usually specify included revisions, turnaround time, and whether project files or raw footage are returned – always confirm what’s excluded (licenses, stock assets, rush fees).
Q6: What are typical turnaround times and rush options?
A: Standard turnaround is 48-120 hours for single videos depending on length and complexity; montage or series work often takes 3-7 business days. Rush services are available for an extra fee (commonly 25-75% surcharge) and depend on editor availability; always send clear timestamps and priorities to reduce back-and-forth and speed delivery.
Q7: How do I choose the right free editor that exports without watermarks?
A: Match software to your goals and hardware: DaVinci Resolve is ideal if you want pro color/audio tools and a future upgrade path, while Shotcut or VSDC work better on low-spec PCs. Test exports early to confirm no watermark and acceptable render times, then stick to one tool for a few projects to build muscle memory and efficiency.
Q8: Quick steps to prepare and deliver footage to an editor (skimmable)?
A: Organize files (raw/, audio/, overlays/) and name clips with timestamps or short descriptions, export a low-res reference video with timecodes, provide a single document with timestamps and desired edits, and share assets via a secure cloud link. Clear, concise briefs save hours: include desired punch-ins, important reactions, and the final format or platform specs.
Q9: Can I remove an existing watermark from footage or a free app export?
A: Removing a watermark from someone else’s copyrighted content is usually unlawful and unethical; for your own exports, re-export from the original project or use the original no-watermark source. If you used an app that forced a watermark, the lawful path is to re-create the edit in a free no-watermark editor or upgrade the app’s license rather than attempting removal.
Q10: Will a gaming video editing course cover software that’s free and exports without a watermark?
A: A practical course should cover at least one free, no-watermark editor so you can learn real workflows without spending. Expect lessons on setup, timeline basics, audio mixing, overlays, and exports that emphasize matching platform specs for YouTube/Twitch; these skills transfer directly to paid tools as you scale.


