


If you’ve ever watched a Reel and thought, “Why does this look so smooth and cinematic compared to mine?”, you’re not alone. The difference usually isn’t a fancy camera it’s the thoughtful use of effects: transitions, pacing, color, audio, and on-screen text that guide your viewer’s eye. In 2026, short-form video continues to deliver standout ROI for marketers and creators, so dialing in your effects stack is one of the fastest ways to grow reach and watch time. Recent industry reporting still puts short-form among the top ROI channels for marketers this year, which means competition is fierce and craft matters.
Before we jump in, a quick promise: this guide stays friendly, practical, and hype-free. We’ll show you how to apply the most effective effects for your goals, the tools that make them easy, and the pitfalls to avoid. By the end, you’ll know exactly which moves to try next and how to make them feel like you.
Why effects matter more in 2026 than ever

Viewers reward clarity, pacing, and polish
Short-form algorithms increasingly optimize for watch time and replays, not just initial clicks. That means the effects you choose should make your story easier to follow: snappier cuts for tutorials, subtle color and audio polish for lifestyle, and readable text for talking-head explainers. Marketers report short-form video leading ROI again this year, so raising your baseline quality isn’t optional; it’s how you hold attention long enough to earn followers and shares.
Platforms keep evolving your edit should too
Meta continues to lean hard into Reels across its apps and to expand creative tooling, while pro editing software adds AI features that speed up the tedious parts (captions, color matching, cleanup) so you can spend more time on story and style. These updates make “premium” polish more accessible to solo creatorsif you know where to look and which effects to use.
Effects aren’t decoration. They’re pacing, clarity, and mood the levers that turn a decent clip into a replay-worthy one. Next, let’s map the essentials you’ll use week in, week out.
Essential instagram video editing effects you’ll use daily

Clean, motivated transitions (not just flashy wipes)
Great transitions feel invisible. Match-cut between similar shapes, whip-pan on movement, or hide a jump cut under a hand swipe. In practice, that means recording your exit frame with intention (a head turn, a step forward) so the entry shot continues the motion. Native Reels transitions, CapCut templates, or keyframed motion blur in pro editors can all deliver the key is matching direction and speed so the cut feels natural.
Speed ramping and dynamic pacing
Speed ramping keeps energy high without overwhelming your viewer. Ramp up to punctuate a reveal, then return to real time for the “value moment” (the tip, the punchline, the before/after). In a tutorial, ramp through repetitive steps and slow down on the crucial technique. This balance increases retention because the viewer never feels stuck waiting.
Color that supports your brand, not fights it
A consistent look separates your Reel from the pack. Use gentle contrast, slightly warmer skin tones, and a coherent palette that fits your niche. In mobile editors, start with exposure and white balance before touching saturation it’s the quickest way to avoid that “overcooked” look. In pro tools, a base correction followed by a LUT or Look-Up Table (customized to your skin tone and brand colors) saves serious time.
On-screen text that earns its space
Hook text buys you the first three seconds. Keep it large, high-contrast, and positioned away from UI overlays. Use text to structure the story: step labels, keywords, and quick recaps. Auto-captions are your accessibility superpower and now easier than ever in both native and pro tools with improved speech-to-text and translation.
Audio polish that feels professional
Crisp dialogue beats any visual flourish. Remove background hum, tame harsh S sounds, and compress gently so loud and quiet lines sit together. Layer music that matches your cut’s BPM; a subtle riser under your hook can increase retention more reliably than another transition pack ever will.
Master these five and you’ll look “pro” without chasing every trend. Next, we’ll align effects to your objective so you’re not guessing which trick to use when.
Choose effects based on your goal (and stop over-editing)

If your goal is reach, front-load clarity and movement
When you’re optimizing for discovery, your hook needs immediate, high-contrast visuals and readable text. Use one bold transition in the first five seconds, but resist stacking multiple effects; too much motion can reduce clarity. Color-grade for brightness and warmth so thumbnails pop on dark mode. Then, tighten mid-section pacing with light speed ramps and cutaways to maintain curiosity.
If your goal is conversion, slow down and build trust
For driving clicks or inquiries, polish matters more than pyrotechnics. Use gentle crossfades or simple cuts, consistent white balance, and clean lower-thirds to explain benefits. Add minimal sound design (UI clicks, soft whooshes) to make product demos feel tactile. People buy when they understand, not when they’re dazzled.
If your goal is community, highlight personality
Lean into talking-head with captions, subtle zooms on punch lines, and quick B-roll cutaways to keep intimacy without losing pace. Use color and typography that match your brand. A recurring effect style the same zoom cadence, the same text animation becomes part of your signature.
Tie every effect to a purpose: reach, conversion, or community. With intent set, you can pick the right tool without wasting time.
The tools behind standout effects (and when to use each)
Below is a quick comparison to help you choose your primary editor. Pick the one that matches your workflow and learning curve consistency beats chasing features.
| Editor | Best for | Strengths | Watch-outs |
| Instagram Reels editor | Fast posting, simple cuts, native text/effects | Zero export fuss, trending audio access, quick captions | Limited precision; color control is basic |
| CapCut (mobile/desktop) | Trend-driven effects and templates | Rapid transitions, auto-sync, robust text tools | Templates can look generic if overused |
| Adobe Premiere Pro | Brand polish, repeatable looks at scale | Pro color, audio, captions, AI time-savers | Higher learning curve, desktop required |
| After Effects | Advanced motion graphics | Custom titles, kinetic type, logo resolves | Time-intensive, not for bulk editing |
| DaVinci Resolve | Color-driven storytelling | Elite grading, powerful free version | Mobile handoff can be clunky |
Pro editors continue to roll out AI features that shave hours off repetitive work auto-translate captions, dialogue cleanup, edit detection, and even generative extend to patch timing. That’s a gift for Reels, where a few frames can make or break comedic timing or tutorial clarity. Tip: If you’re primarily editing Reels and Shorts, a CapCut Premiere flow can be ideal: sketch the pace with a template, then finish color, audio, and typography in Premiere for a distinctive brand look.
Practical mini-workflows for the most effective effects
The “60-second tutorial” blueprint
Start with a visual proof the finished result on screen while your hook line lands in captions. Use a whip-pan or match-cut into step one. Ramp through repetitive steps while cutting to macro B-roll (hands, tools, product details). End with a two-beat recap card that lists the steps and a soft CTA. This format consistently balances speed and substance perfect for saving, which the algorithm loves.
The “before/after transformation” reveal
Open with the after for one second, quickly smash-cut to the before, then stack time-lapse or jump cuts to show progress. Keep color consistent across shots; transformation edits fall apart when white balance shifts. Use a whoosh-into-bass hit combo timed to the reveal for emotional payoff. Finish with a subtle push-in and a branded end card.
The “talking-head with texture” explainer
Shoot eye-level, add auto-captions, and sprinkle micro-zooms at emphasis points. Every 3–5 seconds, cut to relevant B-roll or on-screen keywords in a consistent style. A light film-grain or gentle vignette can add depth, but keep it under control texture should be felt, not seen.
Systems beat inspiration. Reels that win are edited with repeatable blueprints, not reinvented from scratch every time.
Common mistakes that quietly kill performance (and how to fix them)

Overusing flashy transitions
If your cut draws attention to itself, it’s probably stealing oxygen from your story. Keep advanced transitions for punctuating changes in scene or tone. For everything else, clean jump cuts with motivated motion feel more premium.
“Instagram orange” color grades
Over-saturated skin tones and teal shadows look dated and reduce trust. Correct exposure and white balance first, then use subtle contrast and vibrance. If you apply a LUT, dial it back to 20–40% and check skin tones on a vectorscope in pro software, or simply compare to a neutral reference frame.
Illegible or crowded on-screen text
Tiny captions and busy fonts lose mobile viewers. Use bold, high-contrast type, 6–8 word hooks, and clear hierarchy. Place text clear of UI overlays and avoid stacking more than two lines in your first three seconds.
Ignoring audio
Noisy rooms, inconsistent levels, and clipping push viewers away. At minimum, normalize dialogue and remove background rumble. Many tools now include one-click dialogue cleanup and caption translation leverage them to keep viewers engaged longer, especially in global audiences.
The fix is almost always subtraction: fewer transitions, gentler color, clearer type, cleaner audio.
Effect stacks that work for top use cases
Product demo that feels tactile
Pair micro-zooms with whoosh SFX and on-beat text highlights. Use a neutral color grade to keep product tones accurate. A quick macro cutaway to textures or ports adds perceived quality. Close with a minimal end card and a practical takeaway.
Creator vlog with personality
Mix jump cuts, light speed ramps, and handheld B-roll. Grade for warmth and soften highlights for a cozy feel. Use captions for the punch lines and add a recurring title animation that becomes part of your signature look.
Educational carousel-to-Reel repurpose
Turn carousel slides into a kinetic type sequence: animate keywords, add a swipe-to-next motion motif, and layer subtle paper-rip SFX. Keep palette consistent with your IG grid for brand cohesion.
If you’d rather skip the heavy lifting and keep your focus on content and strategy, our team can take this off your plate end-to-end from editorial planning to polished delivery with our dedicated Instagram Reels Video Editing Services.
What the data says about quality and watch time
Short-form still punches above its weight
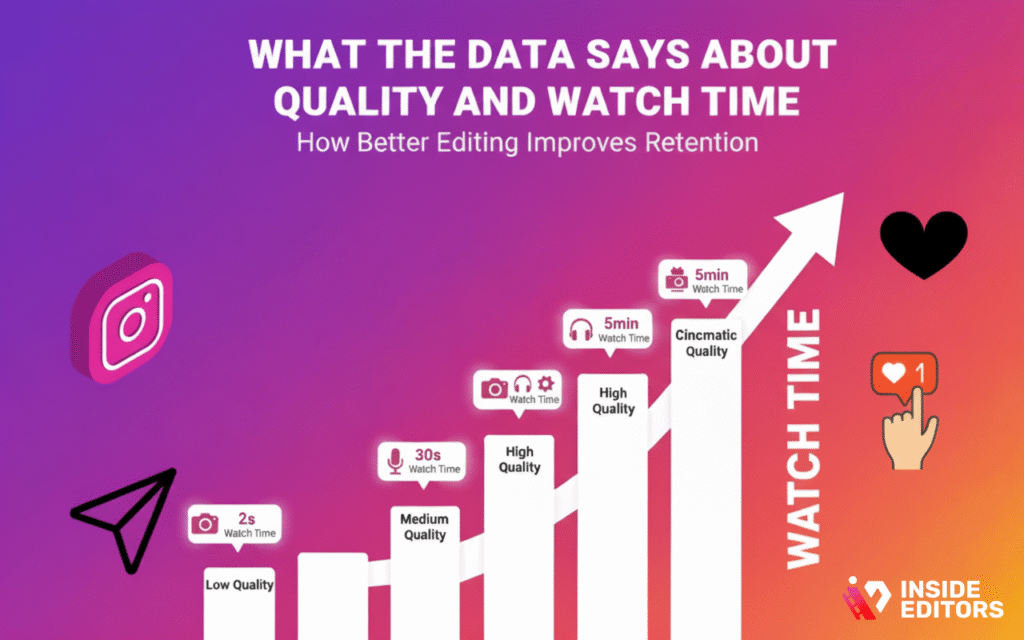
Multiple 2026 marketing roundups continue to rank short-form video among the top ROI formats for brands, driven by improvements in creative tools and audience appetite for quick, value-dense content. For editors, that validates the time you spend on color, pacing, and captions quality work gets rewarded with replays and saves.Platforms keep adding creation features
Meta’s 2026 focus on video from algorithm improvements to discovery surfaces and creative tools further tilts the playing field toward creators who package ideas cleanly and professionally. Meanwhile, Adobe’s spring updates accelerated pro workflows with AI-assisted captions, clip search, and generative extend, making “studio polish” possible on short deadlines.
The bar is rising, but so are your tools. If you invest in a clean, repeatable effects stack, your watch time will reflect it.
Quick reference: goal effect tool (save this)
- Grab attention fast: bold on-screen hook, match-cut, micro-zoom Reels editor or CapCut
- Explain clearly: captions + lower-thirds, gentle zooms, cutaways Reels editor, Premiere
- Show transformation: smash-cut reveal, speed ramps, time-lapse CapCut, Premiere
- Build brand feel: consistent color/LUT, custom title animation Premiere + After Effects
- Polish audio: dialogue cleanup, light compression, music ducking Premiere, Resolve
For deeper creative walkthroughs, you can always explore the Inside Editors blog and related guides like our service pages for Video Ad Editing and Podcast Video Editing, which include practical examples and workflows.
When to bring in a professional editor (and what changes)
You’re consistent on content, but inconsistent on quality
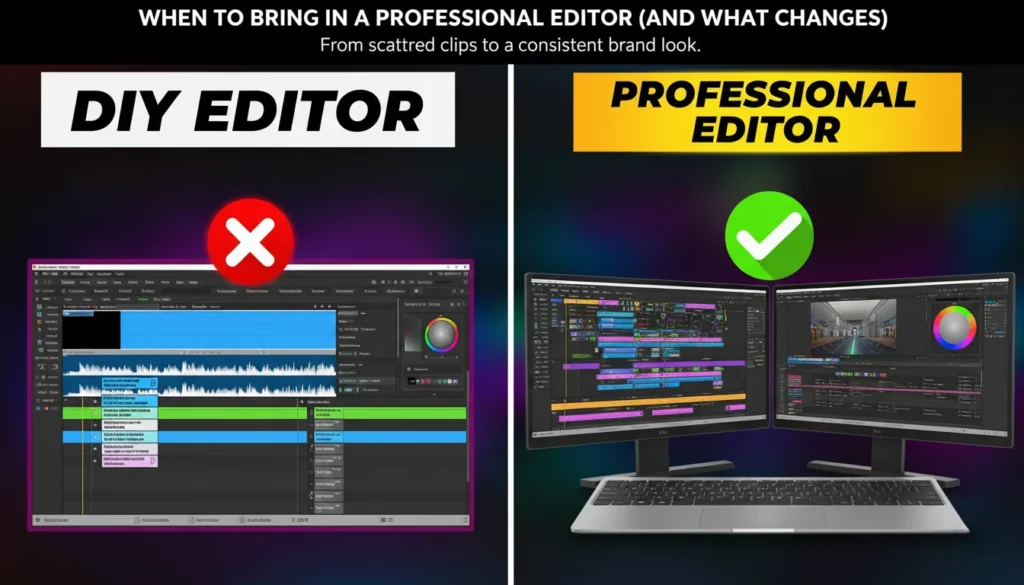
If your ideas are strong but results vary, a pro editor standardizes color, audio, and typography so every Reel looks like your brand even when you batch-shoot. That consistency compounds trust and saves hours every week.
You’re scaling across platforms
Repurposing Reels for Shorts, TikTok, and paid placements demands different crops, text safe-areas, and pacing. A pro will build templates that travel well and keep analytics clean across channels.
You want story help, not just software help
Great editors are storytellers. We’ll spot where your hook lands late, where the B-roll could carry the explanation, or where a single reaction cutaway would unlock replays the details that make an edit “feel right.”
If that sounds like the support you’ve been missing, explore Inside Editors’ Instagram Reels Video Editing Services you’ll notice the difference in both quality and time saved.
Presets that instantly level-up your look (and save hours)

A clean base grade you can reuse on every shoot
Start with a dependable “house look” so clips match even when lighting changes. Correct exposure and white balance first, then add subtle contrast. Keep skin tones honest by nudging warmth slightly and easing saturation rather than cranking vibrance. If you use LUTs, treat them like seasoning 20–40% intensity is usually enough. This gives your instagram video editing effects a consistent foundation, so transitions, text, and overlays feel cohesive instead of patched together.
A text and caption system that stays legible
Design three text styles you can drag into any project: hook text for the first three seconds, step labels for tutorials, and smaller lower-thirds for names or product details. Test on a real phone and keep everything inside safe areas so UI doesn’t overlap. In pro tools, make a captions template with clear hierarchy and set default positions to avoid manual nudging every time. When your words are easy to read, viewers absorb more and watch longer.
A sound polish you can apply with two clicks
Create a chain you can drop on any dialogue track: light noise reduction for room tone, a gentle compressor to even loud/quiet lines, and auto-ducking on music. Save this as a preset. It removes the “amateur” edge instantly, which is why so many high-performing Reels feel effortless even when the visuals are simple. Recent Premiere Pro releases also make generating and styling captions far faster, which helps accessibility without delaying your schedule.
Mini-summary: Reusable presets for color, text, and audio turn “every edit is a fresh puzzle” into “drag, drop, done,” letting you focus on story and pacing.
Color recipes that flatter skin and protect brand colors
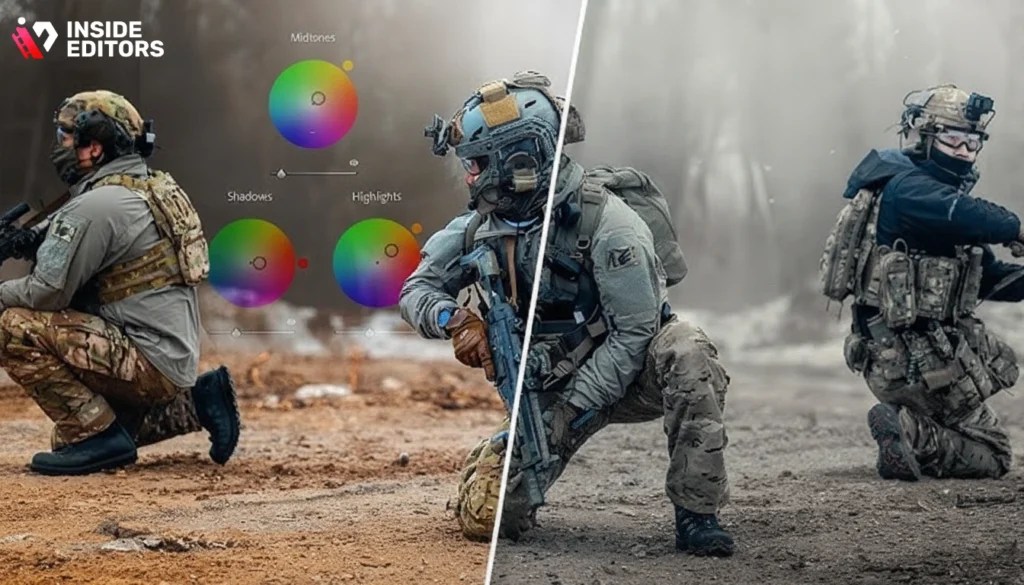
Natural daylight recipe (lifestyle, vlogs, behind-the-scenes)
Aim for neutral whites and soft highlights. Reduce contrast slightly to preserve dynamic range, then add a mild S-curve so the image doesn’t look flat. Lift shadows just a touch; it keeps texture without creating a muddy gray. Finish with selective saturation on brand hues so your palette reads the same across posts.
Product-first recipe (demos, tech, beauty)
Accuracy beats drama. Match white balance to a neutral target, lower saturation a hair to avoid banding on gradients, and add micro-contrast in the midtones so text and labels stay crisp. If your brand uses a signature color, nudge that hue toward consistency across lighting scenarios for grid harmony.
Mood-forward recipe (travel, cinematic edits)
Push contrast gently and cool shadows a few degrees while keeping skin tone warm. Add a soft vignette and a whisper of grain for depth, but keep it light the effect should be felt, not seen. If you speed-ramp often, bake your grade before adding ramps to reduce banding.
Mini-summary: Grade for truth first, then style. Viewers trust what looks natural; they admire what looks intentional.
Export and delivery settings that hold quality on upload
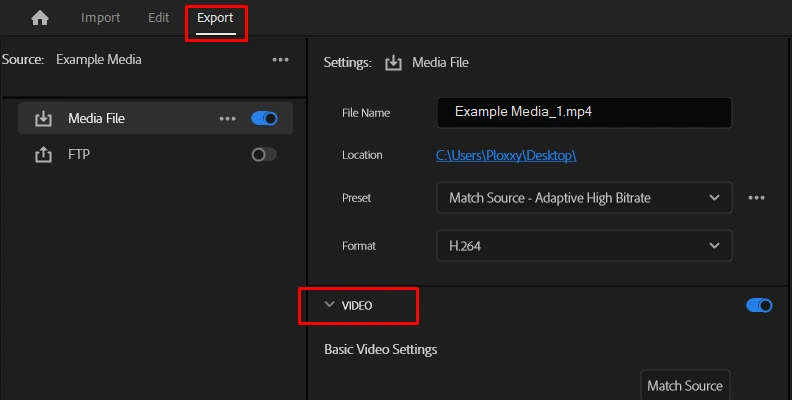
Even the strongest edit can look mushy if the master file is low-quality. The specs below are battle-tested for Reels while staying creator-friendly.
Recommended export settings (Premiere Pro or Resolve)
- Resolution/Aspect: 1080 × 1920 (9:16).
- Codec: H.264.
- Bitrate: VBR 2-pass; target 16–20 Mbps, max 24–30 Mbps for motion-heavy cuts.
- Frame rate: Match source (usually 24, 25, or 30).
- Audio: AAC, 48 kHz, 320 kbps.
Recent specs roundups confirm 1080 × 1920 (9:16) as the vertical baseline for Reels, with evolving length limits that now accommodate longer edits; using a robust bitrate helps retain detail after platform compression.
Quick comparison: native vs. pro exports
| Workflow | When to use | Pros | Watch-outs |
| Export from Instagram/CapCut mobile | Fast drafts, trends | Speed, templates, trending audio | Compression, limited fine control |
| Export from desktop NLE (Premiere/Resolve) | Brand work, paid placements | Color accuracy, audio polish, captions control | Extra steps; mind safe areas |
| Adobe Premiere Pro | Brand polish, repeatable looks at scale | Pro color, audio, captions, AI time-savers | Higher learning curve, desktop required |
| After Effects | Advanced motion graphics | Custom titles, kinetic type, logo resolves | Time-intensive, not for bulk editing |
| DaVinci Resolve | Color-driven storytelling | Elite grading, powerful free version | Mobile handoff can be clunky |
If you edit in CapCut and finalize in a pro NLE, export an intermediate at 1080 × 1920 H.264 at a generous bitrate, then finish color/audio and master from the NLE. CapCut’s own guides align to the same 9:16, 1080 × 1920 delivery target for sharp uploads. CapCut
Mini-summary: Export at 1080 × 1920 H.264 with healthy bitrate and match your source frame rate. You’ll keep crisp edges, smoother gradients, and cleaner text after Instagram recompresses.
Best-fit effect stacks for common Reel formats

The value-dense tutorial
Open with your finished result under the hook text, then hard cut into step one. Use light speed ramps to skip repetitive moments and micro-zooms to emphasize tools or gestures. Keep captions near eye level and avoid stacking more than two lines. Color stays neutral so text remains the star.
The tactile product demo
Pair match-cuts with gentle whooshes timed to taps or swipes. Add a subtle shadow or glow on callouts so they read over busy footage. Grade for accuracy and use a consistent lower-third with product names or specs. A brief end card with a single outcome (“Before/After in 30 seconds”) encourages saves.
The personality-led talking head
Use clean jump cuts, captions with keywords highlighted, and B-roll that advances the point, not just decorates. Slight zooms on punch lines keep rhythm. Warmth in color plus soft contrast builds intimacy without sacrificing clarity.
Mini-summary: Pick one “hero” effect per format and let everything else support it. That restraint reads as taste.
why your Reel doesn’t pop (yet)
“It’s sharp on desktop, blurry on Instagram.”
Your master may be fine, but platform compression is heavy. Increase export bitrate and avoid overly sharp text or thin fonts that shimmer. Keep gradients smooth by avoiding excessive saturation. Cross-check your delivery against current spec guides and aim for a high-quality H.264 encode.“Captions cover my subject.”
Design with UI in mind. Keep the core action within the center third and set your caption baseline high. Build a reusable captions style so position and line breaks are consistent. Modern caption tools in Premiere Pro make this repeatable without manual keyframing.“My fancy transitions feel gimmicky.”
They probably aren’t motivated by movement or story. Record exits and entrances with intentional motion so match-cuts feel natural. Use one stylized transition early to establish energy, then rely on clean cuts. The goal is pace, not pyrotechnics.
“Longer Reels tank my retention.”
Lead with the outcome, not the setup. Use speed ramps through repetitive segments and give viewers micro-wins every 3–5 seconds. The platform now allows longer uploads, but watch time not absolute length is still the north star.
Mini-summary: When in doubt, simplify. Clean pacing, clear captions, and honest color beat aggressive effects every time.
Settings cheat sheet (save or screenshot)
| Setting | Recommendation | Why it helps |
| Resolution / Ratio | 1080 × 1920, 9:16 | Matches vertical full-screen; avoids scaling artifacts. |
| Codec | H.264, High Profile | Broad compatibility and predictable compression. |
| Bitrate | VBR 2-pass, 16–20 Mbps (Target) | Preserves motion detail after Instagram recompresses. |
| Captions | Burn-in for hooks; sidecar or native elsewhere | Accessibility + early engagement; easier localization. |
| Color | Correct WB/exposure subtle look/LUT | Natural skin, consistent brand palette. |
| Audio | AAC 48 kHz, 320 kbps; duck music under dialogue | Clarity and comfort on mobile speakers. |
| Length | Edit for retention; up to 3 minutes supported | Flexibility without sacrificing pace. |
Where a pro editor changes the game (quietly but decisively)
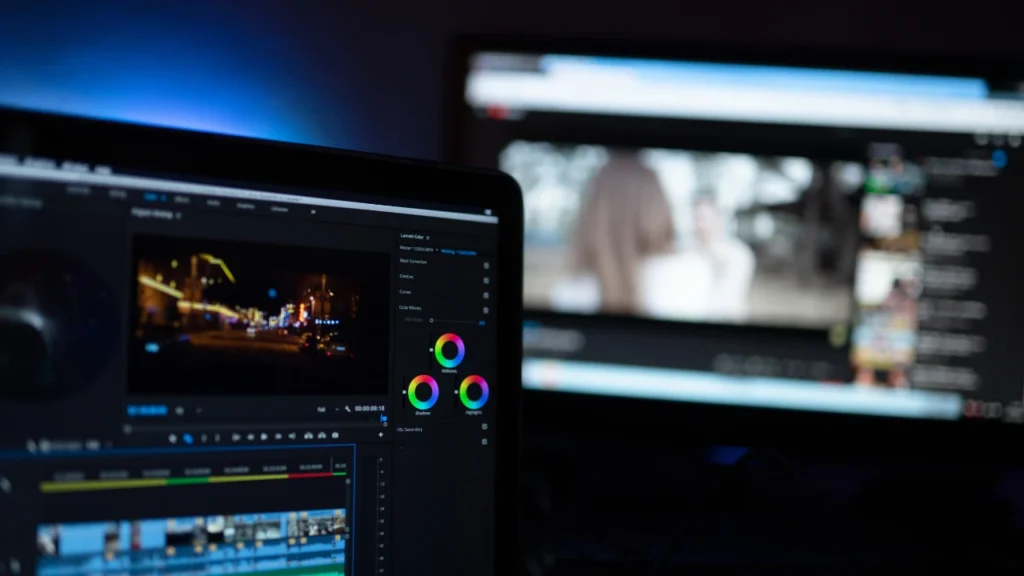
If your schedule is packed, you may know what looks good but not have the hours to build templates, refine audio, and keep color locked across batches. That’s where a dedicated partner makes a visible difference. Inside Editors can turn your raw clips into polished Reels with repeatable presets, brand-safe color, and captions that actually get read freeing you for strategy and storytelling. Explore our tailored Instagram Reels Video Editing Services to see how the workflow fits yours.
For broader production needs from ads to podcast clips you’ll also find practical walkthroughs and examples on our site, including Video Ad Editing and Video Editing Services for Podcasters. Each page includes real-world use cases and process snapshots to help you map the next step.
Final takeaways (and your next move)
Dialing in effects is less about collecting plugins and more about mastering pacing, clarity, and consistency. Build three reusable presets (color, text, audio), export with a robust 1080 × 1920 H.264 master, and choose one hero effect per format. Keep captions readable, sound clean, and color honest. Do this for a month, and you’ll see steadier retention, more saves, and a brand look that travels across platforms.
If you’re ready to move faster with fewer compromises, you can trust Inside Editors to help. When you want your instagram video editing effects to feel unmistakably yours and to hold up under the algorithm’s compression we’re here to make that simple.
Curious what a pro-built preset pack and color look could do for your next batch? Start a conversation with our team via the contact page we’ll share options, timelines, and a clean checklist so you can publish with confidence.
FAQs (PAA-ready)
Do I keep ownership of my footage and edits?
Yes your raw files, project files, and final exports remain yours. We use project agreements that spell out usage rights and NDAs on request. You can request all source files (.prproj/.ae, LUTs, fonts) after delivery, so your instagram video editing effects and templates travel with you. If plugins are licensed, we’ll note any third-party limits.
How do you protect my privacy and unpublished content?
We store files in encrypted drives and use restricted access project folders. Editors sign confidentiality agreements; screen recordings and internal shares are disabled by default. If needed, we’ll use your preferred cloud with granular permissions and auto-delete after 30–90 days. Watermarked previews prevent leaks during review.
What if I don’t like the first cut how do revisions work?
Most packages include 2–3 revision rounds within 7–14 days of the first draft. We use time-coded comments for precise changes and provide change logs each round. After the included rounds, additional edits are billed hourly or as a micro-scope add-on, agreed before work continues.
How do DIY tools compare with hiring a pro editor?
DIY apps (CapCut, VN) are fast and template-rich, great for trends and simple cuts. Pros bring color grading (creative look), audio cleanup, brand typography, and pacing that increases retention and saves you hours. If you post daily, a hybrid model works: DIY drafts + pro finishing for key Reels and ads.
Which tools do you use-and why those?
For mobile-first workflows we draft in CapCut, then finish in Premiere Pro/After Effects or Resolve for color and audio. This keeps speed while enabling custom typography, LUTs, and precision transitions. The result: consistent instagram video editing effects that feel branded, not templated.
How much do Instagram Reels edits cost?
Typical per-Reel pricing ranges from $80–$250 for simple cuts with captions, $300–$600 for branded graphics and color, and $800+ for motion design or complex storytelling. Packages often include a set number of Reels, thumbnails, and cut-downs; music licensing or stock footage is usually extra.
What’s included-and what isn’t?
Included: editing, sound polish, color correction, basic motion graphics, captions, and 1–3 export ratios (9:16, 1:1, 16:9). Not included by default: paid stock, custom illustration, multi-language subtitling, or reshoots. We’ll flag extras upfront with clear line items so there are no surprises.
How long does a Reel edit usually take?
A straightforward 30–60s Reel turns around in 2–4 business days after we receive assets. Branded motion graphics, multi-camera, or narrative pieces can take 5–10 days. Rush options (24–48 hours) are available when calendars allow; we’ll confirm feasibility after a quick asset audit.
What affects turnaround time the most?
Three factors move the needle: asset quality (organized, labeled footage), scope (captions, color grade, graphics), and feedback responsiveness. Clear briefs and examples cut cycles by 30–50%. If you want the fastest path, send your hook line, brand kit, and any reference Reels with timestamps.
How do your packages/tiers differ?
Starter covers clean cuts, captions, and light color; Standard adds branded graphics and SFX; Pro includes custom titles, LUTs, and platform-specific cut-downs. Retainers reduce per-Reel cost and guarantee slots each week. We’ll recommend the smallest tier that still delivers your outcome.
How do I request a project what are the steps?
Step 1: share your brief, footage, and brand kit. Step 2: we confirm scope, price, and schedule, then deliver a hook test or outline. Step 3: first cut arrives for time-coded feedback; Step 4: revisions and final masters in 1080×1920 H.264, plus source files if requested. Simple, skimmable, repeatable.
Can you match a specific creator’s style?
We don’t copy, but we can align to a reference’s pacing, color palette, and text rhythms. Share 2–3 links with timestamps (“0:03 micro-zoom,” “0:11 whip-pan”), and we’ll translate that into a unique treatment so your instagram video editing effects feel on-brand and original.


