Unlock the full potential of AI-powered video generation with KlingAI – an innovative tool designed for creators aiming to produce professional-grade animations quickly and easily. In this guide, we’ll explore best practices, step-by-step instructions, and expert-level insights, ensuring both beginner and intermediate creators walk away equipped to elevate their video content effortlessly.
Why KlingAI Exactly?
KlingAI brings studio-quality video creation to your fingertips. Whether you’re a solo creator looking to reduce production time or an agency scaling content output, KlingAI offers user-friendly features:
- Beginner-friendly Interface: Easy onboarding with a streamlined dashboard and intuitive controls.
- Advanced Customization: Multi-layer scene editing, voice-over integration, and visual effects help convey your brand’s unique identity.
- Cloud-powered Rendering: High-resolution output without local processing demands.
- Affordable Plans: Flexible pricing with free trials and pay-as-you-go options.
As part of Inside Editors’ commitment to modern, helpful content, we’ve designed this guide to be accessible and insightful – perfect for creators at all levels.
Getting Started with KlingAI
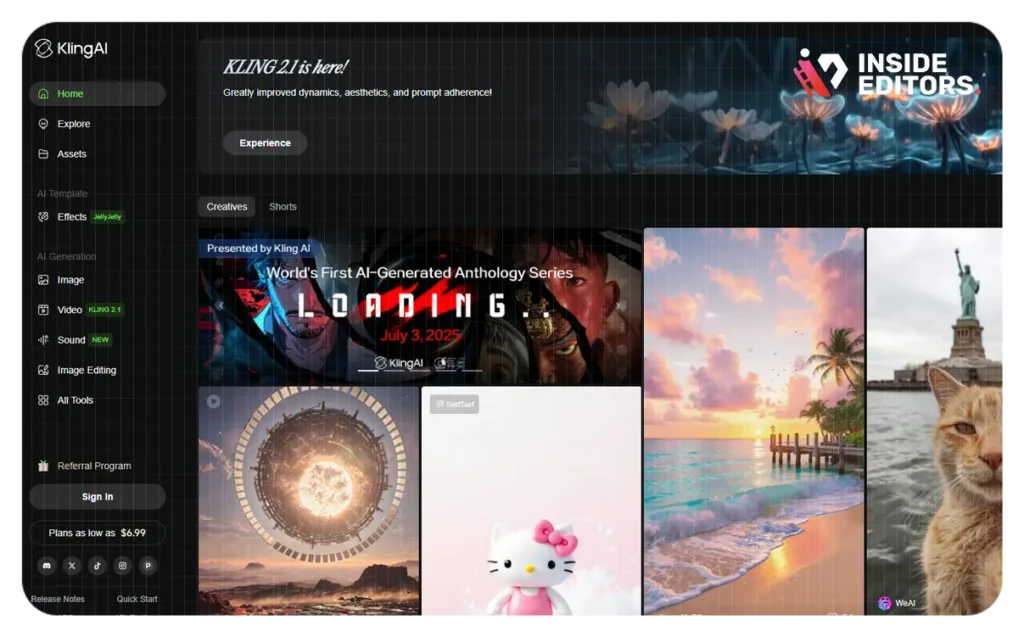
- Sign up and Explore presets
Create your account and explore starter templates – like explainer videos, logo intros, and social media promos. Templates help you understand KlingAI’s capabilities. - Import your script or storyboard
Upload your script or use prompts for auto scene creation. KlingAI analyzes tone and pacing to auto-generate a basic scene breakdown. - Select media assets
Upload brand assets, stock images, or royalty-free clips. Don’t forget audio: upload music tracks, sound effects, and record or synthesise voice-overs. - Set timeline and transitions
Align scenes with beats or narration. Use drag-and-drop to arrange clips and apply transitions like fades or zooms for smoother flow.
Editing Scenes Like a Pro
This section aligns with our video editing principles: keep it clean, purposeful, and polished, as highlighted in our YouTube Video Editing Guide.
A. Visual Composition
- Rule of thirds: Keep subjects aligned for a structured frame.
- Color grading: Apply consistent LUTs to maintain tone.
- Motion design: Use simple animations like text fades and pans to guide viewer attention.
B. Audio Elements
- Clear voice-over: Use noise reduction and equalization to eliminate distortion.
- Ambient sound: Add natural sounds (e.g., office chatter, footsteps) to enrich scenes.
- Music mixing: Keep background tracks between –24 and –18 LUFS so voice stays dominant.
Leveraging AI Tools & Enhancements
- Text-to-Speech (TTS)
Use KlingAI’s TTS to craft natural narration. Adjust voice tone, speed, and inflection for conversational delivery. - AI Subtitle Generation
Auto-generate captions and customize them for visual style and readability. Subtitles boost engagement and accessibility. - Smart Scene Suggestions
KlingAI suggests scene tweaks – length adjustments, media replacements, and audio balancing – based on user behavior and analytics. - Content Optimization
Select platform formats (16:9 for YouTube, 9:16 for TikTok). Auto-optimize for export with ideal bitrate, resolution, and codecs like H.264 or HEVC.
Export & Publish Your Video
After refining your project:
- Preview final cut
Watch the full video, checking transitions, audio syncing, and visual flow. - Export settings
Choose resolution (1080p/4K) and frame rate (30 or 60 fps). Format typically MP4 (H.264/H.265). - Optimize for platforms
Use proper file naming (e.g., MyVideo_Title_1080p_YouTube.mp4). Use subtitle files (.srt) separately. - Publish & measure
Upload to YouTube, embed on your site, or share on social media. Track performance metrics like watch time, retention, and click-through rate.
KlingAI in Action: A Deep Dive Walkthrough
Let’s dive into a practical example: creating a 60-second explainer video for a marketing SaaS.
- Scene 1 (0–10s): Introduce problem with animated icons and voice-over. Add a plank motion for dynamic entry.
- Scene 2 (10–25s): Showcase platform features – capture screen recordings, label with stylish lower thirds.
- Scene 3 (25–45s): Highlight benefits using customer testimonials and gold-tone LUT.
- Scene 4 (45–55s): Call to action with bold text animation and upbeat background score.
- Scene 5 (55–60s): Display branding – logo animation with fade-out.
Customize all at once – upload TTS voice, motion design, caption styles, and audio! Watch it render in minutes. Then export to YouTube for maximum reach.
Tips to Maximize KlingAI Potential
| Tip | Description |
| Plan scenes in advance | Use simple storyboards on paper before building in KlingAI. |
| Batch process projects | Reuse templates and assets for faster turnaround. |
| Keep video length focused | 2–3 min is ideal for explainer content. |
| Integrate brand style guide | Upload fonts, color codes, logo assets. |
| Analyze analytics | Export heatmaps to adjust pacing and structure. |
This method aligns with Inside Editors’ mission to help creators focus on story and strategy – not just technical details.
Inside Editors Bonus: Pro Editing Workflow
As part of our corporate video editing services, Inside Editors can elevate your AI-generated KlingAI video with:
- Color refinement and LUT matching
- Audio sweetening and mixing
- Custom motion graphics and transitions
- Branded font and style integration
Discover real-world editing examples showcasing our impact.
Conclusion
KlingAI is a powerful ally for creators seeking clean, polished videos without hardware bottlenecks. By pairing thoughtful scripting, structured scene planning, visual consistency, and audio clarity, you can deliver engaging content in record time. Whether DIY or supported by Inside Editors, the result is high-quality output built to perform.
What is KlingAI and is it easy for beginners?
Yes – KlingAI is an AI-driven video creation tool accessible for beginners through its intuitive templates and script import features. Advanced users can leverage scene customization and voice-over settings to refine their production.
Can KlingAI generate voice‑overs automatically?
Absolutely. KlingAI’s TTS engine creates lifelike narration, with adjustable tone, speed, and pronunciation. You can also import your own voice recording for more personalization.
How long does it take to render a video?
Typically, a 1‑ to 2‑minute video renders in a few minutes using cloud GPUs. Longer or 4K videos take slightly longer. Export times vary by length and format.
Does KlingAI support social‑media‑ready formats?
Yes – choose from aspect ratios (16:9, 9:16, 1:1) and KlingAI automatically optimizes bitrate and resolution. For deeper social strategy, check our YouTube SEO services.
Can Inside Editors enhance a KlingAI video further?
Yes. We offer post‑production enhancements like color correction, audio editing, and motion graphics to polish your AI-generated content. Learn more on our video editing services page.