
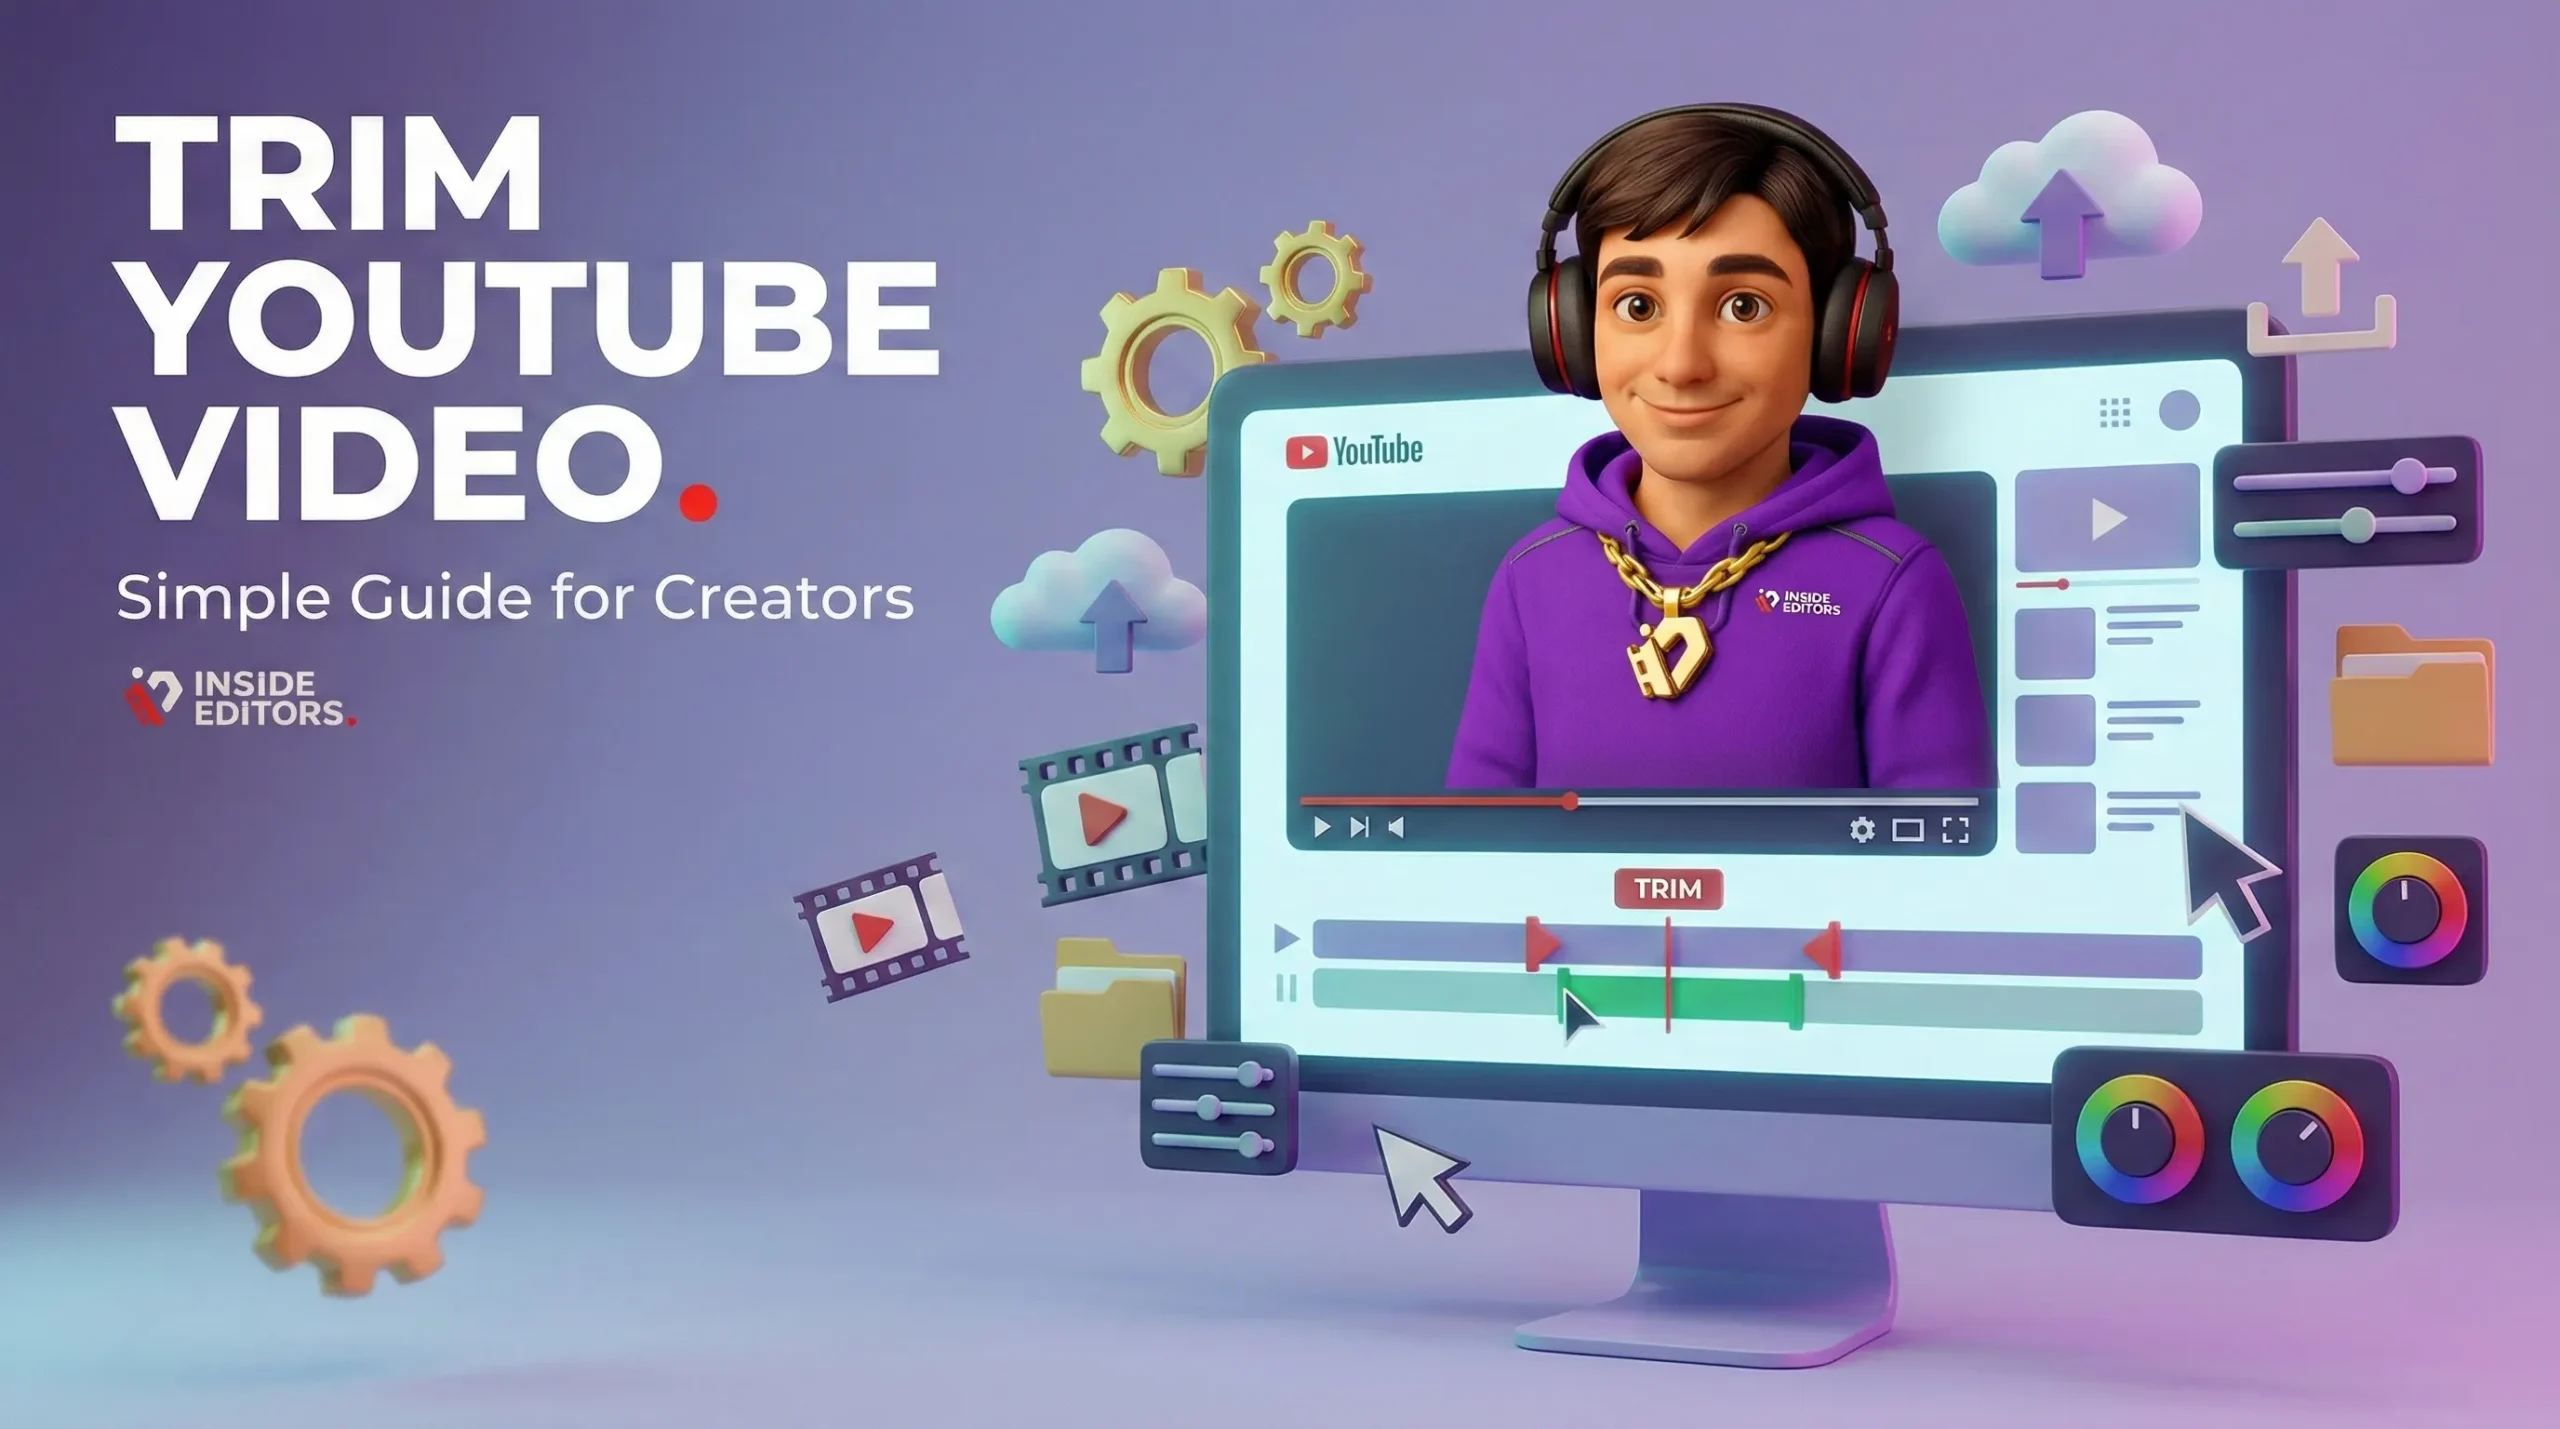
As a content creator, you know that every second counts. A YouTube video that drags on, even for a few extra seconds, can lead to audience drop-off. Learning how to effectively trim YouTube video content is not just about cutting footage; it’s about refining your message, boosting viewer retention, and ensuring professional polish.
Whether you’re removing awkward pauses, correcting a mistake, or simply tightening the intro, mastering the tools to trim YouTube video clips is fundamental to success on the platform. This comprehensive guide will walk you through the various methods-using YouTube’s built-in editor, dedicated desktop software, and professional services-to help you deliver clean, engaging content every time.
Trimming YouTube Videos Is Key for Viewer Retention
In the competitive landscape of online video, viewer retention is the ultimate metric. YouTube’s algorithm heavily favors videos that keep people watching longer. Even the best content can suffer if it includes unnecessary fluff, dead air, or a clumsy start.
The primary goal when you trim YouTube video footage is to respect the viewer’s time. A tight, well-paced video signals professionalism and expertise. Think of trimming as the final polish that transforms raw footage into a broadcast-ready piece. It ensures the viewer gets straight to the value, which dramatically increases the likelihood of them watching until the end and subscribing.
The Creator’s Dilemma: When to Trim, When to Cut
Creators often face the challenge of deciding what stays and what goes. Trimming isn’t always about removing large segments; sometimes it involves micro-adjustments.
“The most powerful editing tool is the delete button. If a scene doesn’t serve the story or the audience, it has to go, no matter how much you love it.” – Walter Murch, Legendary Film Editor
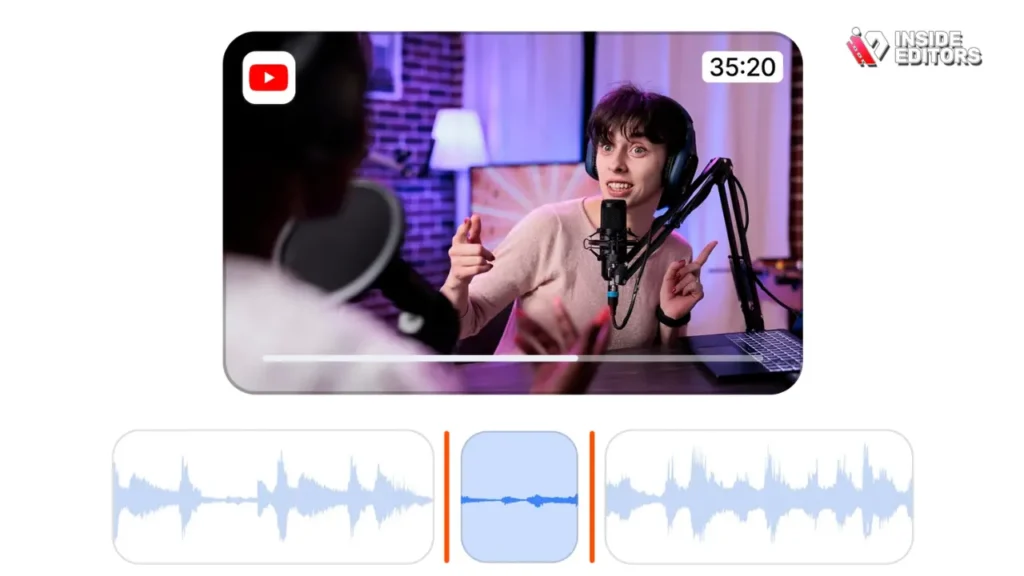
You should look to trim YouTube video segments when you encounter:
- Long Intros/Outros: Viewers often skip these. Keep them snappy (under 5 seconds).
- Dead Air or Pauses: Moments where you are searching for words or adjusting equipment.
- Technical Errors: Glitches, stutters, or background noise bursts.
- Irrelevant Digressions: tangents that distract from the main topic.
By being ruthless with the edit, you elevate the quality of your entire channel.
1: Trim YouTube Video Using the YouTube Studio Editor
For creators who need quick, non-destructive edits on already uploaded content, the YouTube Studio Editor is an invaluable tool. It allows you to make precise cuts without needing to re-upload the entire video, preserving your existing views and comments.
The YouTube Studio Editor is designed for simplicity, making it the fastest way to trim YouTube video content directly on the platform. This method is ideal for minor adjustments or removing small segments from the middle of a video.
Step-by-Step Guide to Using the Editor Tool
To successfully trim YouTube video content using the built-in editor, follow these steps precisely:
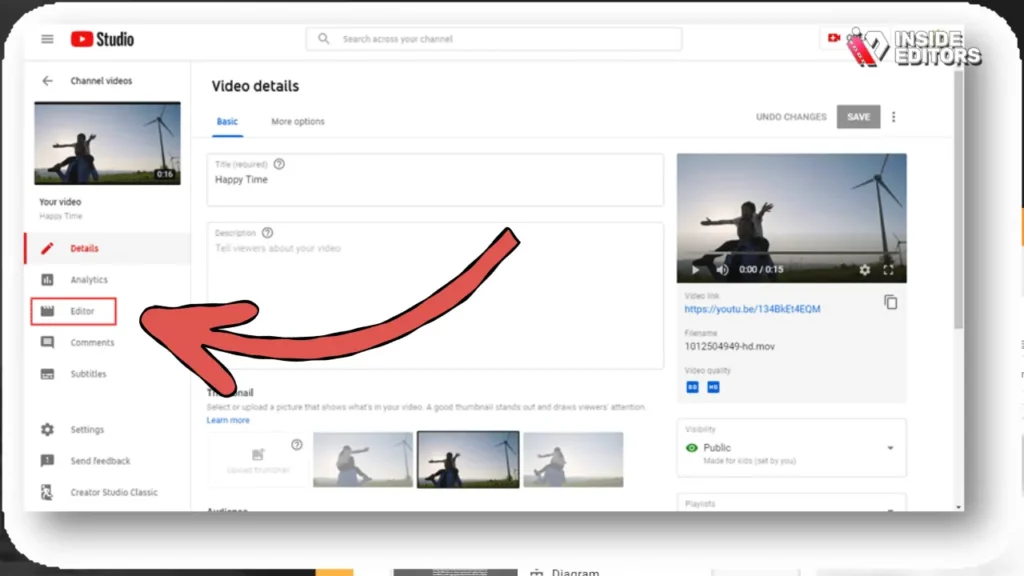
1. Accessing the Video Editor
- Sign In: Log into your YouTube Studio account.
- Navigate to Content: Click on the “Content” tab in the left-hand menu.
- Select Video: Click on the title or thumbnail of the video you wish to edit.
- Open Editor: In the left sidebar of the video details page, click “Editor.”
2. Defining the Trim Points
- Start the Trim Tool: Click the “Trim” button (usually represented by scissors). A blue box will appear around your video timeline.
- Set Start and End: Drag the edges of the blue box to define the new start and end points of your video. Everything outside the blue box will be cut.
- Use the Split Feature (For Mid-Video Cuts): If you need to remove a section from the middle (e.g., a mistake at the 5:00 mark), move the playhead to the beginning of the unwanted section, click “Split,” and then drag the end of the newly created segment to the end of the unwanted footage. This creates a grayed-out area.
3. Reviewing and Saving the Changes
- Preview: Click the “Preview” button to watch the video with the applied trims. Ensure the transitions are smooth.
- Save: Once satisfied, click “Save” in the top right corner. YouTube will process the changes. This process can take a few minutes to a few hours, depending on the video length and current server load. The original video remains visible to viewers until the processing is complete.
Limitations of the YouTube Studio Editor
While convenient, the built-in editor has significant limitations that advanced creators must consider.
| Feature | YouTube Studio Editor | Dedicated Desktop Software (e.g., Premiere Pro) |
|---|---|---|
| Precision | Limited to frame-level accuracy, often less precise for micro-edits. | Sub-frame accuracy, allowing for extremely precise cuts. |
| Functionality | Only trimming, splitting, blurring, and adding end screens/cards. | Full suite of tools: color grading, audio mixing, effects, multi-track editing. |
| Format Support | Works only on the uploaded file format. | Supports a vast array of codecs and resolutions (4K, 8K, HDR). |
| Non-Destructive | Edits are non-destructive (you can revert), but you cannot export the edited file. | Fully non-destructive editing; you maintain the original source files. |
If your goal is professional quality, relying solely on the YouTube Studio Editor to trim YouTube video content will eventually hold you back.
2: Mastering Desktop Software for High-Quality Trims
Professional content demands professional tools. Desktop software provides the control, precision, and flexibility required for complex editing tasks, including advanced trimming and pacing adjustments.
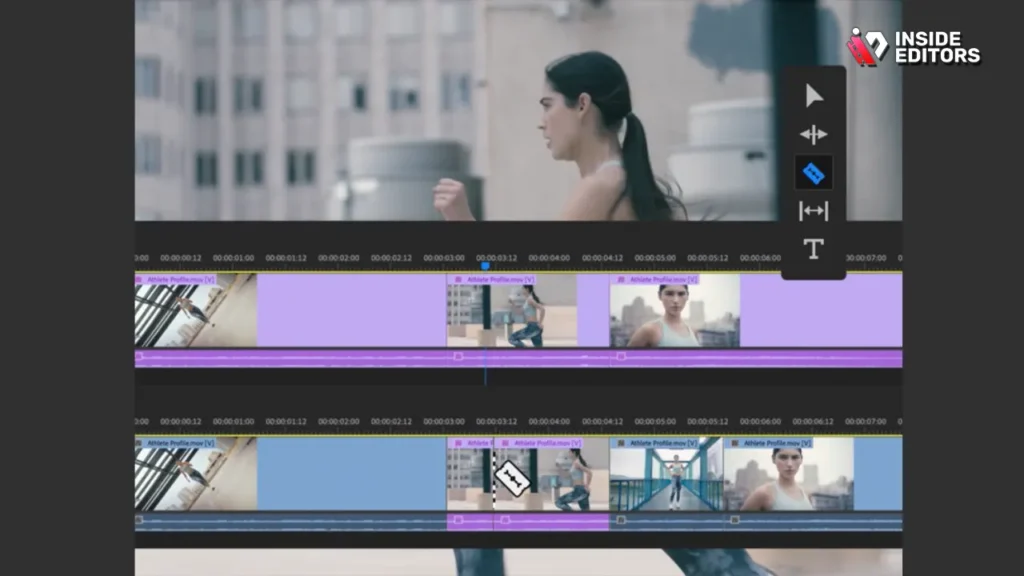
The Power of Non-Linear Editing (NLE)
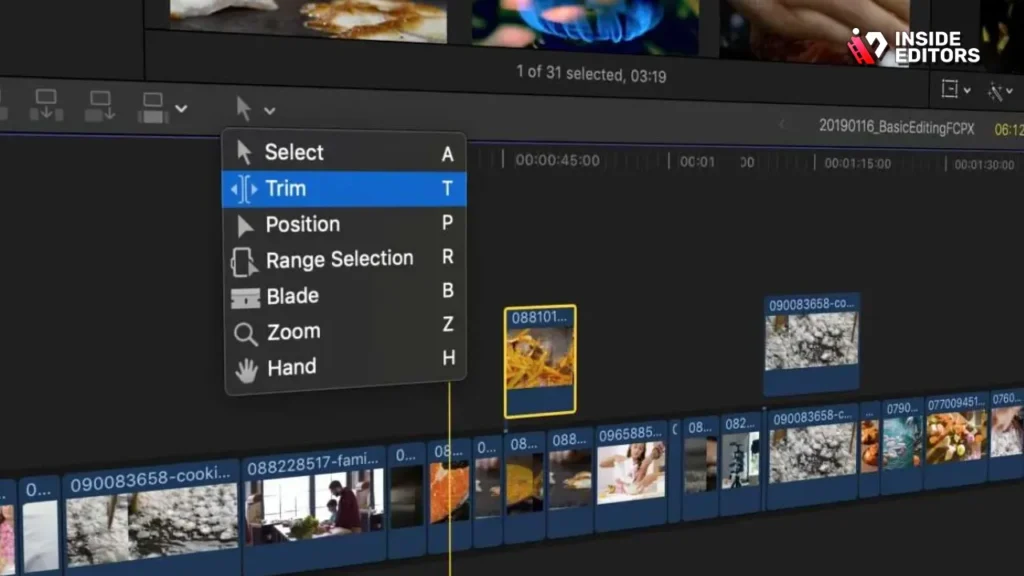
Non-linear editing software (NLEs) like Adobe Premiere Pro, Final Cut Pro, and DaVinci Resolve allow you to manipulate video clips on a timeline without altering the original source file. This is crucial for maintaining quality and providing infinite flexibility.
When you trim YouTube video footage in an NLE, you gain access to tools like the Razor Tool (for splitting clips) and the Ripple Edit Tool (for closing gaps automatically).
Essential Trimming Techniques in NLEs
1. J-Cuts and L-Cuts (Advanced Pacing)
These techniques are essential for making dialogue and scene transitions feel seamless, preventing the jarring effect of a simple straight cut.
- L-Cut: The audio from the next scene starts playing before the video cuts to the next scene. This keeps the momentum going and is often used when a character starts speaking before they appear on camera.
- J-Cut: The video from the next scene starts playing before the audio cuts. This is great for introducing a new setting or character while the previous dialogue wraps up.
2. Utilizing Keyboard Shortcuts
Efficiency in editing comes down to speed. Learn the keyboard shortcuts for splitting, trimming, and deleting. For instance, in Premiere Pro, the ‘C’ key activates the Razor Tool, and the ‘V’ key returns you to the Selection Tool. Using these shortcuts drastically speeds up the process to trim YouTube video segments.
“Editing is not just about cutting; it’s about timing and rhythm. A successful trim changes the emotional beat of the scene.” – Vashi Nedomansky, Professional Film Editor
Avoiding Common Trimming Mistakes
Even experienced editors can slip up. Be mindful of these pitfalls when you trim YouTube video footage:
- Jump Cuts: While often used stylistically (especially in vlogs), excessive jump cuts can be jarring. Use B-roll or different camera angles to mask necessary cuts.
- Cutting Mid-Sentence: Always aim to cut during a natural pause or breath, or use the L-cut/J-cut technique to smooth the transition.
- Ignoring Audio: A visual trim is useless if the audio track abruptly cuts out. Ensure your audio fades in and out smoothly across the trim points.
3: Outsourcing the Trim to Professional Editors
For high-volume creators, businesses, or those who find the editing process tedious and time-consuming, outsourcing the task to professional video editing services is the most efficient solution.
Time is a creator’s most valuable asset. Every hour spent learning advanced editing software or manually executing trims is an hour not spent filming new content, engaging with your audience, or developing new ideas. This is where professional services like Inside Editors become indispensable.
The Professional Advantage: Why Choose Inside Editors
When you trust professionals to trim YouTube video content, you are investing in speed, quality, and consistency. Inside Editors specializes in providing high-quality video editing tailored specifically for content creators and businesses.
Our professional editing team, boasting over 10 years of experience, understands the nuances of YouTube pacing and retention metrics. We don’t just cut; we optimize. We ensure every trim serves the narrative and enhances the viewing experience.
Inside Editors Service Highlights:
- Expertise: Professional editors with deep knowledge of pacing and YouTube best practices.
- Speed: Fast turnaround times, typically 24-72 hours, ensuring your content meets tight upload schedules.
- Quality Assurance: Services include color grading and audio enhancement alongside precise trimming, delivering a polished final product.
- Affordability: Affordable pricing starting at $29/video, making professional quality accessible to creators of all sizes.
- Reliability: Unlimited revisions until you are completely satisfied, guaranteeing the final product perfectly matches your vision.
By choosing Inside Editors, you save time and gain a professional quality that builds trust with your audience. We offer a scalable solution for growing channels, allowing you to focus entirely on content creation while we handle the technical refinement.
Advanced Strategies: Optimizing Your Trimmed Video
Once you trim YouTube video footage down to its perfect length, there are still optimization steps that can maximize its impact on the platform.
A/B Testing Your Intros
The first 15 seconds are critical. Use YouTube Analytics to identify where viewers drop off. If the drop-off is consistently high in the first few seconds, your intro needs a tighter trim.
Try creating two versions of your intro-one very short (5 seconds, straight to the point) and one slightly longer (15 seconds, setting the stage). A/B test these versions on similar videos to see which drives higher initial retention. This data-driven approach is key to continuous improvement.
Leveraging B-Roll to Mask Trims
When you have to remove a large section of dialogue or a mistake, a simple jump cut can be jarring. Instead, use B-roll footage-supplementary clips, graphics, or screen recordings-to cover the trim point.
This technique allows you to maintain the flow of the audio track while providing visual variety. The viewer perceives this as a smooth transition, not a sudden cut. This is a hallmark of professional editing and something our team at Inside Editors excels at.
The Role of Audio in Trimming
We often focus on the visual, but audio is half the battle. When you trim YouTube video segments, pay close attention to the sound.
- Silence is Golden (But Not Too Long): A brief pause can add dramatic effect, but long silences feel like dead air.
- Music Beds: Ensure background music fades out and back in naturally across a trim point. An abrupt music cut signals an amateur edit.
- Noise Reduction: Before and after trimming, run noise reduction filters to ensure consistent audio quality across all segments.
Comparison of Tools to Trim YouTube Video
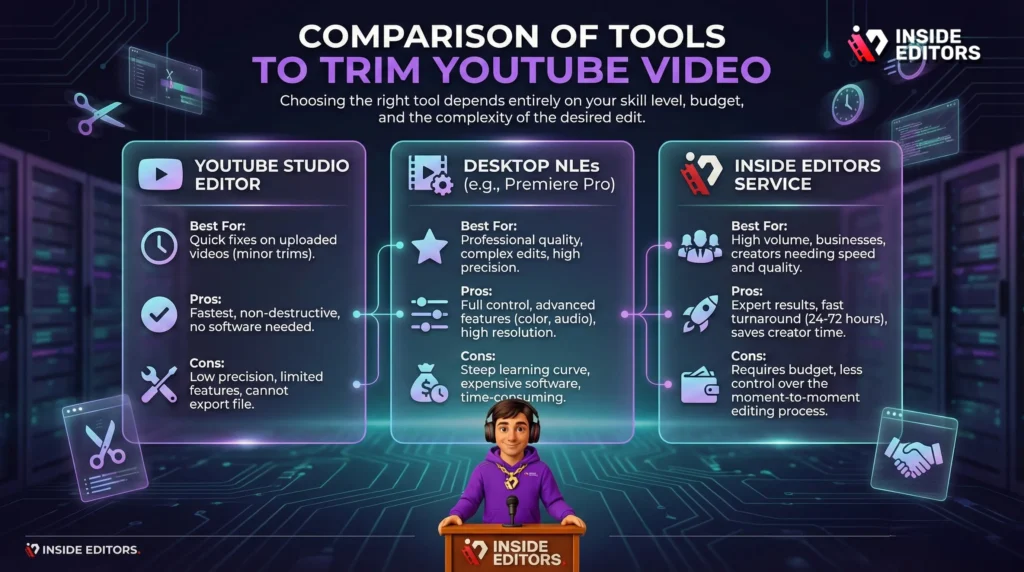
Choosing the right tool depends entirely on your skill level, budget, and the complexity of the desired edit.
| Tool/Method | Best For | Pros | Cons |
|---|---|---|---|
| YouTube Studio Editor | Quick fixes on uploaded videos (minor trims). | Fastest, non-destructive, no software needed. | Low precision, limited features, cannot export file. |
| Desktop NLEs (e.g., Premiere Pro) | Professional quality, complex edits, high precision. | Full control, advanced features (color, audio), high resolution. | Steep learning curve, expensive software, time-consuming. |
| Inside Editors Service | High volume, businesses, creators needing speed and quality. | Expert results, fast turnaround (24-72 hours), saves creator time. | Requires budget, less control over the moment-to-moment editing process. |
Conclusion: Achive Professional Polish with Every Cut
Learning how to trim YouTube video content effectively is the bridge between amateur footage and professional content. Whether you utilize the simplicity of the YouTube Studio Editor for minor adjustments or dive into the complexity of desktop NLEs for maximum control, the goal remains the same: to deliver maximum value in minimum time.
For creators who are scaling rapidly or simply want to reclaim their time, remember that professional help is available. Inside Editors provides the expertise, speed, and quality assurance you need to ensure every single video is perfectly trimmed, color-graded, and polished. Our affordable pricing and commitment to unlimited revisions mean you get professional quality without the professional price tag.
Stop spending hours wrestling with timelines and start focusing on what you do best: creating incredible content. Let our team of experienced editors handle the heavy lifting. To learn more about how we can help you trim YouTube video footage and elevate your entire channel, explore our professional video editing services.
Frequently Asked Questions
How do I trim a YouTube video after uploading?
You can trim YouTube video content after uploading using the YouTube Studio Editor. Navigate to the Content section, select the video, and use the built-in ‘Editor’ tool to define the start and end points of the trim.
Can I trim a video without losing views?
Yes, using the YouTube Studio Editor to trim YouTube video footage ensures you do not lose existing views, comments, or the video URL, as the edit is non-destructive on the platform.
What is the best software to trim YouTube video?
For professional results, Non-Linear Editing (NLE) software like Adobe Premiere Pro or DaVinci Resolve offers the highest precision and flexibility to trim YouTube video clips.
How long does it take YouTube to process a trim?
Processing time varies based on server load and video length, but YouTube typically takes anywhere from a few minutes to a few hours to process and apply a trim to your video.
Should I trim my video intros?
Yes, generally you should trim YouTube video intros to be as short as possible (under 5 seconds) to maximize viewer retention and prevent early audience drop-off.
What is a J-Cut in video editing?
A J-Cut is an advanced trimming technique where the audio of the next clip starts before the video cuts to that clip, creating smoother, more professional transitions.
Is outsourcing trimming cost-effective?
For high-volume creators, outsourcing the task to services like Inside Editors is highly cost-effective, saving you time while ensuring professional quality edits and precise trimming.


