
A wedding is a special day, and the invitation is often the first glimpse your guests have of what’s to come. In today’s digital age, many couples are opting for digital wedding invitation videos instead of traditional paper invitations. This modern approach allows you to incorporate unique elements of your personality, style, and creativity, making it an even more special introduction to your big day. If you want to create a memorable and stunning digital wedding invitation video, you’re in the right place. Here’s how to get started, what tools to use, and how to make sure your video is the perfect invitation for your celebration.
Why Digital Wedding Invites Are Rising

In the age of digital communication, sending a wedding invitation video is becoming increasingly popular. Not only does it allow couples to express their creativity, but it also helps reduce the costs and environmental impact associated with traditional paper invitations.
One of the key reasons people are opting for digital wedding invitation videos is convenience. These videos can be shared instantly with guests across the globe, saving time and effort compared to sending physical invitations. Additionally, digital videos offer a level of personalization that paper invitations simply cannot match. You can incorporate personal stories, music, and visuals that reflect your relationship and set the tone for your wedding day.
Environmental Benefits
Digital wedding invitation videos eliminate the need for printed materials, which helps reduce paper waste. In an age where sustainability is a priority for many, couples are embracing more eco-friendly alternatives, making digital invitations not only stylish but also responsible.
Cost-Effective
While traditional paper invitations can rack up costs for printing, postage, and custom designs, a digital invitation video can be created and shared without significant financial investment. All you need is a smartphone or a computer, and you’re ready to go.
Step 1: Plan Your Invitation Video Concept
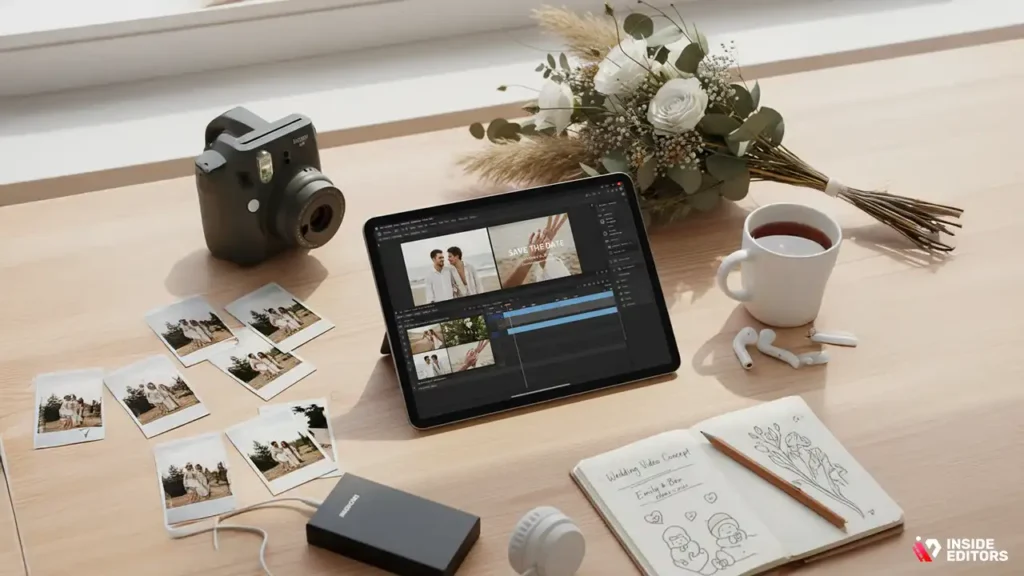
Before diving into the technical aspects of creating your digital wedding invitation, it’s essential to plan out the concept. The concept is the foundation for everything else in the video, from the visuals to the message you convey.
Theme and Style
Think about the theme of your wedding and how you want to reflect that in your invitation video. If you’re having a formal, traditional wedding, a classic, elegant video with sophisticated visuals might be the way to go. If you’re having a more relaxed, bohemian wedding, consider a video that captures the natural beauty of your setting, perhaps with soft lighting and whimsical music.
Personal Touches
The best wedding invitation videos include personal elements that reflect your relationship. This could be a montage of photos from your time together, a quick video of you and your partner sharing why you’re excited to get married, or clips of the place where you first met. Personalizing your video with intimate moments helps make it feel more meaningful and memorable.
Duration and Message
Keep in mind that the video should be short and to the point. Wedding guests have busy schedules, so a video that’s 1 to 2 minutes long is usually perfect. The message should be clear – who are you, what’s the date, time, and location of your wedding, and how can guests RSVP? Don’t forget to include any essential details like dress code or accommodations, but try to keep it light and fun.
Step 2: Choose the Right Tools and Software
Creating a digital wedding invitation video doesn’t require a professional background in filmmaking, but it does help to use the right tools to ensure the video is polished and visually appealing.
Video Editing Software
While there are free tools available, such as iMovie for Mac users or Windows Video Editor for PC users, you might want to explore more Creating a digital wedding invitation video doesn’t require a professional background in filmmaking, but it does help to use the right tools to ensure the video is polished and visually appealing.
Video Editing Software
While there are free tools available, such as iMovie for Mac users or Windows Video Editor for PC users, you might want to explore more advanced options like Adobe Premiere Pro, Final Cut Pro, or DaVinci Resolve for greater flexibility and professional-grade features. These programs allow you to work with higher-quality video, incorporate intricate transitions, and add text and graphics easily.
Online Video Makers
If you’re not familiar with video editing software or don’t want to spend a lot of time learning the ropes, there are plenty of online video makers specifically designed for creating wedding invitation videos. Websites like Animoto, Canva, or Adobe Spark offer user-friendly interfaces, pre-designed templates, and music libraries to make your video creation process a breeze.
Royalty-Free Music
Music plays a significant role in setting the tone of your video, and you should choose a soundtrack that resonates with you as a couple. Luckily, many video editing platforms come with built-in libraries of royalty-free music, so you don’t have to worry about licensing issues. If you’re using your own music, be sure to check copyright laws if you plan to share the video on social media or other public platforms.advanced options like Adobe Premiere Pro, Final Cut Pro, or DaVinci Resolve for greater flexibility and professional-grade features. These programs allow you to work with higher-quality video, incorporate intricate transitions, and add text and graphics easily.
Online Video Makers
If you’re not familiar with video editing software or don’t want to spend a lot of time learning the ropes, there are plenty of online video makers specifically designed for creating wedding invitation videos. Websites like Animoto, Canva, or Adobe Spark offer user-friendly interfaces, pre-designed templates, and music libraries to make your video creation process a breeze.
Royalty-Free Music
Music plays a significant role in setting the tone of your video, and you should choose a soundtrack that resonates with you as a couple. Luckily, many video editing platforms come with built-in libraries of royalty-free music, so you don’t have to worry about licensing issues. If you’re using your own music, be sure to check copyright laws if you plan to share the video on social media or other public platforms.
Step 3: Capture Stunning Footage and Imagery
While editing software plays an important role in polishing your video, the quality of the footage itself is equally important. Fortunately, you don’t need professional-grade equipment to shoot beautiful footage. A smartphone with a decent camera will do the trick if you follow a few key tips.
Lighting
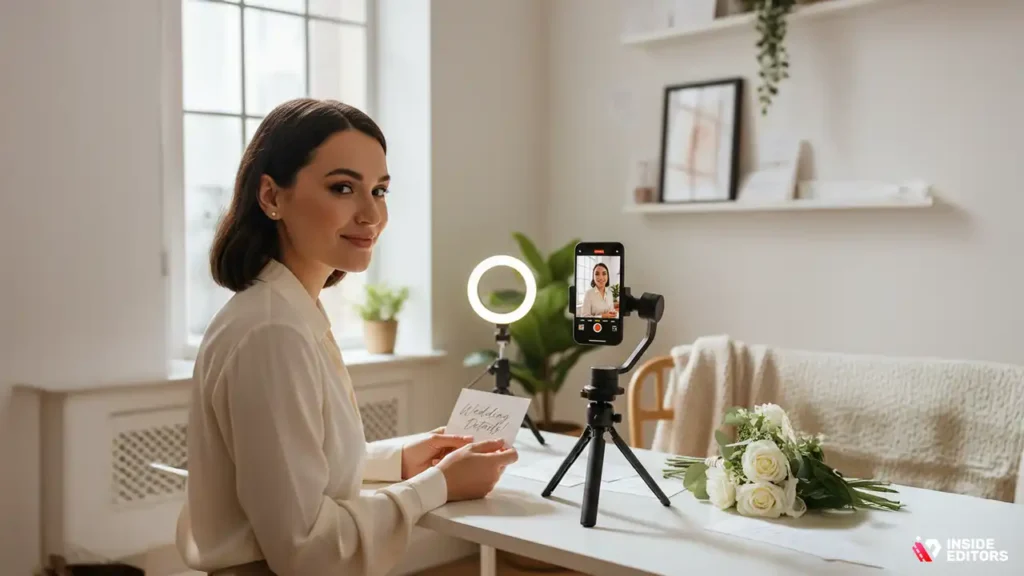
Good lighting can make all the difference in how your video looks. Natural light is often the most flattering, so consider filming during the day near a large window. If shooting at night, use soft, diffused lighting (like a ring light) to avoid harsh shadows.
Composition
Think about how you frame your shots. For example, if you’re filming a talking head segment where you introduce your wedding details, make sure the camera is at eye level, and avoid cluttered backgrounds. For more creative shots, you could incorporate scenic views, nature, or other elements that reflect your personal style.
Stabilization
If you’re filming with your smartphone, use a tripod or gimbal to stabilize the footage. Shaky camera work can distract viewers and make the video feel less polished. Even a basic tripod can dramatically improve the overall quality of your video.
Step 4: Edit Your Wedding Invitation Video
Once you have your footage, it’s time to edit the video. Editing is where you can really make your digital wedding invitation shine.
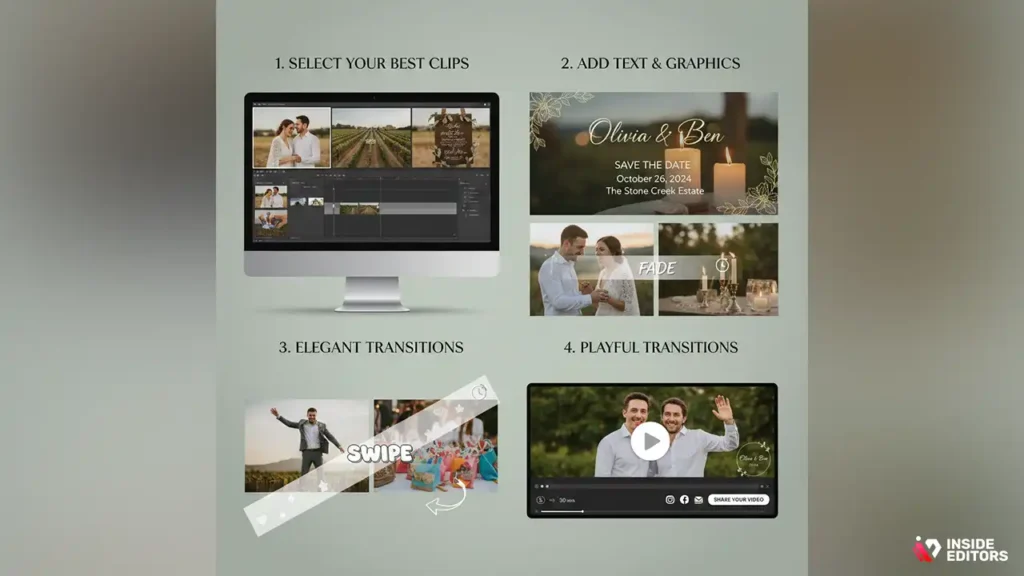
Select Your Best Clips
Start by selecting the most captivating moments from your footage. This could include a sweet moment between you and your partner, clips of your venue, or shots that help convey the vibe of your wedding. Keep it short and sweet; remember, you don’t want the video to feel like a documentary – just a beautiful teaser of what’s to come.
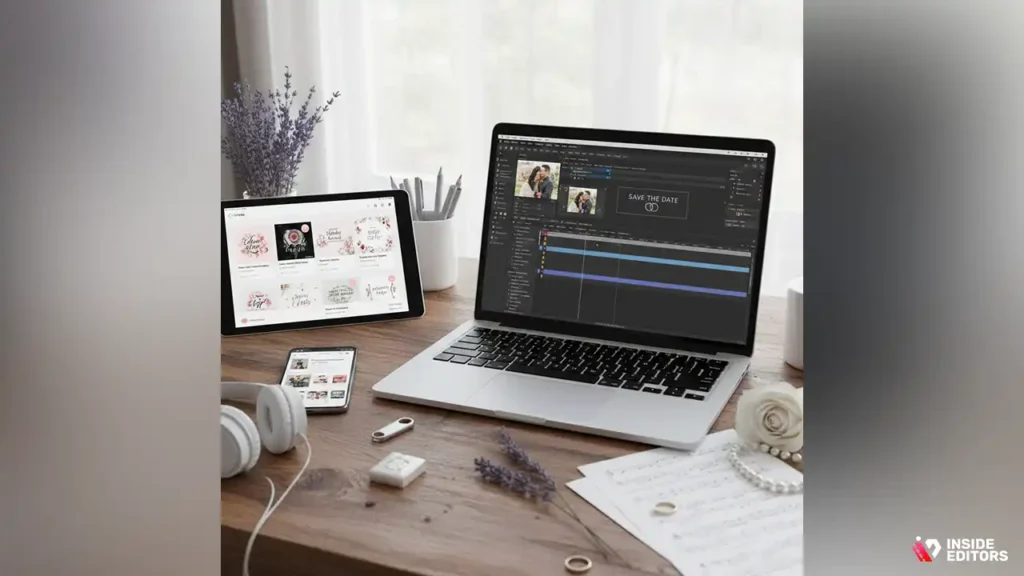
Add Text and Graphics
Incorporating text overlays can make your video clearer and more informative. At the beginning of your video, you can introduce yourselves with your names, and later, add details like the date, time, and location of your wedding. You can even create custom graphics that fit the theme of your wedding for a more personalized touch. Many online video editors, like Canva or Animoto, offer premade text templates that are easy to customize.
Transitions and Effects
Transitions should be smooth, simple, and complement the style of your wedding. Avoid flashy transitions that might distract from the message. For a formal wedding, consider using elegant fade transitions, while a more relaxed wedding might benefit from fun, smooth transitions. Remember, less is more when it comes to effects – keep the focus on your message.
Step 5: Finalize and Share Your Invite Video
Once your digital wedding invitation video is complete, it’s time to share it with your guests. You’ll want to ensure that the video is accessible to everyone you’re inviting, regardless of their tech-savviness.
Exporting the Video
When exporting your video, make sure to choose the right resolution. A 1080p resolution should be sufficient for most cases, as it provides high-quality video while keeping the file size manageable. Also, choose a file format that’s widely supported, such as MP4.
Sharing Your Video
You can share your wedding video in a variety of ways. If you’ve already set up a wedding website, you can embed the video there for easy access. Alternatively, you can send the video directly to your guests via email or through messaging platforms like WhatsApp or Facebook. For a more personal touch, consider sharing the video on a private YouTube or Vimeo link.
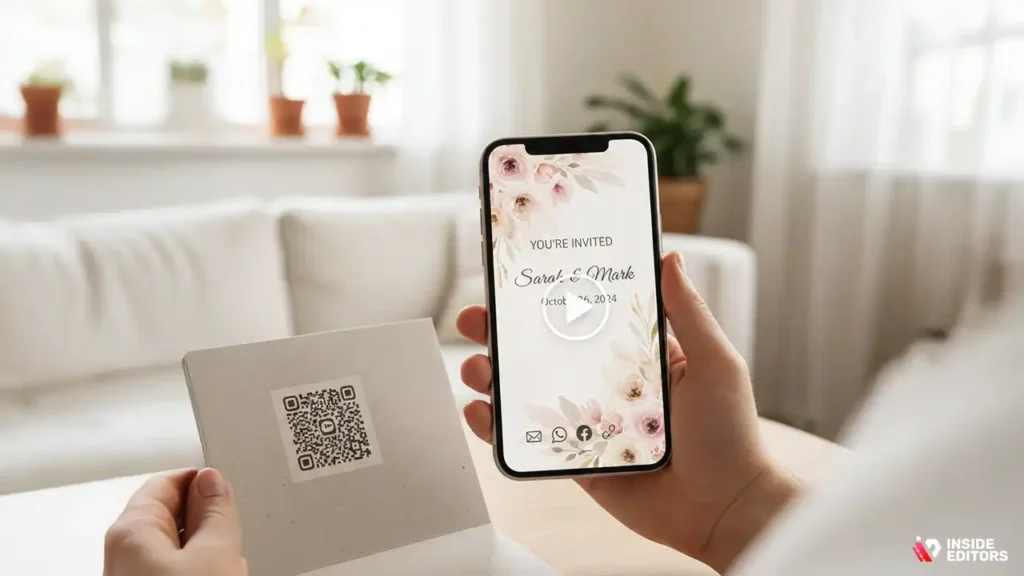
Consider Custom QR Codes
If you want to add a little extra flair to your invitations, consider adding a QR code that links to your digital wedding invitation video. This is an excellent way to combine the traditional with the modern. You can include the QR code in your paper invitations or share it on social media.
Step 6: Troubleshooting Common Issues and Mistakes
As with any creative project, making a digital wedding invitation video comes with its fair share of challenges. You might encounter technical difficulties, or perhaps your vision doesn’t quite match the final product. But don’t worry-most problems can be easily resolved with a little knowledge and some patience.
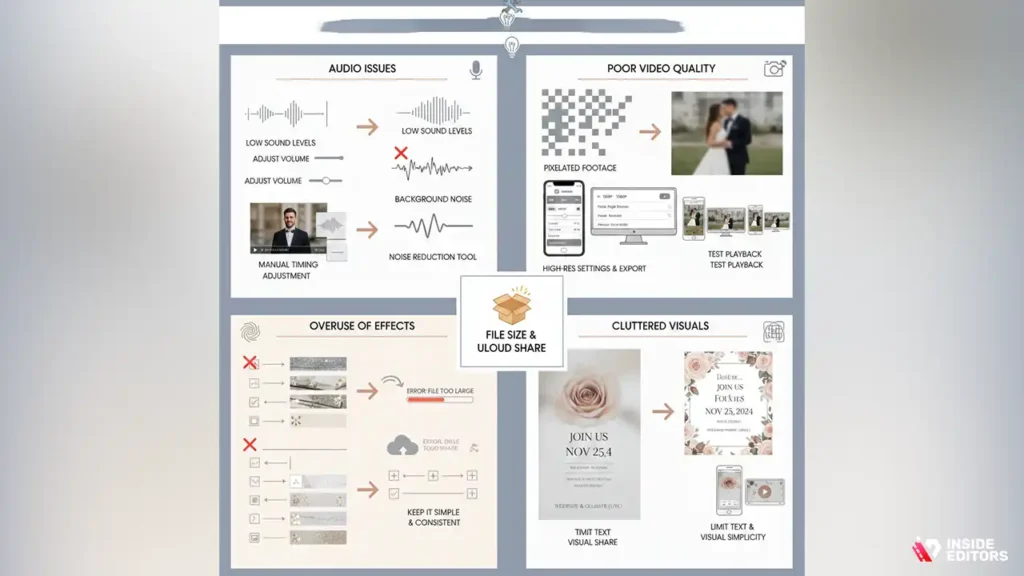
Audio Issues
Audio quality is crucial in a wedding video invitation. Whether you’re adding voiceovers, background music, or both, poor sound quality can detract from the entire experience. Here are a few common audio problems and how to fix them:
- Low Sound Levels: If your voiceover or background music sounds too soft, check the volume levels within your editing software. You can adjust individual audio tracks so that they balance each other out, ensuring neither is too quiet or too overpowering.
- Background Noise: If you’re recording voiceovers and you notice unwanted background noise (like traffic or hums from the air conditioning), try using noise-reduction tools in your editing software. Many programs like Adobe Premiere Pro or Final Cut Pro come with built-in tools to help you clean up your audio tracks.
- Audio Syncing Issues: If your audio doesn’t sync with the video (for example, if your voice doesn’t align with the movements of your mouth), you may need to manually adjust the clip’s timing. This can be done by dragging the audio clip along the timeline to sync it up with the video.
Poor Video Quality
Sometimes the video footage might look great on your phone or camera but ends up looking pixelated when uploaded. This can happen for a variety of reasons, including incorrect resolution settings or file compression issues. Here’s how to prevent and fix it:
- Use High-Resolution Settings: Always record your video in the highest resolution available, preferably 1080p or 4K. This ensures that the final product maintains its quality, especially when viewed on larger screens.
- Choose the Right Export Settings: When exporting your video, make sure to select the appropriate settings for resolution and bitrate. A higher bitrate will ensure better video quality, but keep in mind it will also result in a larger file size.
- Test Playback on Different Devices: Before sending out your video to guests, test it on multiple devices-smartphones, tablets, and desktops. This will help you spot any issues with video playback, ensuring your guests can view it without trouble.
Overuse of Effects and Transitions
While it’s tempting to add all kinds of flashy effects and transitions, too much can overwhelm the viewer and distract from the key information in your video. Here are some tips to avoid this common mistake:
- Keep it Simple: Stick to a few key transitions that match the tone of your wedding. Elegant fades or subtle zooms can enhance your video without stealing the show.
- Use Effects Sparingly: Special effects should serve the story, not overshadow it. Think of your video as a storytelling tool-use effects to highlight key moments rather than add unnecessary flair.
- Maintain Consistency: Ensure that the style of transitions and effects matches the overall aesthetic of your wedding. If your wedding has a rustic theme, avoid futuristic transitions that might clash with the vibe.
Cluttered Visuals and Text Overload
It’s easy to get carried away with adding text and visuals, especially when you’re trying to convey important details like your wedding date, location, and RSVP instructions. However, cluttered visuals can make the video difficult to read or too busy for the viewer.
- Limit Text: Instead of overloading your video with text, use it strategically. Highlight essential information, such as the date and venue, and keep the text concise. You can always send a follow-up email or include additional details on your wedding website.
- Focus on Visual Simplicity: When choosing your visuals, make sure they complement each other rather than competing for attention. For example, avoid using multiple background images or busy patterns while displaying text. Stick to clean, simple designs that allow your message to stand out.
File Size and Uploading Issues
One of the biggest challenges with digital wedding invitation videos is ensuring that the file size is small enough to share without losing quality. Large video files can take a long time to upload, and some platforms may even reject the video if it exceeds the size limit. Here’s how to handle it:
- Optimize Your Video: Many editing tools allow you to export your video in a compressed format that reduces the file size while maintaining good quality. Choose the right export settings, such as exporting in H.264 format, which is known for its balance between quality and file size.
- Use Cloud Storage: If you’re unable to send the video directly due to file size limits, consider uploading it to a cloud storage platform like Google Drive, Dropbox, or OneDrive. You can then share the download or view link with your guests.
Test Uploads: Always test uploading your video to the platform where you plan to share it (whether it’s email, social media, or your wedding website). This ensures there are no surprises when you send the final video to your guests.
Step 7: Advanced Wedding Invite Video Tips

Once you’ve nailed the basics, you may want to go a step further to create a truly standout wedding invitation video. Here are some advanced tips to elevate the quality and impact of your invitation:
Incorporate Cinematic Storytelling
To really captivate your guests, consider crafting a narrative. Instead of just listing the details of your wedding, tell a short story about your relationship. You could start with how you met, highlight your journey together, and then transition into the wedding details. This creates a more engaging experience for your viewers and can evoke emotion-something every wedding invitation should do.
Use Drone Footage
If you’re filming in a scenic location or have access to a drone, incorporating aerial shots can add a dramatic flair to your video. Drone footage of your wedding venue, especially if it’s outdoors, adds an impressive visual element and makes your video feel more cinematic.
Add Personal Voiceovers
A personal voiceover can make the invitation even more intimate. Record a message with you and your partner talking about what excites you about the wedding, why you’re inviting specific guests, or what you envision for the future. A heartfelt voiceover helps connect the viewer to the emotion of the event, making the invitation feel more personal and warm.
Create a Custom Animation
For something truly unique, consider adding custom animations or illustrations. This could be a hand-drawn animation of your wedding date, your venue, or even a cartoon version of the couple. Custom animations give your video a one-of-a-kind look and can be a fun way to reflect your personality.
Include Guest Interactions
Make your invitation even more interactive by asking your guests to respond directly in the video. You could include a segment where your family members or friends share what they’re looking forward to at the wedding. Or, invite guests to send video clips of their own, which you can then edit into your invitation. This personalized touch makes the video feel more inclusive and heartfelt.
Final Thoughts on Digital Wedding Invite Videos
Creating the perfect digital wedding invitation video is about more than just showcasing your wedding details. It’s an opportunity to share your love story, set the tone for your wedding, and create something memorable that your guests will enjoy and remember.
By planning your concept carefully, using the right tools, and paying attention to the details, you can make a wedding invitation video that stands out and perfectly matches the joy and excitement of your big day.
If you want to take your digital wedding invitation video to the next level, Inside Editors’ professional Wedding Video Editing services are here to help. We can work with your raw footage to create a polished and stunning video that fits your vision perfectly. Whether you need help with color grading, sound design, or special effects, our team of expert editors can make your invitation video shine.
Explore Inside Editors’ Custom Wedding Video Editing Service
We also offer specialized Indian Wedding Video Editing and Ai Wedding Video Editing solutions.
FAQs
1. What if I’m unsure about the quality of the video?
At Inside Editors, we pride ourselves on delivering high-quality wedding videos that align with your vision. We offer multiple rounds of revisions to ensure you’re completely satisfied with the final result. If you’re not happy with the first draft, we’ll work closely with you to make adjustments until it’s perfect. Our team uses professional-grade editing software to ensure top-notch quality, so you can trust that your wedding video will be beautifully crafted.
2. What’s the difference between DIY wedding video editing and hiring a professional editor?
DIY video editing tools are great for beginners, but they often lack advanced features and flexibility. Professional editors bring years of experience, helping you avoid common mistakes and creating a polished final product that looks and feels like a high-quality film. While DIY options are cost-effective, they may require significant time and effort. Professional services, like Inside Editors, streamline the process, offering expert guidance and saving you time for a flawless result.
3. How much does a digital wedding invitation video cost?
Pricing for a digital wedding invitation video can vary, but generally, professional editing services range from $200 to $1,000 depending on complexity. Costs depend on factors like the length of the video, special effects, voiceover work, and whether custom animations are included. Basic packages usually include video editing and sound design, while more premium packages may offer extras like drone footage or personalized animation. Contact us for a customized quote based on your needs.
4. What is the typical turnaround time for a wedding invitation video?
The typical turnaround for a wedding invitation video is about 1-2 weeks, depending on the complexity of your project and the workload of the editing team. If you’re working with a tight timeline, we offer rush options that can shorten delivery times to as little as 3-4 days, though additional fees may apply. We recommend starting your project early to ensure plenty of time for revisions and feedback.
5. How do I create a digital wedding invitation video?
To create a digital wedding invitation video, start by gathering your footage, photos, and audio clips (such as voiceovers or background music). Choose a video editing software or hire a professional editor who can bring your vision to life. From there, you’ll decide on the style, whether it’s a traditional, modern, or cinematic look. After editing, review the video for any tweaks before finalizing it. If you’d like expert help, Inside Editors can assist you in every step.


